
Let me be upfront about something. I used to be terrified of cheesecake.
Not eating it. Making it. The whole idea of water baths, cracked tops, and perfectly timed oven temperatures had me convinced it was reserved for professional pastry chefs and overachieving home bakers.
Then I found the no-bake version. And honestly? It changed everything for me.
No oven. No water bath. No stress. Just a handful of simple ingredients, a bit of mixing, and a long nap in the fridge. The result is a creamy, tangy, gorgeous centerpiece that looks like it came from a bakery window.
This no-bake raspberry cheesecake has become my go-to for summer gatherings, dinner parties, and honestly, any Tuesday when I feel like impressing someone. The raspberries cut right through the richness of the cream cheese with this bright, punchy tartness. It’s the kind of balance that makes people close their eyes when they take the first bite.
Let’s make it together.
Before you start, here’s what you need to know:
| Prep Time | 25 minutes |
| Cook Time | 0 minutes |
| Chill Time | 6 hours minimum |
| Total Time | 6 hours 25 minutes |
| Servings | 8 to 10 slices |
| Difficulty | Easy |
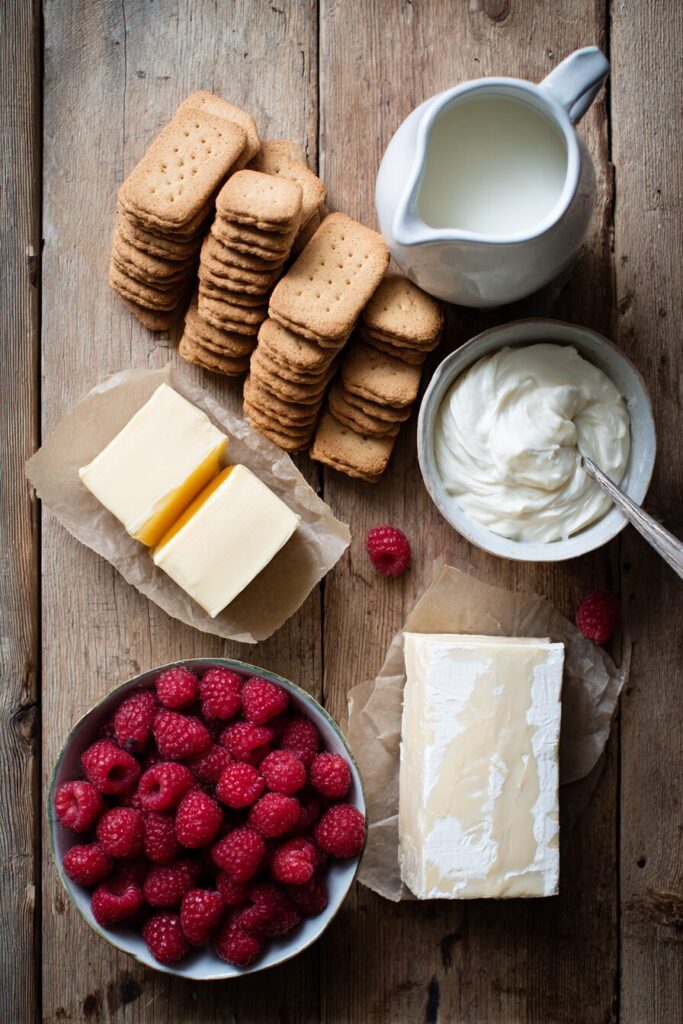
Ingredients
Here’s your complete ingredient list. Don’t swap anything out just yet. Every item here is doing a specific job.
| Ingredient | Quantity | Notes |
|---|---|---|
| Digestive biscuits | 300g | Perfect crunch and just enough sweetness |
| Unsalted butter | 100g | Fully melted before using |
| Full-fat soft cheese | 500g | Do not use light or low-fat versions |
| Caster sugar | 100g | Dissolves smoothly into the cheese |
| Vanilla extract | 1 tsp | Rounds out the sweetness |
| Double cream | 300ml | Must stay cold until you use it |
| Fresh raspberries | 300g | Adds color, tartness, and freshness |
| Icing sugar | A small amount | Optional, for dusting at the end |

One thing people often overlook? Temperature matters before you even begin.
Your soft cheese should sit out for a bit and come to room temperature. Cold cheese straight from the fridge will clump and fight you the whole way. But your double cream? Keep that in the fridge until the very last second. Cold cream whips faster and holds its shape far better.
Step 1: Make the Biscuit Base
Every great cheesecake starts here. The base is what gives you that satisfying crunch against the creamy filling.
Grab your 300g of digestive biscuits. You’ve got two options:
- Food processor: Pulse until you get fine crumbs. Fast and clean.
- Rolling pin method: Drop the biscuits into a sealed heavy-duty plastic bag and bash them firmly with a rolling pin. This one is honestly kind of fun.
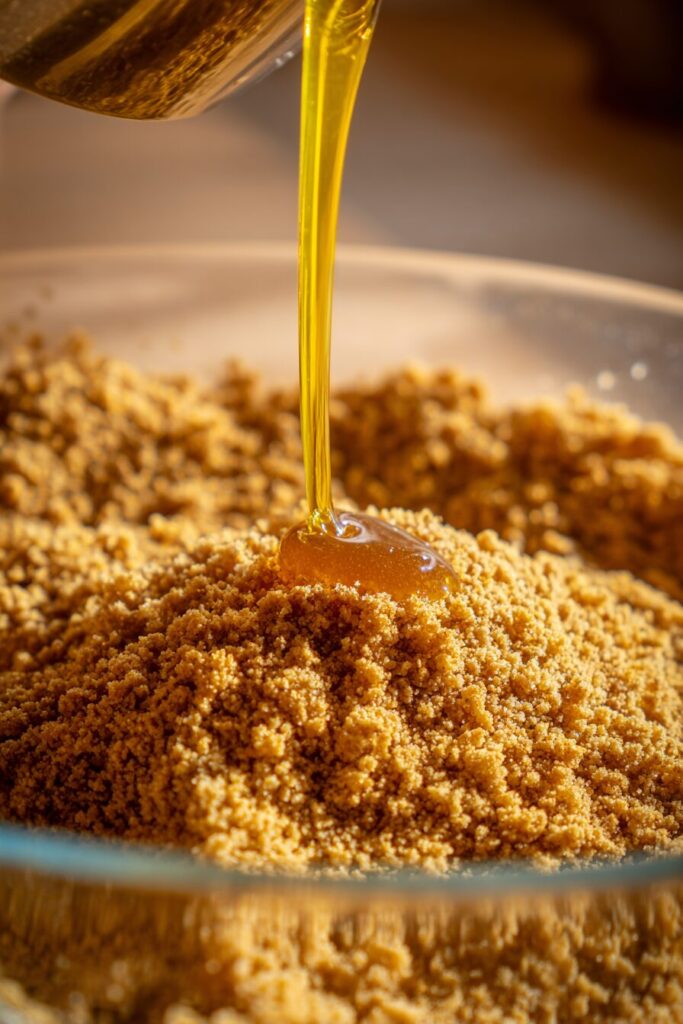
Either way, you’re aiming for a texture that looks like coarse, golden sand. No big chunks left behind.
Now pour your 100g of fully melted unsalted butter over the crumbs. Stir everything together until every single crumb is coated. Squeeze a small handful together. If it clumps and holds, you’re good. If it’s dry and falls apart, the butter isn’t fully mixed in yet.
Tip the buttery crumbs into your lined 20cm springform tin. Spread them out evenly, then press down firmly using the back of a metal spoon or the flat bottom of a drinking glass.
Don’t be gentle here. Press hard. A firmly packed base is what gives you clean, neat slices later.
Once it’s smooth and compact, slide the tin into the fridge while you work on the filling.
Step 2: Make the Creamy Filling
This is the heart of the whole dessert. And it’s easier than you think.
Add your 500g of full-fat soft cheese to a large mixing bowl. Pour in the 100g of caster sugar and the 1 tsp of vanilla extract. Using an electric whisk on medium speed, beat everything together until it’s completely smooth and slightly glossy. No lumps, no graininess. Just a thick, creamy base.
In a separate, clean bowl, pour in your 300ml of cold double cream.
Whip it until it reaches soft peaks. Soft peaks means the cream holds a shape when you lift the whisk, but the tip gently folds over. Think of it like a little wave. That’s where you want to stop.
Do not keep going. Over-whipped cream turns stiff and grainy, and it will make your filling feel heavy instead of light.
Now, gently fold the whipped cream into the cheese mixture using a silicone spatula. Folding means scooping from the bottom, bringing it up and over the top. Slow, deliberate strokes. You’re trying to keep all that air you just whipped in. That air is what gives the cheesecake its light, mousse-like texture.
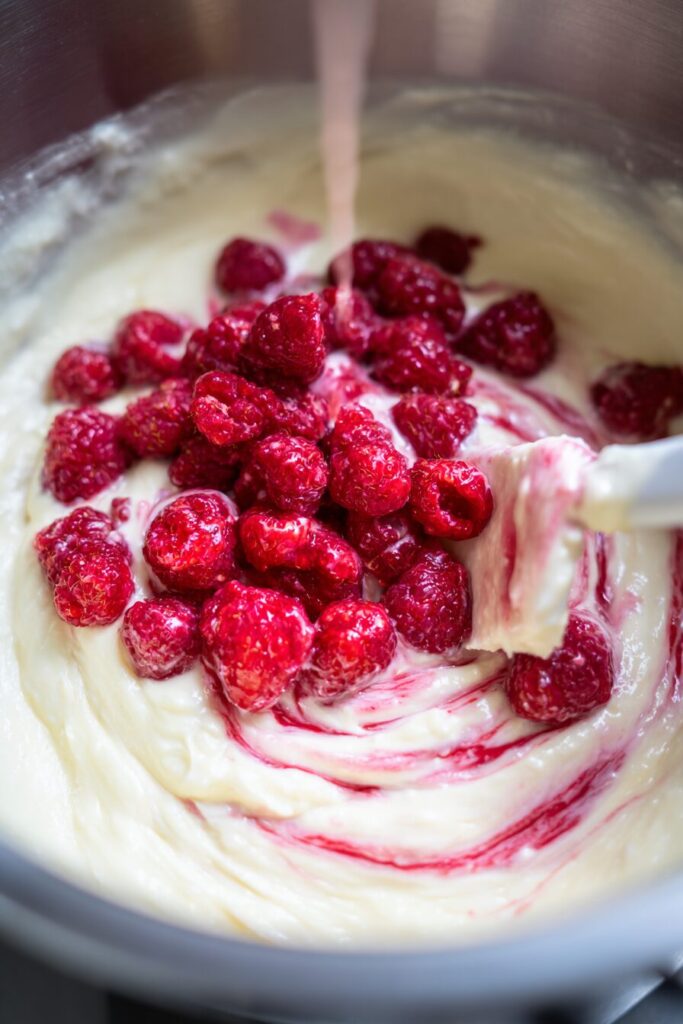
Take about two-thirds of your raspberries (roughly 200g) and drop them straight into the batter. Fold them in gently. As you go, press a few berries softly against the side of the bowl. They’ll break slightly and release a little burst of deep pink juice. Those streaks of color swirling through the white filling? That’s the magic.
Step 3: Assemble and Chill
Pull your chilled biscuit base out of the fridge. The butter should have firmed up nicely by now, giving you a solid, stable crust.
Scrape every bit of that raspberry cream filling over the base. Push it right to the edges and smooth the top gently with your spatula. Make sure there are no air pockets hiding along the sides of the tin.
Now comes the hardest part.
Walk away.
Cover the tin loosely with foil or plastic wrap, making sure it doesn’t press against the surface of the cream. Put it in the coldest spot in your fridge.
Leave it for at least 6 hours. Overnight is even better.
I know it’s tempting to peek. Don’t rush this. The double cream and full-fat cheese need that full chilling time to set together into something sliceable and beautiful. Cut into it too early and you’ll end up with a delicious but very messy puddle.
Step 4: Serve It Right
When you’re ready, run a thin knife around the inside edge of the springform tin. This loosens the sides without tearing the filling. Then unclasp the tin and lift the ring straight up.
Transfer the cheesecake carefully to a flat serving plate.
Scatter your remaining fresh raspberries across the top. Keep it organic-looking. No need for perfection. Then, just before you carry it to the table, dust lightly with icing sugar.
It looks stunning. Every time.

To slice it cleanly, use a large sharp knife and wipe the blade with a damp cloth between every cut. This gives you those gorgeous, distinct layers in each slice instead of a smeared mess.
Frequently Asked Questions
Can I use low-fat soft cheese? Please don’t. This recipe depends on the fat content to set properly. Low-fat versions have more water and less structure, which means a runny, unstable cheesecake. Stick with full-fat and you’ll be fine.
Why did my filling turn out runny? Two likely culprits. Either the double cream wasn’t whipped to soft peaks before folding, which means it didn’t have enough structure to hold the filling together. Or the cheesecake didn’t chill long enough. It needs a minimum of 6 hours in the fridge, no shortcuts.
How long does it keep in the fridge? Up to three days, covered. That said, the biscuit base will slowly soften as it sits and absorbs moisture from the filling. The raspberries on top may also start to bleed. For the best experience, eat it within the first 48 hours.
Can I freeze it? Yes, and it freezes really well. Wrap the set cheesecake tightly in plastic wrap, then cover with foil. Freeze it whole or in individual slices for up to one month. Thaw overnight in the fridge. Add the fresh raspberry garnish after it thaws, not before.
Do I have to use digestive biscuits? This recipe is built around 300g of digestive biscuits specifically. They give you exactly the right crumb texture and absorb the butter in a way that holds the base together. Follow the ingredient list and your crust will be solid, clean, and delicious.

No-Bake Raspberry Cheesecake
Ingredients
Base
- 300 g Digestive biscuits crushed into fine crumbs
- 100 g Unsalted butter fully melted
Filling
- 500 g Full-fat soft cheese room temperature; do not use low-fat
- 100 g Caster sugar
- 1 tsp Vanilla extract
- 300 ml Double cream keep cold until use
- 300 g Fresh raspberries divided (200g for filling, 100g for topping)
- Icing sugar for dusting
Instructions
- Combine crushed digestive biscuits and melted butter. Mix until crumbs are fully coated and hold together when squeezed.
- Press the mixture firmly into the bottom of a lined 20cm springform tin using the back of a spoon. Chill in the fridge while preparing the filling.
- Whisk the soft cheese, caster sugar, and vanilla extract together until smooth and glossy.
- In a separate bowl, whip the cold double cream to soft peaks. Gently fold the whipped cream into the cheese mixture.
- Gently fold in 200g of raspberries, crushing a few slightly to create pink streaks in the batter.
- Smooth the filling over the biscuit base and chill in the fridge for at least 6 hours, preferably overnight.
- Run a knife around the edge to loosen, remove from the tin, top with remaining raspberries, and dust with icing sugar before serving.