
Let me be honest with you for a second.
I used to dread making biscuits from scratch. The cold butter. The rolling pin. The flour absolutely everywhere. By the time I finished, my kitchen looked like a snowstorm had hit it, and I still wasn’t sure the biscuits would even turn out right.
Then I found this recipe. And everything changed.
Butter swim biscuits require zero rolling. Zero cutting. Zero mess.
You mix a wet dough, drop it into a pan of hot melted butter, and let the oven do all the work. The dough literally swims in butter as it bakes. The bottom fries up into this deeply golden, crunchy crust while the inside stays soft and fluffy. It sounds almost too simple to work.
It works every single time.
I make these on slow weekend mornings when I want something warm and homemade without spending an hour in the kitchen. I also pull this recipe out when I need a hearty side dish for soups and stews. They hold up beautifully under thick gravies and rich broths, thanks to that sturdy, crispy bottom.
The best part? You only need six ingredients. Things you probably already have sitting in your pantry right now.
What You Need
No specialty items here. No trips to a fancy grocery store. Just simple, everyday staples that come together in a seriously impressive way.
| Ingredient | Quantity | Notes |
|---|---|---|
| Buttermilk | 1 ¾ cups | Low-fat or whole buttermilk; room temperature is best. |
| Unsalted Butter | ½ cup (8 tbsp) | Cut into 1-inch cubes for easier melting. |
| All-Purpose Flour | 2 ½ cups (300g) | Spoon and level your flour for accurate measuring. |
| Baking Powder | 4 tsp (16g) | Ensure it is fresh for the best possible rise. |
| Sugar | 1 tbsp (12g) | Adds a very subtle sweetness to balance the salt. |
| Kosher Salt | 2 tsp (6g) | Diamond Crystal preferred; use less if using table salt. |
Prep Time: 10 minutes | Cook Time: 25 minutes | Total Time: 35 minutes | Servings: 9 | Difficulty: Easy
A quick note on the butter. Use unsalted so you can control the salt level yourself. And take your buttermilk out of the fridge before you start. Room-temperature buttermilk blends into the dry ingredients much more smoothly than cold buttermilk straight from the fridge.
How to Make Butter Swim Biscuits
Step 1: Get Your Oven and Pan Ready
Preheat your oven to 450 degrees Fahrenheit with the rack set in the center position.
Grab an 8×8-inch baking dish. Glass or light ceramic works best here. It distributes heat evenly and helps you avoid burning that buttery bottom crust. Skip the dark non-stick pans if you can.
Place your cubed butter directly into the empty baking dish. Slide it into the oven while it finishes preheating.

Let the butter melt completely, about six minutes. Keep a close eye on it. You want it fully melted and hot, but you do not want those milk solids burning on the bottom. Once it looks perfectly golden and bubbling, pull the pan out carefully with thick oven mitts. Set it on a heat-proof surface and leave it alone while you mix the batter.
Step 2: Mix the Dry Ingredients
Grab a medium mixing bowl. Add your flour, baking powder, sugar, and kosher salt.
Whisk everything together vigorously until fully combined. This step matters more than it seems. Getting the baking powder evenly distributed through the flour is what gives you that beautiful, even rise later.

Now pour your room-temperature buttermilk into the center of the dry mixture. Use a rubber spatula to fold everything together gently.
Here is the most important rule in this entire recipe:
Stop mixing the moment you no longer see dry streaks of flour.
That is it. Do not keep going. Overmixing develops the gluten in the flour, and that turns your soft, fluffy biscuits into dense little hockey pucks. The batter should look shaggy, wet, and a little sticky. That is exactly what you want.
Step 3: Add the Dough to the Butter
Carefully pour your wet batter into the pan of hot, melted butter.
Use your spatula to spread it out into an even layer. As soon as the dough hits the pan, you will notice the butter washing up over the sides and pooling on top. It might look like you have used way too much fat.
You have not. Trust the process.
The dough soaks up all that butter beautifully as it bakes. That is the whole secret behind the incredible crust.
Now take a sharp knife and score the batter into nine equal squares right inside the pan. The lines will not look perfect. The wet batter will try to close back up after each cut. That is normal. Just run the knife over each line two or three times.
Pro tip: wipe your knife clean with a towel between each pass. It makes a surprisingly big difference.
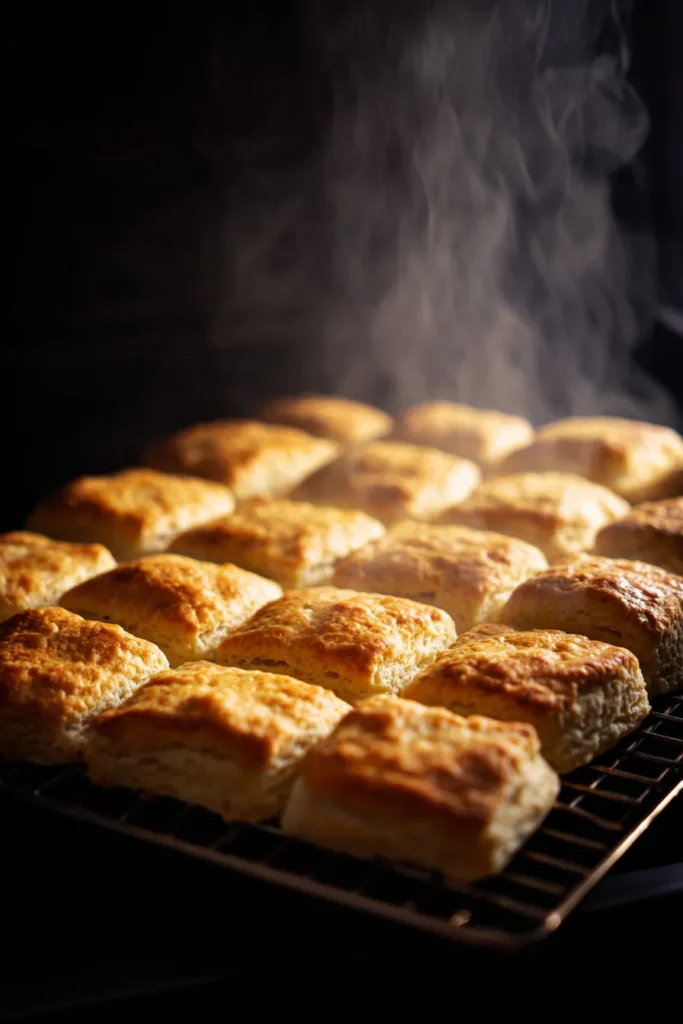
Step 4: Bake Until Golden
Place the pan back into your hot oven. Bake for 25 minutes.
You are looking for:
- Deep, crispy brown edges
- An even golden-brown top crust
- A firm center that does not jiggle when you shake the pan
I always rotate the pan halfway through the baking time. It takes five seconds and ensures every square bakes evenly. Worth doing every single time.
The Resting Step You Cannot Skip
When you pull the pan from the oven, your kitchen is going to smell incredible. Toasted butter and warm bread. It is genuinely one of the best smells in the world.
But do not reach for one yet.
Let the pan rest for three minutes. You will see hot butter still bubbling around the edges. That is the dough pulling in the last of the fat. This short rest is what takes the texture from good to absolutely perfect.
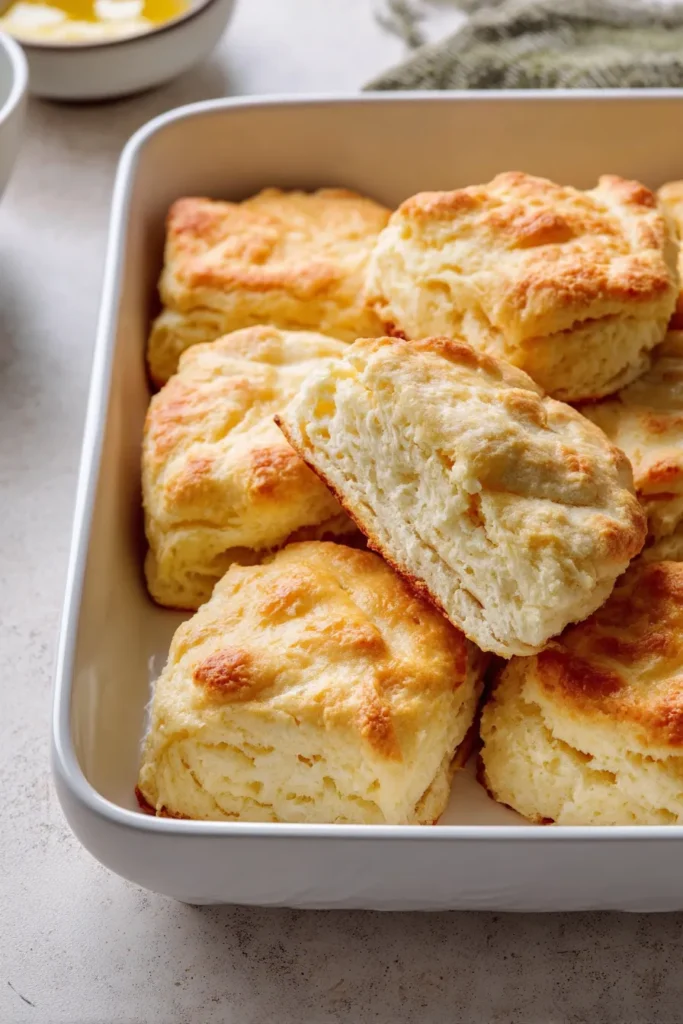
After three minutes, run a butter knife along the outer edges of the pan. Then slice through your original score lines one more time to fully separate the squares.
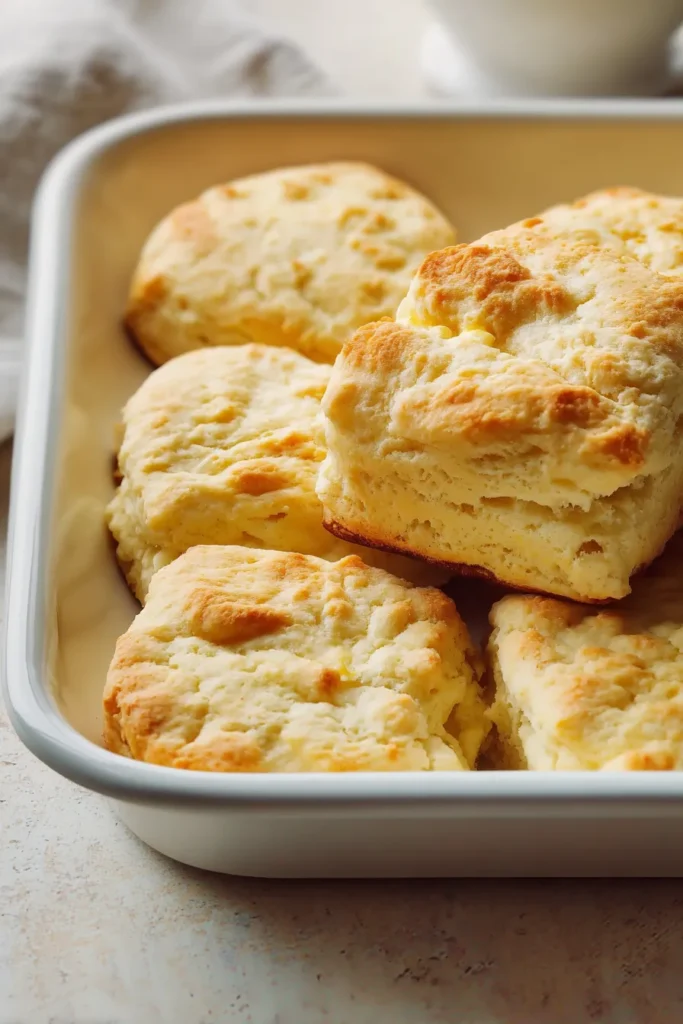
Now they are ready.
How to Serve Them
These are flexible. Serve them sweet or savory, and they hold their own either way.
Some of my favorite ways to eat them:
- A generous drizzle of local honey over the warm top
- Smothered in thick, savory cream gravy
- Alongside a bowl of vegetable soup or a slow-cooked stew
- With a simple fried egg and a cup of coffee on a quiet Saturday morning
The crispy bottom crust holds up beautifully to heavy sauces. It does not go soggy the way softer biscuits do. That sturdy base is one of the best things about this style of baking.
Storing and Reheating Leftovers
Good news if you somehow end up with extras.
Store cooled squares in an airtight container in the refrigerator for up to three days.
When you are ready to eat them again, pop them into a 250-degree oven and warm them gently until heated through. The oven brings that crispy bottom crust right back to life. It is almost as good as fresh.
Skip the microwave. I know it is faster. But microwaving these makes the crumb soft and slightly rubbery, and you lose everything that makes this recipe special. The few extra minutes in the oven are absolutely worth it.
To freeze: Let the squares cool completely, then seal them in a heavy-duty freezer bag. They keep well for up to three months. Thaw overnight in the fridge, then reheat in the oven as usual.
Frequently Asked Questions
Can I make this recipe without buttermilk?
Yes. Mix 1 ¾ cups of regular milk with 2 tablespoons of white vinegar. Let it sit for five minutes. It is a solid substitute that works beautifully in this recipe.
Why did my biscuits turn out dense and tough?
Overmixing. That is almost always the answer. You only want to stir until the dry streaks of flour disappear. The less you handle the batter, the lighter and fluffier your squares will be.
Can I freeze these after baking?
Absolutely. Cool them completely first, then store in a heavy-duty freezer bag. They stay good for up to three months. Thaw in the fridge overnight and reheat in the oven.
Do I have to use an 8×8-inch pan?
It gives you the best thickness for the final product. A 9×9 pan works, but your squares will come out noticeably thinner. Stick with glass or light ceramic if you can, and avoid dark non-stick pans since they tend to burn the buttery bottom crust.

Butter Swim Biscuits
Ingredients
- 1/2 cup unsalted butter 8 tbsp; cut into 1-inch cubes
- 2 1/2 cups all-purpose flour 300g; spooned and leveled
- 4 tsp baking powder 16g; ensure it is fresh
- 1 tbsp sugar 12g
- 2 tsp kosher salt 6g; Diamond Crystal preferred
- 1 3/4 cups buttermilk room temperature preferred
Instructions
- Preheat your oven to 450°F (230°C) with the rack in the center position.
- Place the cubed butter into an 8×8-inch baking dish. Slide the dish into the oven for about 6 minutes until the butter is completely melted and bubbling, but not burned. Remove and set aside.
- In a medium mixing bowl, vigorously whisk together the flour, baking powder, sugar, and salt to ensure even distribution.
- Pour the buttermilk into the dry ingredients. Gently fold with a rubber spatula just until no dry streaks of flour remain. Do not overmix.
- Carefully pour the wet batter into the pan of hot melted butter. Spread it into an even layer with your spatula; the butter will pool on top.
- Using a sharp knife, score the batter into 9 equal squares. Wipe the knife clean between passes if necessary.
- Bake for 25 minutes, rotating the pan halfway through. The biscuits are done when the edges are deep brown and the center is firm.
- Let the pan rest for 3 minutes to allow the dough to absorb the remaining butter. Slice through the score lines again before serving.