
Okay, real talk.
I wasn’t always a lemon person. Actually, I used to skip right past anything lemon-flavored at the bakery.
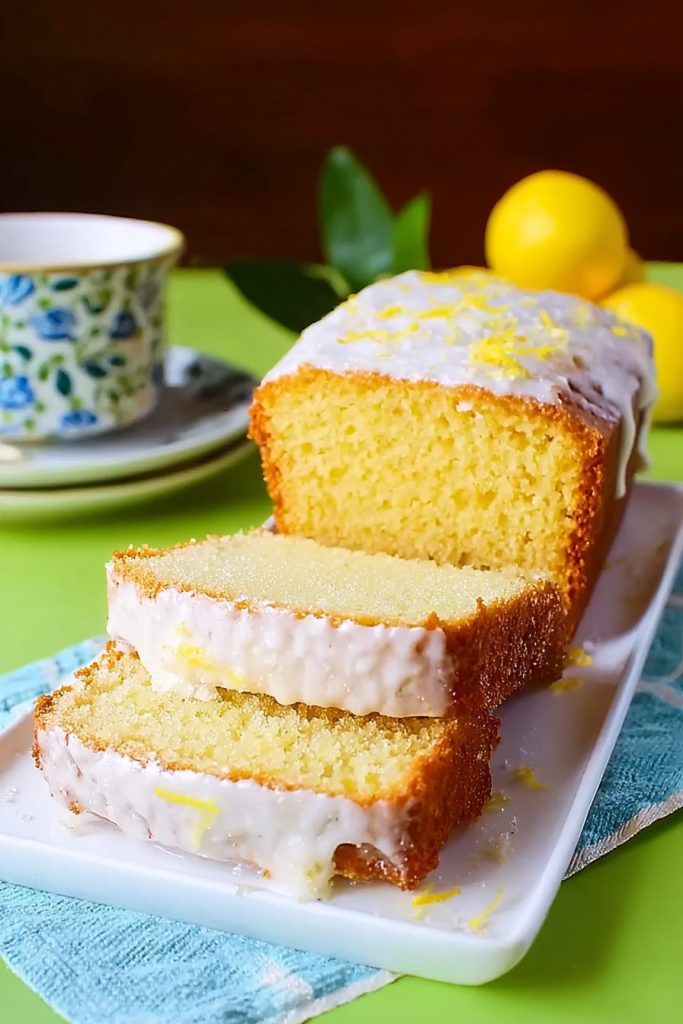
Then one day, I grabbed a slice of that famous Starbucks Lemon Loaf. You know the one. That gorgeous yellow cake with the thick white glaze that somehow stays moist for days?
Yeah. That bite changed my life.
The buttery texture. The bright lemon flavor that wasn’t too tart. And that glaze? Don’t even get me started on that glaze.
I was hooked.
But here’s the thing. Those slices cost almost great value each. And I was stopping by Starbucks way too often. My wallet was crying.
So I did what any reasonable person would do. I decided to figure out how to make it at home.
After burning through about 6 batches (my kitchen smelled amazing though), I finally cracked the code. And honestly? My version might be even better than the original.
Why This Recipe Actually Works
Look, I’ve tried a bunch of lemon loaf recipes before.
Some were too dry. Others tasted like furniture polish (yes, really). And a few just.. missed the mark completely.
This one? It nails everything.
The texture sits right in that sweet spot between cake and bread. Dense enough that you feel like you’re eating something substantial. But tender enough that it practically melts in your mouth.
And the lemon flavor comes at you in waves:
- First hit: bright, fresh zest
- Second hit: tangy lemon juice
- Final hit: that concentrated extract punch
It tastes professional. Like something you’d actually pay money for at a bakery.
The One Ingredient That Changes Everything
Want to know the secret to keeping this loaf moist for days?
Sour cream.
I’m serious. This is the game-changer.
Most recipes use oil or extra butter. And sure, those work okay. But sour cream? It’s on another level.
The fat content locks in moisture like nothing else. Even three days later, each slice still tastes fresh-baked. No dry, crumbly nonsense here.
I tested this recipe with Greek yogurt once. Then tried buttermilk another time.
Both were.. fine.
But sour cream delivered exactly what I wanted. That velvety, tender crumb that tastes just like the Starbucks version.
My Triple Lemon Strategy
Here’s where most recipes mess up. They use just lemon juice. Maybe some zest if you’re lucky.
Not enough.
You need all three lemon components working together:
Lemon zest brings those essential oils. The ones that make your whole kitchen smell incredible. It’s where the most intense flavor lives.
Fresh lemon juice adds that bright, tangy kick. The natural acidity that wakes up your taste buds.
Lemon extract delivers concentrated citrus flavor. This is what makes it taste like the real deal. Like you bought it from an actual bakery.
Together?
Magic.
The flavor is bright but not sour. Sweet but not cloying. Just.. perfect.

When Should You Make This?
Honestly? Anytime.
I’ve served this for breakfast with coffee. Cut thick slices and pretended it was “breakfast bread” instead of cake. Nobody complained.
Had friends over for afternoon tea? Thin, elegant slices looked fancy. Everyone asked for the recipe.
Needed a quick dessert? Warmed it slightly and added whipped cream. Boom. Instant dinner party hero.
The best part about making it yourself?
You’re in control.
Want more glaze? Make a double batch. Prefer it less sweet? Cut back on the sugar. This recipe doesn’t judge.
It’s forgiving. It’s flexible. And it always turns out amazing.
What You’ll Need
Let me break down exactly what goes into this loaf. No surprises here.
| Ingredient | Quantity | Notes |
|---|---|---|
| Butter | 1/2 cup | Softened to room temperature |
| Granulated sugar | 1 cup | Regular white sugar works best |
| Sour cream | 1/3 cup | Full-fat recommended |
| Vanilla extract | 2 tsp | Pure extract preferred |
| Lemon extract | 1 tsp | Essential for authentic flavor |
| Large eggs | 3 | Room temperature |
| Lemon zest | 2 tbsp | From about 2 medium lemons |
| Lemon juice | 1 tbsp | Freshly squeezed |
| All-purpose flour | 1 1/2 cups | Measured correctly |
| Baking soda | 1/4 tsp | For proper rise |
| Baking powder | 1/2 tsp | Works with baking soda |
| Salt | 1/2 tsp | Enhances flavors |
| For the Icing: | ||
| Powdered sugar | 1 cup | Sifted if lumpy |
| Milk | 1 tbsp | Whole milk works best |
| Lemon juice | 1 tbsp | Fresh preferred |
| Lemon extract | 1 tsp | Optional but recommended |
| Salt | Pinch | Optional, balances sweetness |
A quick note about measurements: Be precise with your flour.
Too much and your loaf turns into a brick. Too little and it won’t hold together.
Spoon it into your measuring cup. Level it off with a knife. Don’t pack it down.
How to Make It (The Easy Way)
Alright, let’s get baking. This is simpler than you think.
Step 1: Get Your Oven Ready
Crank that oven to 400°F.
I know. That sounds crazy hot. But stick with me here.
Grab your 9×5-inch loaf pan. Spray it really well with cooking spray. And I mean really well. Get in those corners. You don’t want this baby sticking later.
Step 2: Beat Butter and Sugar
Throw your softened butter and sugar into a mixer bowl.
Beat them on medium speed for about 2 minutes.
Now here’s the weird part. The mixture will look dry and crumbly. Like sand almost.
Don’t freak out. This is totally normal. It’s supposed to look like that.
Step 3: Add Those Eggs
Crack in your eggs. One at a time works best.
Beat well after each one goes in.
Watch the mixture transform. It’ll get smoother. Lighter in color. Almost fluffy.
This step is important. It’s putting air into your batter. That air creates those tender crumbs we’re after.
Step 4: Mix the Wet Stuff
Time for the good stuff.
Add your sour cream. Both extracts. That gorgeous lemon zest. And the fresh juice.
Beat everything together until it looks creamy and smooth.
See those little yellow flecks? That’s the lemon zest. Beautiful, right?
Step 5: Deal with Dry Ingredients
Grab a separate bowl. This is important.
Whisk together your flour, baking powder, baking soda, and salt.
Why separate? Because we need these leaveners distributed evenly. Clumps are the enemy here.
Step 6: Bring It All Together
Add your dry mixture to the wet stuff.
Mix on low speed. Stop the second you don’t see dry flour anymore.
Here’s where people mess up. They overmix.
Overmixing = tough, dense loaf. Nobody wants that.
We’re going for tender and light here.

Step 7: The Oven Temperature Trick
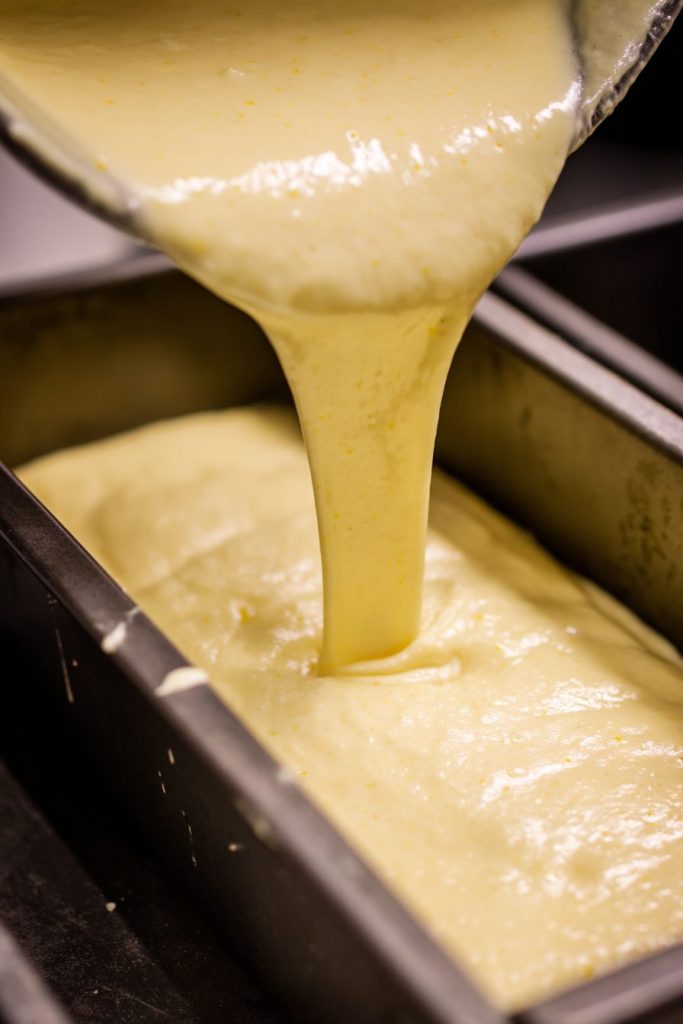
Pour your batter into that prepared pan.
Pop it in the oven immediately.
Then—and this is crucial—drop the temperature to 350°F right away.
That initial blast of heat? It gives the loaf its rise. Then the lower temp bakes it through evenly.
Set your timer for 45 minutes.
You’ll know it’s done when a toothpick comes out clean. Or maybe with a few moist crumbs. That’s fine.
Top browning too fast? Just tent some foil loosely over it. Problem solved.
Step 8: The Cooling Part (Don’t Skip This)
Take it out of the oven.
Let it sit in the pan for 10 minutes. No more, no less.
Then run a knife around the edges. This loosens it up.
Flip it onto a wire rack. Let it cool completely.
I know you want to dig in right now. But trust me. Hot cake + glaze = disaster.
Step 9: Make That Glaze
While it’s cooling, whisk together your powdered sugar, milk, lemon juice, and extract.
Too thick? Add milk. One teaspoon at a time.
Too runny? More powdered sugar.
The consistency should be like.. thick cream? Pourable but not watery.
Step 10: Glaze Time
Once that loaf is completely cool?
Pour the glaze over the top.
Let it drip down the sides naturally. Don’t try to control it. The messier it looks, the better it tastes.
Wait 20-30 minutes for it to set.
This creates that signature crackly coating on top. The one that looks professional even though you made it in your pajamas.
Making It Even Better
Okay, so you’ve got the basic recipe down. Now let’s talk about how to nail it every single time.
Things That Actually Matter
Temperature is everything.
Room temperature ingredients blend together so much better. Cold stuff? It clumps. It curdles. It’s just a mess.
Take your eggs, butter, and sour cream out 30 minutes before you start. Let them sit on the counter. Makes a huge difference.
Zest properly.
Use a microplane if you have one. Or the small holes on your box grater.
Only zest the yellow part. That white stuff underneath? It’s called pith. And it’s bitter as heck.
You don’t want bitter in your lemon loaf.
Don’t expect a huge dome.
Some cakes rise up into this beautiful rounded top, right?
This one doesn’t.
It bakes pretty flat. Almost level on top.
This is normal. This is how it’s supposed to look.
The first time I made it, I panicked. Thought I did something wrong.
Nope. It was perfect.
Storage 101:
Keep it in an airtight container. Room temperature only.
It’ll stay moist for 3-4 days easily.
Never, ever put it in the fridge. That’ll dry it out faster than you can say “lemon loaf.”
Want to keep it longer? Wrap it tight and freeze it. Good for up to 3 months.
Ways to Mix It Up
Get bored easily? Me too. Here are some variations I’ve tried.
Lemon Blueberry Version:
Fold in 1 cup of fresh blueberries before baking.
Toss them in a tablespoon of flour first. This stops them from sinking to the bottom.
The combo of tart lemon and sweet berries? Chef’s kiss.
Lemon Poppy Seed Style:
Add 2 tablespoons of poppy seeds.
Mix them in with your dry ingredients.
Gives it that classic diner vibe. Plus the little black specks look fancy.
Lemon Lavender (Fancy Alert):
Steep 1 teaspoon of dried culinary lavender in warm milk. Let it sit for 10 minutes.
Strain it before using in your glaze.
The floral note is subtle but sophisticated. Perfect for impressing people.
Questions I Get All The Time
“Can I just use bottled lemon juice?”
You can. But should you?
Nah.
Bottled juice tastes metallic. Sometimes artificial. It’s just not the same.
You’re already zesting lemons anyway. Just squeeze them while you’re at it. The fresh juice makes everything taste brighter.
Worth the extra 30 seconds.
“Why did mine sink in the middle?”
Usually one of two things:
Opening the oven door too early. That temperature drop makes everything collapse. Wait at least 35 minutes before peeking.
Or your baking powder and soda are old. Those things expire. Check the dates. Old leaveners don’t work properly.
“Do I really need the lemon extract?”
Technically? No.
But the flavor won’t hit the same without it.
If you skip it, bump up the lemon zest to 3 tablespoons. And increase the juice to 2 tablespoons.
It won’t be quite as intense. But it’ll still taste good.
“How do I know when it’s actually done?”
Stick a toothpick in the center.
It should come out clean. Or with just a few moist crumbs clinging to it.
Press the top lightly. Does it feel firm? Good.
Still jiggly? Give it another 5 minutes.
“Can I make two loaves at once?”
Absolutely!
Use two 9×5-inch pans. Bake them side by side.
Same baking time applies. Just rotate them halfway through for even browning.
Make sure there’s enough space between the pans. Air needs to circulate.
The Bottom Line
This lemon loaf has become my go-to recipe. I make it at least twice a month now.
It’s easy enough for a random Tuesday. But impressive enough when company comes over.
And here’s the best part?
Each slice costs maybe 50 cents to make. Maybe.
Compare that to the great value Starbucks charges. You’re saving serious money.
Your friends will assume you spent hours on this. That you followed some complicated French pastry technique.
Let them think that.
I won’t tell if you don’t.

Starbucks Lemon Loaf (Copycat Recipe)
Ingredients
For the Loaf
- 1/2 cup butter softened to room temperature
- 1 cup granulated sugar
- 1/3 cup sour cream full-fat recommended
- 2 tsp vanilla extract pure extract preferred
- 1 tsp lemon extract essential for authentic flavor
- 3 large eggs room temperature
- 2 tbsp lemon zest from about 2 medium lemons
- 1 tbsp lemon juice freshly squeezed
- 1 1/2 cups all-purpose flour measured correctly
- 1/4 tsp baking soda
- 1/2 tsp baking powder
- 1/2 tsp salt
For the Lemon Glaze
- 1 cup powdered sugar sifted if lumpy
- 1 tbsp milk whole milk works best
- 1 tbsp lemon juice fresh preferred
- 1 tsp lemon extract optional but recommended
- 1 pinch salt optional, balances sweetness
Instructions
- Preheat oven to 400°F. Spray a 9×5-inch loaf pan thoroughly with cooking spray, especially the corners.
- In a mixer bowl, beat softened butter and granulated sugar on medium speed for 2 minutes. The mixture will look dry and crumbly – this is normal.
- Add eggs one at a time, beating well after each addition until the mixture becomes smooth and fluffy.
- Mix in sour cream, vanilla extract, lemon extract, lemon zest, and lemon juice. Beat until creamy and smooth.
- In a separate bowl, whisk together flour, baking powder, baking soda, and salt until evenly distributed.
- Add dry ingredients to wet ingredients. Mix on low speed just until no dry flour remains. Do not overmix.
- Pour batter into prepared loaf pan. Place in oven immediately, then reduce temperature to 350°F.
- Bake for 45 minutes, or until a toothpick inserted in the center comes out clean or with just a few moist crumbs. Tent with foil if top browns too quickly.
- Let loaf cool in pan for 10 minutes. Run a knife around edges, then flip onto a wire rack to cool completely.
- While loaf cools, whisk together powdered sugar, milk, lemon juice, lemon extract, and salt for the glaze. Adjust consistency with more milk or sugar as needed.
- Once loaf is completely cool, pour glaze over the top, letting it drip down the sides naturally. Let set for 20-30 minutes before slicing.