
You know that feeling when you bite into a warm cinnamon sugar donut?
The soft cake. The sweet, spiced coating. Pure comfort in every single bite.
Well, I’m about to share something exciting with you.
You can recreate that exact experience in loaf form. Right in your own kitchen. No frying. No fancy equipment. Just pure donut goodness.
Let me tell you how I discovered this recipe. It was a dreary Saturday morning, and I was seriously craving something sweet. The kind of day where you just want to stay in your pajamas and bake something comforting.
The beauty of this bread?
It’s ridiculously simple.
No yeast. No waiting for dough to rise. No complicated techniques that make you question your life choices.
Just mix, bake, and coat in that irresistible cinnamon sugar mixture.
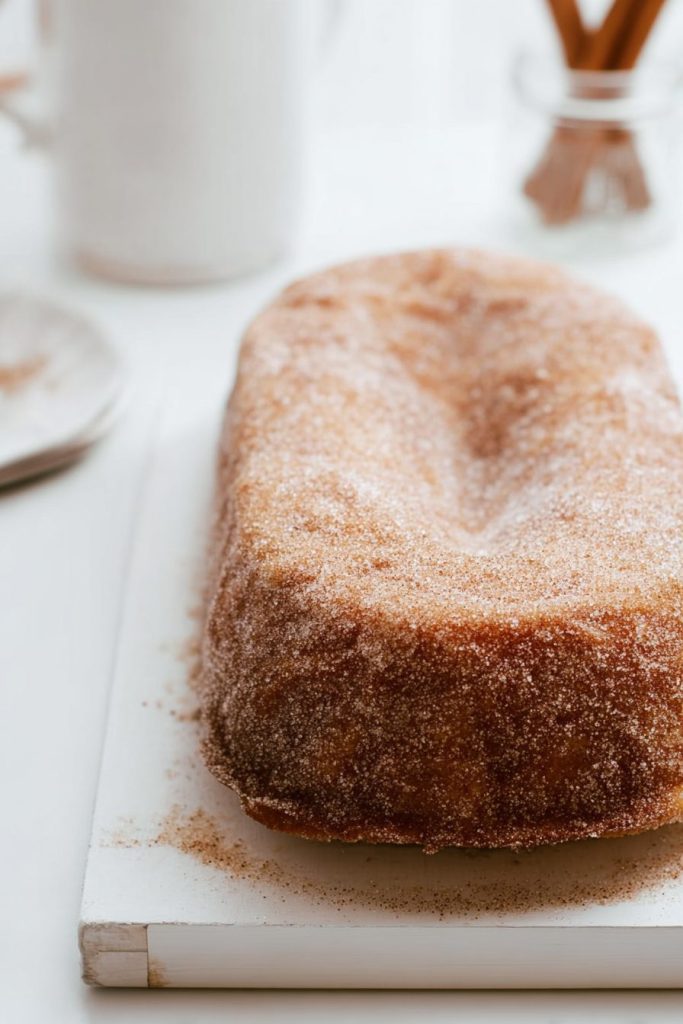
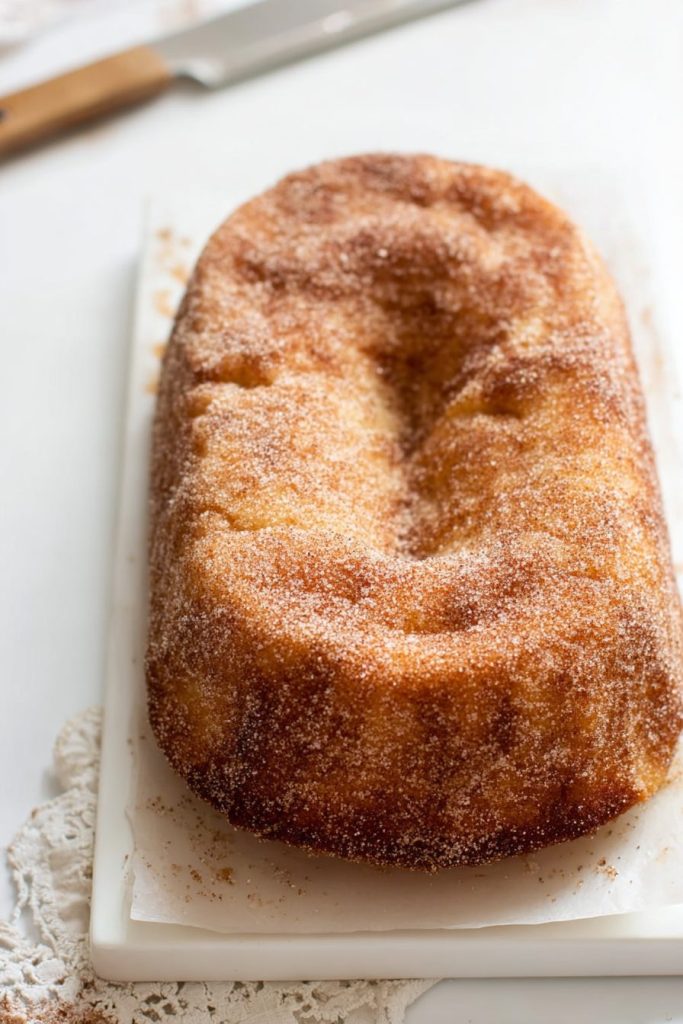
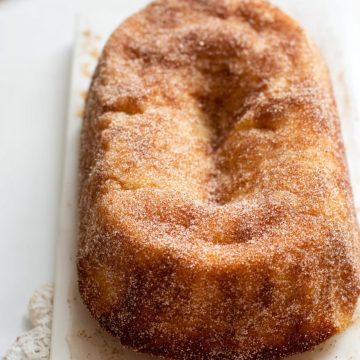
The result? A gorgeous golden loaf with a tender crumb. And that signature donut coating that makes it impossible to stop at just one slice. Trust me, I’ve tried.
Here’s what makes this bread special. After baking, you brush the warm loaf with melted butter. Then you roll it in cinnamon, nutmeg, and sugar. This creates that classic donut shop exterior—slightly crispy and utterly addictive.
Every bite tastes like you just grabbed a fresh cinnamon sugar donut from your favorite bakery.
Understanding Your Ingredients
Let me walk you through why each ingredient matters here.
Because understanding the “why” behind your ingredients? It helps you bake with confidence. And it helps you troubleshoot when things don’t go according to plan.
Whole Milk
This is the foundation for your bread’s incredibly moist texture.
The fat content in whole milk adds richness. It helps create that tender, almost cake-like crumb that makes this bread so special.
I’ve experimented with lower-fat milk options. And while it still works, you’ll notice the difference. The bread isn’t quite as luscious. Not as moist.
If you only have 2% milk on hand? Go ahead and use it.
But whole milk truly makes this bread shine.
Granulated Sugar
Sugar does double duty in this recipe.
In the batter, it sweetens and helps create structure. In the coating, it provides that classic donut exterior crunch.
Now, don’t be alarmed by the amount of sugar here.
Remember—this is meant to taste like a donut. And donuts are unapologetically sweet treats. That’s the whole point.
Unsalted Butter
Butter appears twice in this recipe for good reason.
In the batter, melted butter adds moisture and rich flavor. For the coating, it acts as the glue that helps all those beautiful spices stick to your bread.
Using unsalted butter gives you complete control over the salt level.
If you need to use salted butter? Just reduce the added salt by about half.

Baking Powder
This is your leavening agent.
It creates those lovely air bubbles that give the bread its soft, tender texture.
Here’s something important: Make sure your baking powder is fresh.
If it’s been sitting in your pantry for over six months, do a quick test. Drop a teaspoon into hot water. If it bubbles vigorously? You’re good to go.
If nothing happens? Time to buy a new container.
Vanilla Extract
Vanilla adds warmth and depth to the overall flavor.
Pure vanilla extract works best. But imitation vanilla will work in a pinch.
That tablespoon might seem like a lot. But it really enhances all the other flavors. It gives the bread that homemade bakery quality that makes people ask for your recipe.
The Spiced Sugar Coating
This is where the magic happens.
Ground cinnamon provides that classic donut flavor we all know and love.
The ground nutmeg? It adds a subtle warmth and complexity that takes this from good to absolutely incredible.
Nutmeg has a slightly sweet, nutty flavor that complements cinnamon beautifully.
Together, they create that signature donut shop taste.
Ingredient Table
| Ingredient | Quantity | Notes |
|---|---|---|
| All-purpose flour | 2 cups (250g) | Spoon and level for accuracy |
| Granulated sugar (batter) | 1½ cups (300g) | Regular white sugar |
| Baking powder | 2 teaspoons | Check freshness date |
| Kosher salt | ½ teaspoon | Or ¼ tsp table salt |
| Whole milk | 1¼ cups (306g) | Room temperature preferred |
| Large egg | 1 | Room temperature |
| Unsalted butter (batter) | 2 tablespoons | Melted and slightly cooled |
| Vanilla extract | 1 tablespoon | Pure extract recommended |
| Unsalted butter (coating) | ¼ cup (57g) | Melted for brushing |
| Granulated sugar (coating) | ½ cup (100g) | For the exterior |
| Ground cinnamon | 1 teaspoon | Fresh for best flavor |
| Ground nutmeg | ½ teaspoon | Freshly ground if possible |
Recipe Timing: Prep Time: 15 minutes | Cook Time: 60-70 minutes | Total Time: 1 hour 25 minutes | Servings: 12 slices | Difficulty: Easy
The Baking Process
Now comes the fun part.
Actually making this delicious bread!
The process is straightforward and forgiving. Perfect even if you’re new to baking. I’ll guide you through each step with tips I’ve learned from making this bread many times.
Setting Up for Success
Start by preheating your oven to 350°F.
This gives it plenty of time to reach the right temperature while you mix your batter.
Grab an 8½ x 4½-inch loaf pan. Spray it generously with nonstick cooking spray. Make sure you get the corners and up the sides.
Why so thorough?
This bread has sugar in it. And sugar makes things stick if you’re not careful.
Here’s a pro tip I learned the hard way.
If you don’t have nonstick spray, butter and flour your pan instead. Coat it with softened butter. Then dust with flour, tapping out the excess.
This old-school method works beautifully. And it ensures your bread releases perfectly every single time.
Mixing the Batter
Get out your large mixing bowl.
Combine your dry ingredients first. Whisk together the flour, sugar, baking powder, and salt.
This step is important. It distributes the leavening agent evenly throughout the flour.
Because no one wants a bite with too much baking powder. It leaves a metallic taste that ruins the whole experience.

In a separate bowl, whisk together your wet ingredients.
Combine the milk, egg, melted butter, and vanilla extract.
One quick warning: Make sure your melted butter isn’t too hot. If it is, it might cook the egg. Let it cool for about two minutes after melting.
Whisk everything together until it’s smooth and well combined.
Now here’s where many home bakers make a mistake.
Overmixing.
When you pour the wet ingredients into the dry ones, you want to stir gently. Just until combined.
The batter should look slightly lumpy. And definitely runny.
It’s actually supposed to be thinner than you might expect.
This loose batter creates that tender, moist crumb we’re after.
I use a rubber spatula for this step. Folding the ingredients together with broad strokes. Stop as soon as you don’t see any more dry flour streaks.
A few small lumps? Perfectly fine. They’ll disappear during baking.
Baking to Perfection
Pour your batter into the prepared loaf pan.
Use your spatula to spread it evenly. Give the pan a gentle tap on the counter to release any air bubbles.
Slide it into your preheated oven on the center rack.
This bread bakes for 60 to 70 minutes.
I know that seems like forever. But remember—it’s a dense, moist batter with quite a bit of sugar. That sugar needs time to caramelize and develop flavor.
Your kitchen will smell absolutely incredible as it bakes.
Warm cinnamon and vanilla notes will fill every corner. Your family will start wandering into the kitchen asking when it’ll be ready.
Start checking at the 60-minute mark.
Insert a toothpick into the center of the loaf. You’re looking for it to come out with just a few moist crumbs attached.
If you see wet batter? Give it another 5 to 10 minutes.
The top should be golden brown. It may have a few small cracks, which is completely normal.
The Magical Coating Process
Once your bread is baked, remove it from the oven.
Let it cool in the pan for exactly 10 minutes.
This resting time is crucial.
If you try to remove it too soon? It might break apart. If you wait too long? The coating won’t stick as well.
While the bread cools, prepare your coating station.
Melt your quarter cup of butter in the microwave or on the stovetop. In a small bowl, mix together the sugar, cinnamon, and nutmeg.
Set up a large piece of parchment paper on your counter as your work surface.
After 10 minutes, run a butter knife around the edges of the pan to loosen the bread.
Carefully invert the pan. Let the loaf slide out onto your parchment paper.
The bread should still be quite warm. Warm enough that you need to handle it carefully.
Here’s where it gets messy and fun.
Using a pastry brush or even a spoon, brush melted butter all over the warm loaf.
Cover every surface. Top, sides, and ends.
Work quickly while the bread is still warm. The butter should soak in slightly and create a sticky surface.
Now for the grand finale.
The sugar coating.
Sprinkle the cinnamon-nutmeg-sugar mixture generously over the buttered loaf.
I start with the top. Then carefully turn the loaf to coat each side. Press gently so the sugar mixture adheres well.
You want a thick, even coating all around.
Don’t worry if you have leftover sugar mixture. Save it in an airtight container for next time. Or sprinkle it over your morning oatmeal or toast.
Nothing should go to waste!
Serving Your Creation
Let the coated bread cool for another 10 to 15 minutes before slicing.
This gives the coating time to set slightly.
Use a serrated knife and a gentle sawing motion to cut clean slices. The bread is incredibly tender, so a sharp knife and a light touch work best.
I love serving this bread slightly warm.
The coating is still a bit soft. And the interior is at its most tender.
It pairs beautifully with morning coffee or afternoon tea. The sweetness balances perfectly with bitter coffee, making it an ideal breakfast or brunch treat.
For brunch gatherings, I slice the entire loaf and arrange the slices on a platter.
It looks impressive. And it makes serving easy.
Guests can grab a slice with their fingers. No plates needed.
I often put out small bowls of softened butter or cream cheese alongside. For those who want an extra indulgence.
This bread also makes a wonderful dessert.
Warm a slice in the microwave for about 10 seconds. Serve it with a scoop of vanilla ice cream.
The warm bread with cold ice cream creates an amazing contrast in temperatures and textures.
A drizzle of caramel sauce? Takes it completely over the top.
Storage, Variations, and Your Questions Answered
One of the best things about this Cinnamon Sugar Donut Bread?
How well it keeps.
Unlike actual donuts that go stale within hours, this bread stays fresh for days when stored properly.
Proper Storage Methods
For short-term storage, keep the bread at room temperature in an airtight container.
A plastic storage container with a tight-fitting lid works perfectly. You can also wrap it tightly in plastic wrap or aluminum foil.
At room temperature, the bread stays fresh and soft for up to two days.
This is actually my preferred storage method. Because the texture remains ideal.
Need to extend the shelf life?
Refrigeration is your friend.
Place the wrapped loaf in an airtight container or resealable plastic bag before refrigerating. This prevents the bread from absorbing any refrigerator odors.
Properly stored, it will last up to five days in the fridge.
Before serving refrigerated bread, let it come to room temperature. Or warm individual slices in the microwave for 10 to 15 seconds.
For longer storage, freezing works beautifully.
Wrap the completely cooled loaf tightly in plastic wrap. Then wrap again with aluminum foil. Place it in a heavy-duty freezer bag, pressing out as much air as possible.
Label it with the date.
The bread freezes well for up to six months. Though the flavor is best within the first month.
To thaw frozen bread, leave it on the counter in its wrapping.
Let it come to room temperature naturally over several hours. This allows the bread to reabsorb moisture and return to its original texture.
Never unwrap frozen bread immediately. Condensation will form and make it soggy.
Creative Variations
Once you’ve mastered the basic recipe, try these fun variations.
Cardamom Twist: You can swap the nutmeg for an equal amount of cardamom. It creates a slightly floral, exotic twist. Cardamom pairs beautifully with cinnamon and creates a more complex flavor profile.
Chocolate Version: Reduce the flour by two tablespoons. Add two tablespoons of cocoa powder to the dry ingredients. Keep the cinnamon sugar coating the same. The combination of chocolate and cinnamon is absolutely divine.
Add Some Crunch: Want to add texture? Fold in half a cup of chopped pecans or walnuts right before pouring the batter into the pan. The nuts add a lovely crunch that contrasts nicely with the soft bread.
Muffin Magic: For individual servings, transform this recipe into muffins. Line a standard muffin tin with paper liners or spray with nonstick cooking spray. Fill each cup about two-thirds full with batter. Bake at 350°F for 20 to 25 minutes. After cooling, brush each muffin with melted butter and roll in the cinnamon sugar mixture. Muffins are perfect for grab-and-go breakfasts or lunchboxes.
Frequently Asked Questions
Can I use a different size loaf pan?
You can. But you’ll need to adjust the baking time.
A 9×5-inch pan will work. But your bread will be slightly shorter and may bake faster. Start checking at 50 minutes.
Smaller pans will require longer baking time as the batter will be deeper.
Why is my bread dense instead of tender?
The most common culprit?
Overmixing the batter.
When you stir too vigorously or for too long, you develop the gluten in the flour. This creates a tough, dense texture.
Remember—mix just until the dry ingredients disappear.
Another possibility is using expired baking powder. Check the date and do the fizz test if you’re unsure.
Can I reduce the sugar in this recipe?
I don’t recommend it for this particular bread.
The sugar isn’t just for sweetness. It also contributes to the texture and moisture.
Reducing sugar significantly will result in a drier, less tender bread that doesn’t taste like a donut.
This is meant to be an indulgent treat. So embrace the sweetness!
My coating isn’t sticking well. What went wrong?
The bread needs to be warm when you apply the butter and sugar coating.
If it cooled too much, the butter won’t absorb properly.
Make sure you brush the butter on generously. And work quickly.
Also, press the sugar mixture gently but firmly into the buttered surface to help it adhere.
Can I make this ahead for a brunch party?
Absolutely!
This bread actually tastes great the next day.
Make it the evening before. Let it cool completely. Store it in an airtight container at room temperature.
About 30 minutes before serving, you can warm individual slices in a 300°F oven for 5 minutes to refresh them.
Your guests will never know it wasn’t baked that morning.
This Cinnamon Sugar Donut Bread has become a weekend staple in my kitchen.
It satisfies my donut cravings without any frying. And the house smells amazing while it bakes.
Whether you’re treating yourself on a lazy Sunday morning or impressing guests at brunch, this bread delivers bakery-quality results with minimal effort.
Give it a try.
I promise you’ll be adding it to your regular baking rotation.
Cinnamon Sugar Donut Bread
Ingredients
Bread Batter
- 2 cups all-purpose flour
- 1½ cups granulated sugar
- 2 teaspoons baking powder
- ½ teaspoon kosher salt or ¼ tsp table salt
- 1¼ cups whole milk room temperature preferred
- 1 large egg room temperature
- 2 tablespoons unsalted butter melted and slightly cooled
- 1 tablespoon vanilla extract pure extract recommended
Cinnamon Sugar Coating
- ¼ cup unsalted butter melted for brushing
- ½ cup granulated sugar
- 1 teaspoon ground cinnamon fresh for best flavor
- ½ teaspoon ground nutmeg freshly ground if possible
Instructions
- Preheat your oven to 350°F. Spray an 8½ x 4½-inch loaf pan generously with nonstick cooking spray, making sure to get the corners and sides.
- In a large mixing bowl, whisk together the flour, 1½ cups sugar, baking powder, and salt until well combined.
- In a separate bowl, whisk together the milk, egg, 2 tablespoons melted butter, and vanilla extract until smooth.
- Pour the wet ingredients into the dry ingredients. Gently fold together with a rubber spatula just until combined. The batter should be slightly lumpy and runny. Do not overmix.
- Pour the batter into the prepared loaf pan and spread evenly. Tap the pan gently on the counter to release air bubbles.
- Bake for 60 to 70 minutes, until a toothpick inserted into the center comes out with just a few moist crumbs. The top should be golden brown.
- Let the bread cool in the pan for exactly 10 minutes. Meanwhile, melt the ¼ cup butter and mix together the ½ cup sugar, cinnamon, and nutmeg in a small bowl.
- Run a butter knife around the edges of the pan to loosen the bread. Carefully invert onto parchment paper.
- Brush the warm loaf generously with melted butter on all surfaces – top, sides, and ends. Work quickly while the bread is still warm.
- Sprinkle the cinnamon-nutmeg-sugar mixture generously over the buttered loaf, turning to coat all sides. Press gently to help it adhere.
- Let cool for 10 to 15 minutes before slicing with a serrated knife. Serve warm or at room temperature.