
Let me tell you something about my kitchen.
It is loud, chaotic, and always in motion. Between school pickups, work calls, and last-minute guests showing up at the door, I rarely have time to pull off anything complicated. That is exactly why this recipe has become such a staple around here.
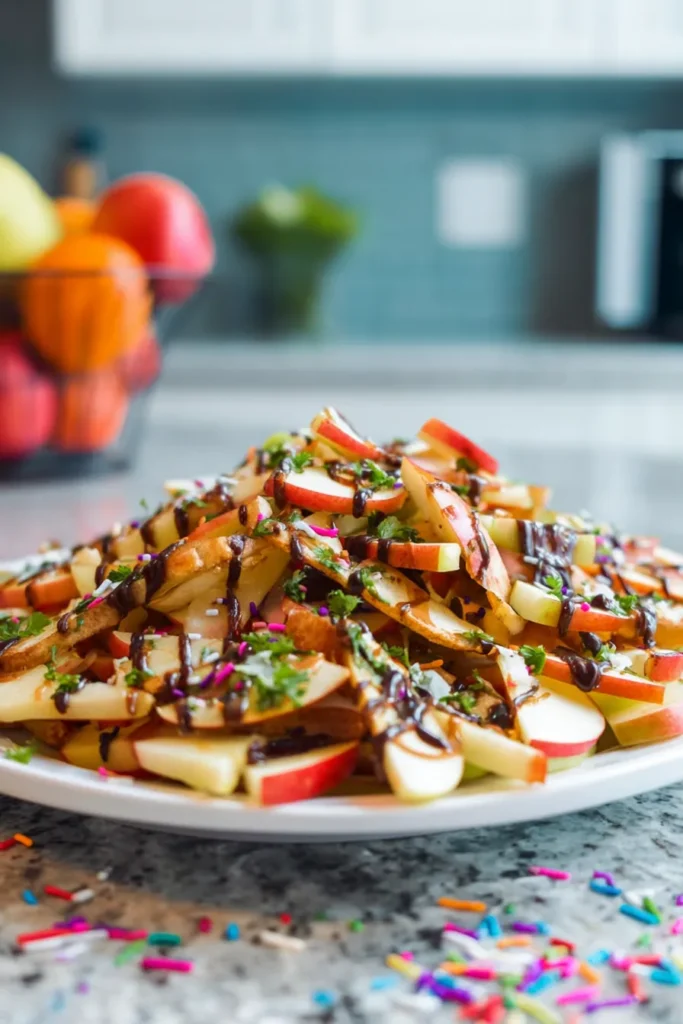
Apple Nachos.
Simple ingredients. Zero cooking. Ready in under 30 minutes. And every single time I put this plate on the table, it disappears within minutes.
The magic is in the combination. You get that sharp, satisfying crunch from fresh apple slices. Then warm chocolate sauce ribbons across the top. Sticky caramel fills in the gaps. Tiny chocolate chips cling to every surface. And colorful sprinkles make the whole thing look like something from a dessert shop window.
It is the kind of dish that looks like you tried really hard. But honestly? You barely did.
Whether you are hosting a movie night, need a quick after-school snack, or just want something sweet without turning on the oven, this recipe has you covered.
Choosing the Right Apple Matters More Than You Think
Here is where most people go wrong with fruit platters.
They grab whatever apple is on sale, slice it up, and wonder why everything turns mushy by the time they drizzle the sauce. The truth is, your apple choice is the foundation of this whole dish.
You want firm. You want crisp. You want something that holds its shape even with warm caramel pooling on top.
Here are my top picks:
- Granny Smith – Sharp and tart. The perfect contrast to sweet sauces.
- Honeycrisp – Naturally sweet with an amazing snap when you bite in.
- Fuji – Mild, dense, and incredibly reliable.
- Pink Lady – Slightly floral, beautifully firm, and visually stunning.
My personal favorite move? Mix red and green varieties together. The color contrast alone makes the platter look gorgeous before you even add a single topping.
Whatever you do, skip the soft, mealy varieties. A Red Delicious apple that has been sitting in a grocery bin for two weeks will turn this dish into a soggy mess faster than you can say “dessert platter.”

Prep Your Fruit the Right Way
This step takes maybe five minutes. But it makes a huge difference in the final result.
Start by washing each apple thoroughly under cold, running water. Then dry them completely with a clean paper towel. And I mean completely. No moisture left on the skin at all.
Why does this matter so much? Think about it like painting a wall. If the surface is wet, the paint just slides right off. Same thing happens here. Wet apple skin causes your caramel and chocolate to slide straight off the fruit and pool at the bottom of the platter.
A dry surface is everything.
Once they are dry, core each apple carefully with a sharp chef’s knife on a stable cutting board. Slice them into even, thin wedges. Not paper thin, but not thick chunky slabs either. You want a slice that is:
- Sturdy enough to hold the sauce and toppings
- Thin enough to be a comfortable, one-bite piece
That balance is the sweet spot.
The Presentation Makes It
Here is a detail I learned the hard way.
The first time I made Apple Nachos, I piled everything into a deep salad bowl. It looked fine from the top. But the bottom half of the apples? Completely buried. No sauce reached them. No toppings landed on them. Half the plate was just plain apple slices drowning at the bottom.
Use a large, flat serving platter. Always.
A wide, shallow surface lets you spread the slices out in a single layer. Every piece gets sauce. Every piece gets toppings. Every person who grabs a slice gets the full experience.
Think of it like building a pizza. You want coverage across the entire surface, not a mountain in the middle.
Ingredients You Will Need
Everything on this list is probably already in your kitchen right now.

| Ingredient | Quantity | Notes |
|---|---|---|
| Sliced apples | 2 cups | Crisp varieties are highly preferred for crunch |
| Caramel sauce | 2 tbsp | Thick consistency works best for drizzling |
| Chocolate sauce | 2 tbsp | Warm slightly in a bowl for easy pouring |
| Sprinkles | 1 tbsp | Use your favorite bright, vibrant colors |
| Miniature chocolate chips | 1 tbsp | Mini size sticks much better to fruit slices |
Prep Time: 10 minutes | Cook Time: 15 minutes | Total Time: 25 minutes Servings: 4 | Difficulty: Easy
How to Assemble Apple Nachos Step by Step
Step 1: Build Your Base
Grab that large flat platter. Arrange your two cups of sliced apples across the surface in a single layer. Overlap the edges just slightly so there are no big empty gaps. You want the platter fully covered from edge to edge.
Take a moment and look at it. That right there is your canvas.
Step 2: Warm Your Sauces
Store-bought caramel and chocolate sauces are often too thick straight from the jar. Cold sauce does not drizzle. It clumps. It globs. It ruins the look.
Pour your two tablespoons of caramel into a small microwave-safe bowl. Heat it for about ten seconds. Just enough to make it loose and pourable. Do the exact same thing with the two tablespoons of chocolate sauce.
Warm sauces are glossy. They flow beautifully. They coat every slice the way they should.
Step 3: Drizzle with Intention
Take a spoon and load it up with warm caramel. Now drizzle it back and forth across the entire platter in a zigzag motion. Left to right. Right to left. Keep going until every section of the platter has some caramel on it.
Then repeat the exact same motion with the chocolate sauce.
Watch those two colors weave together across the apples. Honestly, it looks incredible every single time.

Step 4: Add the Finishing Touches
Now for the fun part.
Scatter your tablespoon of miniature chocolate chips across the entire platter. The reason you want mini chips specifically is simple. Regular-sized chips are too heavy. They roll right off the wet sauce and fall onto the plate. Mini chips have just enough surface area to stick and stay put.
Finally, scatter your tablespoon of colorful sprinkles all over the top. They add a tiny bit of texture and a huge amount of visual pop.
Step back and look at what you just made.
That is a proper dessert platter. And it took you less time than it would to preheat an oven.
Pro Tips for the Best Results
You could stop here and already have a great result. But these small details push it from good to genuinely impressive.
Serve immediately. Freshly cut apples start to oxidize fast. That brown color creeping in is just the fruit reacting to air. Not harmful, but not pretty. If you need to prep ahead, toss the slices lightly in lemon juice. It slows the browning significantly without affecting the flavor much.
Use a piping bag for the sauces. I know it sounds fussy. But a disposable piping bag with the very tip snipped off gives you incredible control over your drizzle lines. The result looks like something from a bakery counter. A spoon works perfectly fine for everyday snacking though.
Pat the fruit dry. I said it before and I will say it again because it is that important. Dry fruit equals perfect topping adhesion. Wet fruit equals a sad puddle at the bottom of your platter.
Apple Nachos FAQ
Can I prepare this ahead of time?
It is best to assemble everything right before serving. The fruit will start to brown and the warm sauces can soften the slices if left to sit too long. Make it fresh for the best crunch and flavor.
What if I do not have a microwave to warm the sauces?
No problem at all. Place the sauce jars in a small bowl of hot tap water and let them sit for five minutes. They will loosen up nicely without any microwave needed.
Can I use a different type of fruit?
Yes. Sliced pears work really well as an alternative. They are slightly softer but still firm enough to hold toppings. Just make sure whatever fruit you choose is sturdy enough to carry the sauces without collapsing.
How do I store leftovers?
Transfer any leftovers into an airtight container and refrigerate. Eat within twenty-four hours. The slices will soften slightly overnight, but the flavor is still really good the next day.
Can I use regular chocolate chips instead of mini?
You can. Just chop them into smaller pieces first. Smaller pieces stick to the sauce much better than whole standard-sized chips do.
Final Thoughts
I have made a lot of recipes in this kitchen over the years.
Some take hours. Some require obscure ingredients. Some just do not come together the way you hope. But Apple Nachos? They never let me down. Every time I set this platter on the table, people genuinely light up. Kids love it. Adults go back for seconds. And the cleanup is barely anything.
It is one of those rare recipes where the effort you put in and the result you get back feel wildly mismatched. In the best possible way.
So grab some crisp apples, warm up your sauces, and build yourself a platter. You are going to love every crunchy, sticky, chocolatey bite.

Easy Apple Nachos
Ingredients
Base
- 2 cups sliced apples Crisp varieties like Granny Smith or Honeycrisp; washed and patted completely dry
Toppings
- 2 tbsp caramel sauce Thick consistency works best for drizzling
- 2 tbsp chocolate sauce Warm slightly in a bowl for easy pouring
- 1 tbsp sprinkles Use your favorite bright, vibrant colors
- 1 tbsp miniature chocolate chips Mini size sticks much better to fruit slices
Instructions
- Build Your Base: Grab a large flat platter. Arrange your sliced apples across the surface in a single layer, overlapping the edges slightly so there are no big empty gaps.
- Warm Your Sauces: Pour the caramel and chocolate sauces into separate small microwave-safe bowls. Heat each for about 10 seconds, just enough to make them loose and pourable.
- Drizzle with Intention: Take a spoon and load it up with warm caramel. Drizzle it back and forth across the entire platter in a zigzag motion. Repeat the exact same motion with the chocolate sauce.
- Add the Finishing Touches: Scatter the miniature chocolate chips and colorful sprinkles evenly across the wet sauces on the platter. Serve immediately.
Notes
- Pat the fruit dry: Dry fruit equals perfect topping adhesion. Wet fruit will cause the sauces to slide right off.
- Prevent browning: If you need to prep ahead, toss the apple slices lightly in lemon juice.
- Piping trick: For a bakery-style look, use a disposable piping bag with the tip snipped off instead of a spoon to drizzle the sauces.