
This post may contain affiliate links. Please read my disclosure policy.
Welcome to my kitchen.
Where we celebrate the flavors of the season without the sugar crash.
If you think brownies are only for special occasions? Think again. I’ve been tinkering with this recipe for a while now, and what came out of that oven honestly surprised me. Deep chocolate. Dense, fudgy texture. And a secret ingredient that most people never see coming.
Pumpkin.
Yes, really. These healthy pumpkin brownies blend rich chocolate indulgence with the nutritional power of autumn’s favorite squash. And no, you won’t taste the vegetable. Not even a little bit.
What pumpkin actually does here is replace butter or oil. It adds this incredible moisture that keeps every single square from drying out. Fewer calories. More fiber. Same satisfying bite.
Most people are genuinely shocked when I tell them.
I started making these during that in-between stretch when summer is fading and fall hasn’t quite taken over. You know that time. The air gets a little crisp. You want something warm and cozy from your kitchen, but you also don’t want to undo a week of good eating.
These brownies are the answer.
They’re completely flourless, which makes them a solid choice for anyone avoiding gluten. They come together in one bowl. And they’re ready in about 25 minutes from start to finish.
Let’s talk about what goes into them.
The Star Ingredients
Every ingredient here earns its place. Nothing is filler. Each one plays a specific role in building that perfect, fudgy bite.
| Ingredient | Quantity | Notes |
|---|---|---|
| Almond Butter | 3/4 cup | Use creamy, natural variety for the best texture |
| Pumpkin Puree | 3/4 cup | Ensure it is 100% pure pumpkin, not pie filling |
| Eggs | 2 large | Room temperature helps them incorporate better |
| Maple Syrup or Honey | 1/2 cup | Pure maple syrup offers a lovely depth of flavor |
| Vanilla Extract | 1 tsp | High-quality extract makes a big difference |
| Cocoa Powder | 1/2 cup | Unsweetened Dutch-processed or natural cocoa |
| Baking Soda | 1/2 tsp | Helps the brownies rise just enough |
| Salt | 1 pinch | Elevates the chocolate and pumpkin flavors |
| Chocolate Chips | 1/2 cup | Dark chocolate chips provide the best contrast |
Prep Time: 10 minutes | Cook Time: 15 minutes | Total Time: 25 minutes | Servings: 12 | Difficulty: Easy
A quick note on the almond butter: go for the natural, drippy kind. The kind where the oil separates at the top. That texture blends far more smoothly into the batter than a stiff, stabilized version.
And please, double-check your pumpkin can. You want 100% pure pumpkin puree, not pumpkin pie filling. Pie filling is pre-seasoned and sweetened. It will completely change the flavor profile and not in a good way.
Step-by-Step Guide
I always say the best recipes are the ones that don’t leave you with a mountain of dishes.
This is a one-bowl wonder. That’s it. One bowl, a whisk, and about ten minutes of active work. Put on your favorite apron, and let’s get into it.
Step 1: Create Your Base
Preheat your oven to 350°F. Line an 8×8-inch baking pan with parchment paper. In a large mixing bowl, combine your almond butter and pumpkin puree. Stir these two together until the mixture is completely smooth.
Think of it like making a thick, creamy sauce. The healthy fats in the nut butter blend with the moisture of the pumpkin to create a silky foundation for everything else.

Step 2: Add the Liquids
Crack your two eggs into the bowl. Add your maple syrup (or honey) and the vanilla extract. Whisk everything vigorously until the batter looks glossy and smooth.
Here’s a little trick I swear by: use room-temperature eggs. Cold eggs can cause the nut butter to seize up and clump. Letting them sit on the counter for 20 minutes before you start keeps the batter fluid and easy to work with.
Step 3: The Dry Components
Sift in your cocoa powder. This step matters. Sifting breaks up any lumps before they become a problem. Add the baking soda and that essential pinch of salt. Stir gently until the brown color is uniform and no streaks of orange remain.
The batter will be thick. It will smell like a chocolate dream. That’s how you know you’re on the right track.

Step 4: The Final Flourish
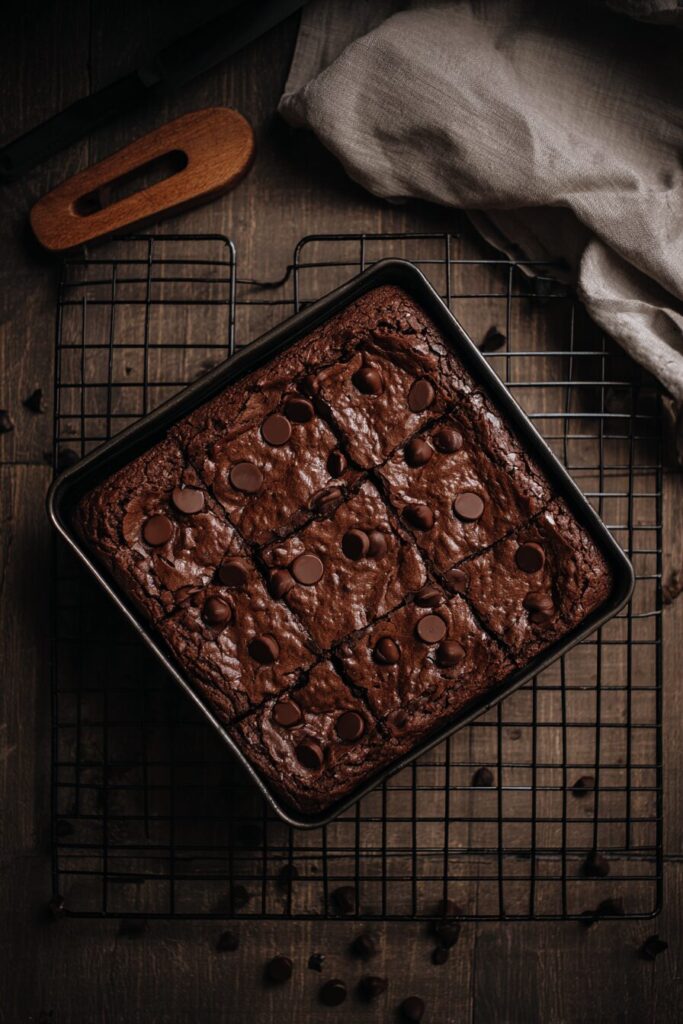
Fold in those chocolate chips.
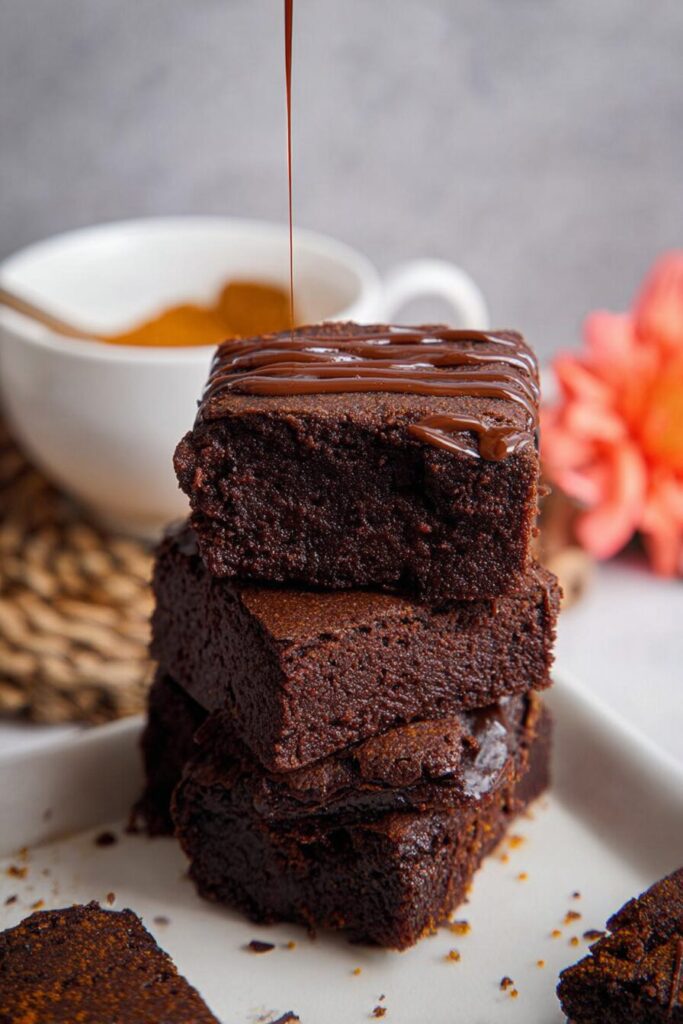
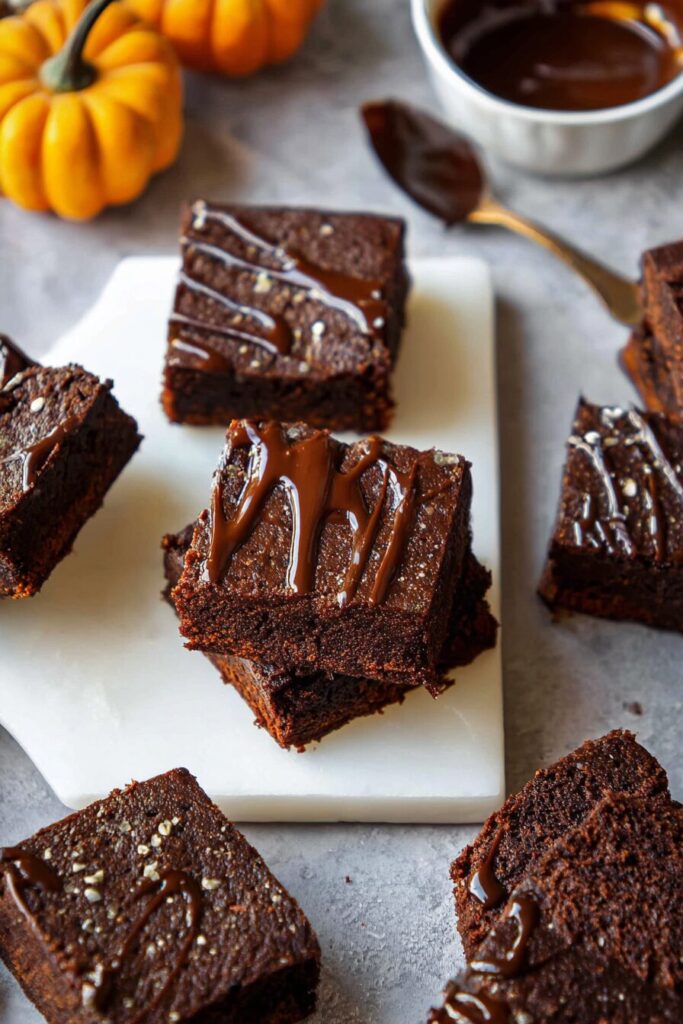
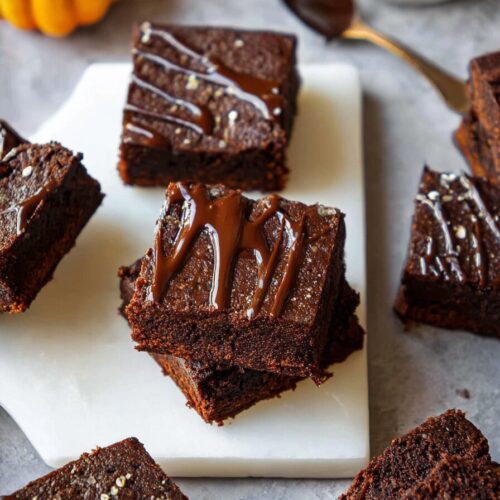
I always save a small handful to scatter across the top right before the pan goes into the oven. It’s a tiny detail, but it gives the finished brownies that bakery-style look. Pour the batter into your prepared pan and smooth the top with a spatula.
Step 5: Baking to Perfection
Slide the pan into the center of your oven. Bake for 15 to 20 minutes.
You’re looking for edges that are firm and a center that still has a slight wobble. Stick a toothpick into the middle. It should come out with just a few moist crumbs clinging to it. Not wet batter. Just a few crumbs.
Do not overbake. These brownies continue to firm up as they cool. Pulling them out a minute or two early is always the safer bet.
Storage, Tips, and Frequently Asked Questions
Your kitchen smells incredible right now.
The hardest part? Waiting for them to cool before slicing. Cutting in too early will give you a crumbly mess instead of clean, beautiful squares. Patience here is rewarded.
Pro Technique: The Fridge Trick
Want these to taste like a rich, decadent fudge? Once they’ve cooled to room temperature, pop the whole pan into the refrigerator. The cold settles the healthy fats and tightens the crumb into something truly special.
Honestly? I think they taste even better the next day. That overnight chill takes the texture from great to incredible.
Storage Instructions
Here’s how to keep them fresh:
- Counter: Store in an airtight container for up to 2 days
- Fridge: Keeps well for up to 1 week
- Freezer: Wrap individual squares in parchment paper, place in a freezer bag, and freeze for up to 3 months
They thaw quickly at room temperature, which makes them a brilliant make-ahead option for busy weeks.
Frequently Asked Questions
Can I use peanut butter instead of almond butter?
Absolutely. Peanut butter works wonderfully and adds a distinct nutty twist to the pumpkin. Just make sure it’s the natural, drippy kind without added sugars or oils. If there’s a nut allergy in the house, sunflower seed butter is a fantastic swap. It keeps the recipe school-safe and holds up just as well in the batter.
Why did my brownies come out too soft?
Because these are flourless, they rely on the eggs and the cooling process to set properly. If yours seem too soft right out of the oven, don’t panic. Transfer the pan to the fridge for at least two hours. This almost always solves the texture issue and makes them perfectly sliceable.
Can I add other mix-ins?
Yes, and I encourage it. This batter is very forgiving. I often toss in half a cup of chopped walnuts or pecans for a bit of crunch. You could also stir in a teaspoon of pumpkin pie spice if you want that classic fall flavor to shine through the chocolate layer. It’s a small addition with a big payoff.
Is there a way to make these even lower in sugar?
Since we use maple syrup, these are already naturally sweetened. But if you want to reduce the sugar further, swap in sugar-free dark chocolate chips. The pumpkin itself brings a mild natural sweetness that carries the flavor really well, so you won’t feel like anything is missing.
I hope you enjoy every single bite of these healthy pumpkin brownies.
They prove that you don’t need flour or refined sugar to create something truly satisfying. Just good ingredients, one bowl, and a little bit of patience while they cool.
Happy baking.
Healthy Fudgy Pumpkin Brownies
Ingredients
- 3/4 cup Almond Butter creamy, natural variety
- 3/4 cup Pumpkin Puree 100% pure pumpkin, not pie filling
- 2 large Eggs room temperature
- 1/2 cup Maple Syrup or Honey pure maple syrup preferred
- 1 tsp Vanilla Extract
- 1/2 cup Cocoa Powder unsweetened Dutch-processed or natural
- 1/2 tsp Baking Soda
- 1 pinch Salt
- 1/2 cup Chocolate Chips dark chocolate chips
Instructions
- Preheat your oven to 350°F. Line an 8×8-inch baking pan with parchment paper.
- In a large mixing bowl, combine almond butter and pumpkin puree until completely smooth.
- Whisk in the eggs, maple syrup, and vanilla extract until the batter looks glossy and smooth.
- Sift in the cocoa powder, baking soda, and salt. Stir gently until the color is uniform.
- Fold in the chocolate chips, saving a small handful to scatter across the top.
- Pour the batter into the prepared pan and bake for 15 to 20 minutes until edges are firm and center has a slight wobble.