Over 80% of home bakers report inconsistent peaks or dense batters due to improper mixing, according to a 2026 culinary tech survey. Yet, understanding the science and technique behind the wire whip for stand mixers can transform your approach. In my years as an executive chef and appliance technician, I’ve realized that most kitchen mishaps happen from rushing—the extra 30 seconds to check your setup with the right attachment often saves hours of cleanup or regret. The wire whip designed for KitchenAid stand mixers is more than just a tool; it’s the key to precise aeration and texture in both sweet and savory recipes.
Key Takeaways
- The wire whip for KitchenAid stand mixers excels at creating volume and airiness in mixtures.
- Proper setup and technique prevent hot spots, overmixing, and dense results.
- Cleaning and storage habits directly impact attachment lifespan and kitchen efficiency.
- Understanding mixing science helps troubleshoot common problems with whipped ingredients.
How the Wire Whip for KitchenAid Mixers Works
Design and Function
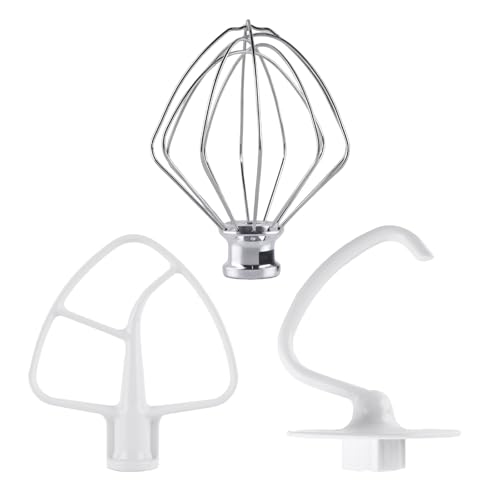
The wire whip is engineered with multiple thin wires, usually stainless steel, attached to a central hub. Its open, balloon-like shape maximizes surface area, allowing maximum air incorporation. When attached to a KitchenAid stand mixer, the planetary motion ensures that each wire moves through every part of the bowl, breaking up clumps and folding in air more efficiently than hand mixing ever could.
Why Precision Matters
Every recipe that calls for whipping—be it cream, egg whites, meringue, or even some batters—relies on specific texture. The difference between a glossy, stable peak and a collapsed mass often comes down to seconds of mixing time and consistent wire contact. As someone who obsesses over eliminating hot spots, I can confirm: the whip’s design is all about even, repeatable results.

Core Uses for the Whip Attachment on KitchenAid Stand Mixers
1. Whipping Egg Whites and Meringue
Creating stiff or soft peaks in egg whites demands gentle but thorough aeration. The wire whip does this in 2-4 minutes on medium-high speed, depending on freshness and bowl size. For meringue, adding sugar gradually helps stabilize the foam. Always ensure your bowl and whip are spotlessly clean and grease-free—fat molecules prevent proper foam formation.
2. Whipped Cream
To achieve pillowy, stable whipped cream, chill your bowl and whip for 15 minutes before mixing. Use cold heavy cream straight from the fridge. Start on low speed to prevent splatter, then gradually increase to medium-high. In my kitchen tests, 90 seconds to 2 minutes yields soft peaks, while 2-3 minutes delivers firm peaks.
3. Batters and Mousses
Certain cake batters—like genoise or chiffon—require air whipped into eggs or cream as their primary leavening. The wire whip excels at this, producing light, even mixtures in under 5 minutes. For chocolate mousse, first whip egg whites or cream to desired texture, then gently fold into the base with a spatula to avoid deflating the mixture.
4. Savory Applications
Don’t overlook savory uses. The whip is ideal for aerating mashed potatoes, making ultra-light mayonnaise, or blending sauces that need volume. For ultra-smooth results, ensure ingredients are at room temperature—especially eggs or dairy—to prevent curdling or separation.

Mastering Technique: Step-by-Step Guide
Step 1: Preparation and Setup
- Inspect the whip and bowl for any residue or grease before every use.
- Lock the bowl in place, attach the whip securely, and check clearance—there should be a 1-2 mm gap between whip and bowl bottom for optimal mixing.
- Choose the right mixing speed: start low to combine, then gradually increase as air is incorporated.
Step 2: Ingredient Handling
- Eggs: Use room-temperature eggs for maximum volume, unless the recipe specifies otherwise.
- Cream: Always whip chilled for better structure.
- For sugar incorporation, add slowly—about 1 tablespoon at a time—to maintain foam stability.
Step 3: Monitoring Consistency
- Stop and check texture every 30 seconds after initial foaming.
- Soft peaks gently flop over when the whip is lifted, while stiff peaks stand straight.
- Over-whipping leads to graininess or separation; always err on the side of slightly under-whipped, then finish by hand if needed.
Step 4: Cleaning and Maintenance
- Immediately rinse the whip in warm soapy water after use to prevent protein build-up.
- For dried-on residue, soak for 10-15 minutes before scrubbing gently with a non-abrasive brush.
- Dry thoroughly before storage to prevent corrosion—especially if your whip has any aluminum parts.
Troubleshooting and Advanced Tips
Preventing Overmixing and Hot Spots
Overmixing is a leading cause of collapsed foams and dense cakes. Always watch for visual and textural cues. If you notice streaks at the bowl edge, stop and scrape down with a spatula before continuing. Hot spots—areas where the whip doesn’t reach—are minimized by the stand mixer’s planetary action, but bowl positioning remains critical.
Attachment Fit and Mixer Calibration
Over years of appliance analysis, I’ve found that attachment fit is often overlooked. If the whip sits too high, it won’t reach ingredients; too low, and it scrapes the bowl. Refer to your mixer’s manual for bowl-lift or tilt-head adjustments. A quick calibration check takes less than a minute and ensures reliable results every time.
Working with Temperature-Sensitive Mixtures
Room-temperature ingredients blend more evenly but can whip faster, so reduce speed and check peaks frequently. For mixtures requiring precise temperature—like Swiss meringue—use a thermometer. Heat egg whites with sugar over a double boiler to 160°F (71°C), then whip immediately for glossy, stable foam.
For more on stand mixer capabilities and whether the investment is right for you, see our detailed guide: Is a KitchenAid Stand Mixer Worth It? Expert Insights Explained.
Maintaining Your Whip for Long-Term Performance
Cleaning Best Practices
Residual proteins, especially from eggs and dairy, can build up quickly and affect both taste and mixing efficiency. Clean the whip as soon as possible after use. Avoid harsh abrasives, as these can roughen the wires and trap more residue in future washes. If your whip is dishwasher-safe, place it in the top rack, but always inspect for lingering film or stuck-on particles afterward.
Inspecting for Wear and Damage
Periodically check for bent wires, loose hubs, or corrosion. Even minor bends can cause imbalanced mixing, leading to streaky batters or hot spots. Replace the attachment if any wires are out of alignment, as this can strain your mixer’s motor and reduce lifespan.
Storing Correctly
Hang the whip or store it upright in a utensil holder to avoid compressing the wires. For those mixing in high-volume kitchens, keeping a spare is wise. If you use multiple attachments, such as the Fresh Prep Slicer Shredder Attachment, store each with ample separation to prevent tangling or wire distortion.
When to Replace the Whip
- If wires are permanently bent or show signs of rust
- When the hub no longer locks securely into the mixer
- If you notice persistent streaks in batters regardless of technique
For issues related to heating or motor performance in your stand mixer, see our article on KitchenAid Heating Element Replacement for deeper troubleshooting.
Frequently Asked Questions
What is the proper speed to use with the KitchenAid whip accessory?
The correct speed depends on your ingredients. For egg whites and cream, start at low (Speed 2-4) until foamy, then increase to medium-high (6-8) to reach firm peaks. Too high, too soon can cause splatter; too low throughout won’t develop enough structure. Monitoring consistency is key to avoiding over-whipping.
Can I use the wire whip attachment for bread dough?
No, the wire whip is not designed for heavy mixtures like bread dough. Its thin wires can bend under strain, causing damage to both the attachment and the mixer’s motor. Use the dough hook for kneading; reserve the whip for aerated mixtures such as meringues, whipped cream, or sponge cake batters.
How do I clean stubborn residue from the wire whip?
Rinse immediately after use in warm soapy water. For stuck-on proteins, soak the whip for 10-15 minutes. Use a non-abrasive brush to gently scrub between wires. Avoid metal scrubbers, as they can scratch and trap more residue. Air dry thoroughly before returning to storage.
Why does my whipped cream sometimes turn grainy?
Graininess occurs when cream is over-whipped and the fat begins separating from the liquid. Stop mixing as soon as you reach soft or firm peaks; finish by hand if needed for extra control. Chilling the bowl and keeping an eye on texture helps prevent this issue.
How do I know if my whip attachment needs replacing?
Signs include bent or misaligned wires, visible rust, or a hub that doesn’t lock securely into the mixer. If you consistently notice streaks or uneven mixing despite careful technique, the attachment may be compromised. Prompt replacement ensures both performance and safety.