
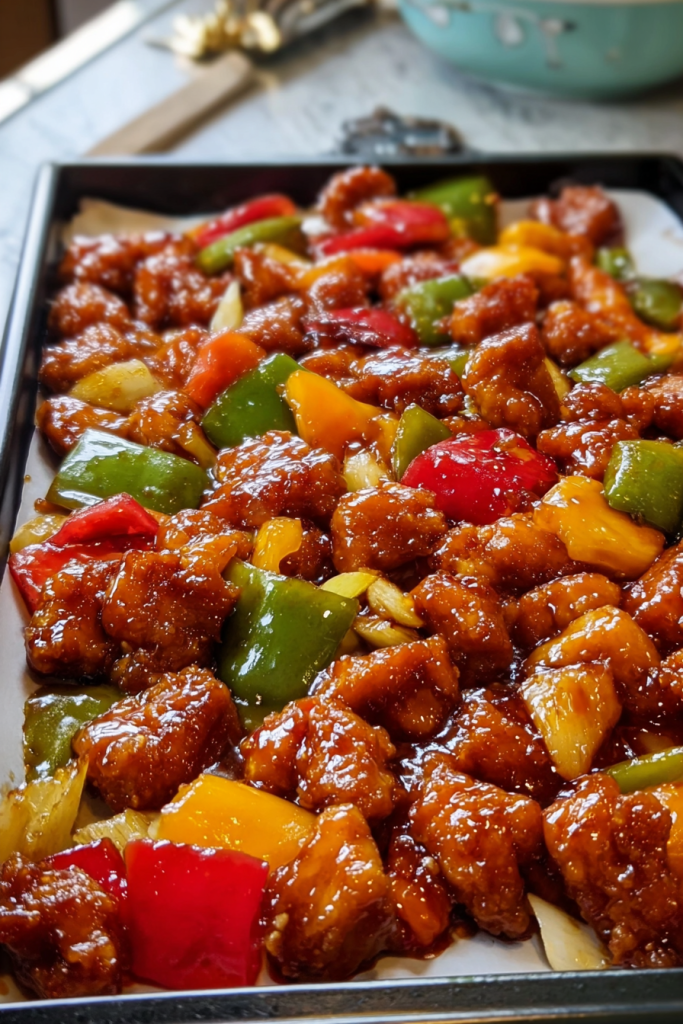
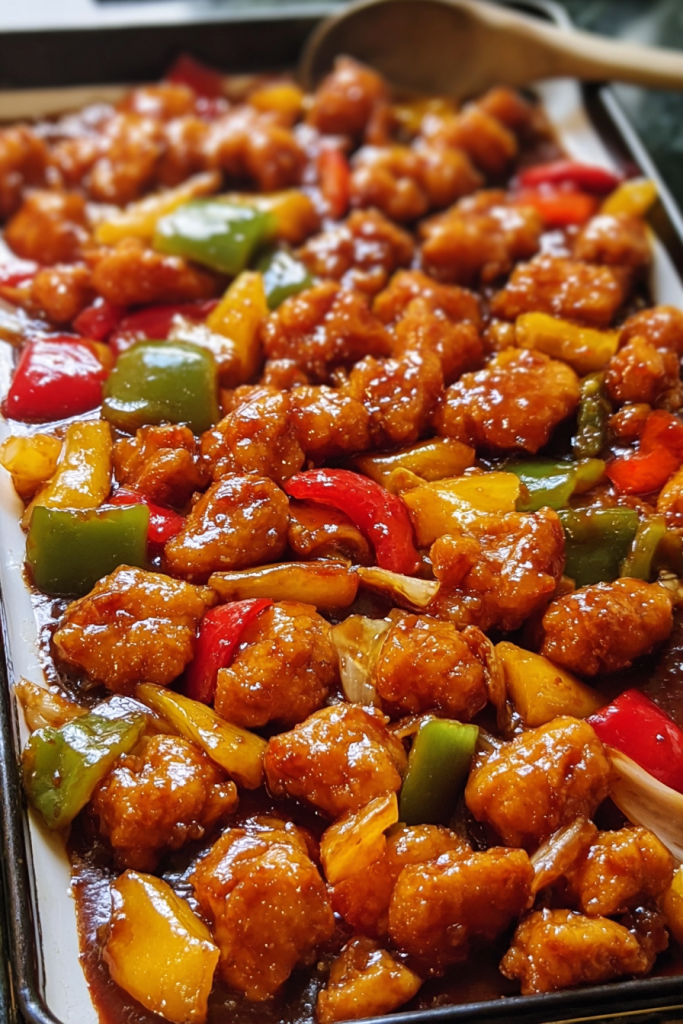
Picture this: tender, juicy chicken pieces glazed with a sticky, tangy sauce that perfectly balances sweet and sour flavors. That’s exactly what you’ll get with this Sheet Pan Sticky Sweet and Sour Chicken – a restaurant-quality dish that’s surprisingly easy to make at home. The magic happens when everything roasts together on a single sheet pan, allowing the chicken and colorful vegetables to caramelize beautifully while the homemade sauce transforms into an irresistible glaze.
I’ve been perfecting this recipe for years, and it never fails to impress. The best part? You’ll have minimal cleanup while creating maximum flavor impact. This isn’t just another weeknight dinner – it’s a complete meal that brings the taste of your favorite takeout restaurant straight to your kitchen.
Why You’ll Love This Recipe
This Sheet Pan Sticky Sweet and Sour Chicken will quickly become your go-to family dinner for several compelling reasons. First, the convenience factor is unbeatable – everything cooks together on one pan, meaning less cleanup and more time enjoying your meal. The contrast between the crispy exterior of the chicken and the tender, juicy interior creates a texture paradise that’s enhanced by the caramelized vegetables.
What truly sets this recipe apart is the homemade sweet and sour sauce. Unlike takeout versions that can be overly sweet or artificially colored, this sauce achieves the perfect balance of tangy rice vinegar, natural brown sugar sweetness, and savory elements. The high-heat roasting method allows the sauce to reduce and caramelize, coating each piece of chicken with a sticky glaze that’s impossible to resist.
Additionally, this sheet pan dinner is highly customizable to your family’s preferences and what you have on hand. It’s weeknight-friendly while being impressive enough for casual entertaining. The vibrant colors from the bell peppers and pineapple make it as visually appealing as it is delicious.
Recipe Timing & Servings
Prep Time: 10 minutes | Cook Time: 25 minutes | Total Time: 35 minutes
Servings: 4 | Difficulty: Easy
Ingredients, Pro Tips & Instructions
Ingredients
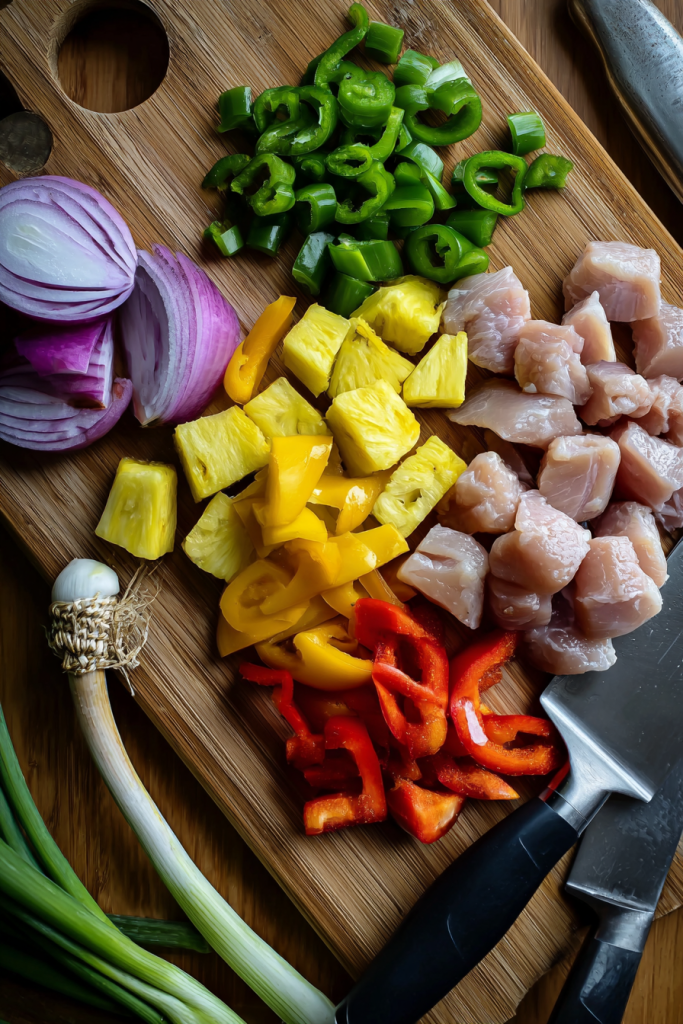
For this Sheet Pan Sticky Sweet and Sour Chicken, you’ll need fresh, simple ingredients that pack maximum flavor:
| Ingredient | Quantity | Notes |
|---|---|---|
| Boneless, skinless chicken breasts or thighs | 1½ pounds (680g), cut into 1-inch cubes | Thighs stay juicier |
| Vegetable oil | 2 tablespoons (30ml) | For coating chicken |
| Cornstarch | 2 tablespoons (16g) | Creates crispy coating |
| Salt | ½ teaspoon (3g) | Season to taste |
| Black pepper | ¼ teaspoon (1g) | Freshly ground preferred |
| Red bell pepper | 1 pepper, cut into 1-inch chunks | Adds sweetness and color |
| Green bell pepper | 1 pepper, cut into 1-inch chunks | Provides crunch |
| Yellow onion | 1 onion, cut into 1-inch chunks | Sweet when caramelized |
| Fresh pineapple chunks | 1 cup (150g) | Canned works too, drained |
| Rice vinegar | ⅓ cup (80ml) | Key for tangy flavor |
| Brown sugar | ⅓ cup (67g), packed | Natural sweetness |
| Ketchup | ¼ cup (60ml) | Adds body to sauce |
| Soy sauce | 2 tablespoons (30ml) | Umami depth |
| Pineapple juice | 2 tablespoons (30ml) | Enhances fruit flavor |
| Garlic | 2 cloves, minced | Fresh is best |
| Cornstarch (for sauce) | 1 tablespoon (8g) | Thickening agent |
| Water | 1 tablespoon (15ml) | For cornstarch slurry |
| Green onions | 2, sliced | For garnish |
| Sesame seeds | 1 tablespoon | For garnish |
The chicken thighs provide more moisture and flavor, but breasts work well too if you prefer leaner meat. Fresh pineapple delivers the best flavor, but canned is a convenient alternative that still brings tropical sweetness to this sheet pan chicken dish.
Pro Tips
Preheating is Non-Negotiable: Always preheat your sheet pan in the oven before adding the ingredients. This technique is crucial for achieving that restaurant-quality caramelization and prevents the chicken from sticking and steaming instead of roasting. Simply place your sheet pan in the oven while it preheats to 425°F (220°C).
Space Matters: The secret to perfectly crispy Sheet Pan Sticky Sweet and Sour Chicken is proper spacing. Overcrowding the pan will cause the ingredients to steam rather than roast. Use a large sheet pan (18×13 inches works best) and arrange the chicken pieces with space between them. If necessary, use two pans rather than cramming everything onto one.
Two-Stage Sauce Application: For the ultimate sticky glaze, apply the sweet and sour sauce in two stages. Add half during the initial roasting to allow it to caramelize, then brush the remaining sauce on during the last 5 minutes of cooking. This method prevents burning while ensuring each piece of chicken gets that perfect sticky coating.
Instructions
Step 1: Prep Your Oven and Pan
Position your oven rack in the center position and preheat to 425°F (220°C). Place your sheet pan in the oven while it preheats. This hot start will help create that desirable caramelization on your Sheet Pan Sticky Sweet and Sour Chicken.
Step 2: Prepare the Chicken
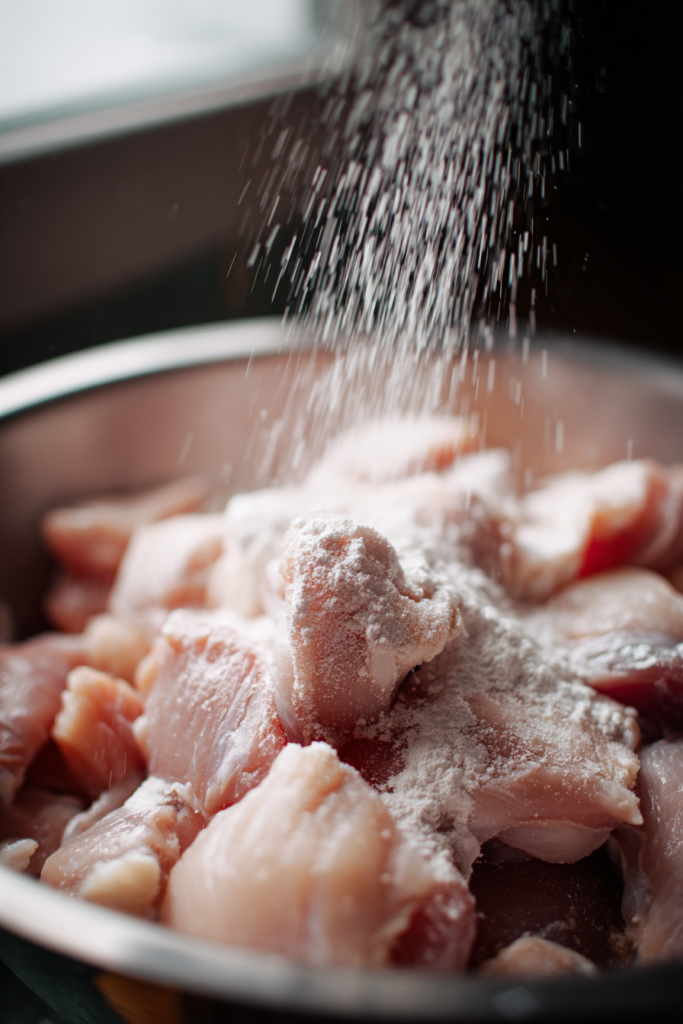
In a large bowl, toss the chicken pieces with vegetable oil. In a small bowl, combine cornstarch, salt, and pepper, then sprinkle over the chicken and toss until every piece is evenly coated. This dry coating will help the chicken develop a crispy exterior while sealing in moisture.
Step 3: Make the Sweet and Sour Sauce
In a medium bowl, whisk together rice vinegar, brown sugar, ketchup, soy sauce, pineapple juice, and minced garlic. In a separate small bowl, mix 1 tablespoon cornstarch with 1 tablespoon water to create a slurry. Add this to your sauce mixture and whisk until completely incorporated.
Step 4: Arrange on Sheet Pan
Carefully remove the hot sheet pan from the oven. Quickly arrange the coated chicken pieces on the pan, ensuring they’re spread out in a single layer. Add the bell peppers, onion, and pineapple chunks, distributing them evenly around the chicken.

Step 5: First Bake
Drizzle half of the sweet and sour sauce over the chicken and vegetables. Return the pan to the oven and bake for 15 minutes. The initial high heat will help seal in the juices and begin the caramelization process.
Step 6: Finish and Glaze
After 15 minutes, remove the pan from the oven. Carefully flip the chicken pieces and stir the vegetables. Pour the remaining sauce over everything, focusing on coating the chicken pieces. Return to the oven for another 10 minutes, until the chicken is cooked through (internal temperature of 165°F/74°C) and the sauce has thickened to a sticky glaze.
Step 7: Final Touch
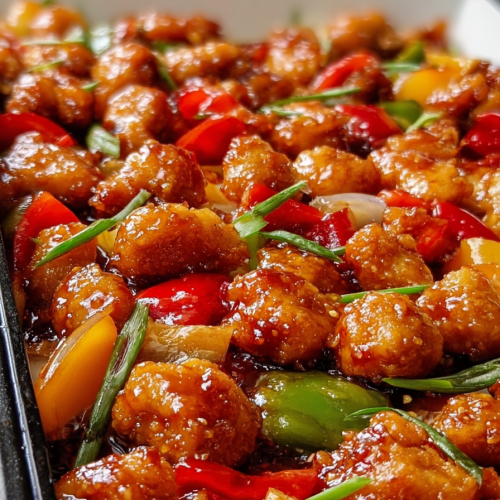
For an extra burst of color and freshness, garnish your Sheet Pan Sticky Sweet and Sour Chicken with sliced green onions and sesame seeds before serving. The bright garnish provides visual appeal and a fresh counterpoint to the rich, sticky sauce.
Variations, Storage & FAQs
Variations
Spicy Sweet and Sour Chicken: Transform this Sheet Pan Sticky Sweet and Sour Chicken into a fiery delight by adding 1-2 tablespoons of sriracha or 1 teaspoon of red pepper flakes to the sauce mixture. The heat beautifully complements the sweet and tangy flavors, creating a more complex taste experience. You can also add sliced jalapeños or fresno chilies to the vegetable mix for pops of spice throughout the dish.
Vegetarian Option: Create a plant-based version by substituting the chicken with extra-firm tofu or tempeh. Press the tofu for at least 30 minutes before cutting into cubes, then toss with 1 tablespoon of cornstarch and 1 tablespoon of oil before arranging on the sheet pan. You might need to reduce the cooking time slightly, as tofu cooks faster than chicken.
Tropical Twist: Enhance the island flavors by adding mango chunks alongside or in place of the pineapple. Include red onion instead of yellow for a more vibrant color profile, and consider adding a tablespoon of grated ginger to the sauce for an aromatic dimension that complements the tropical fruits beautifully.
Storage and Serving
Store leftover Sheet Pan Sticky Sweet and Sour Chicken in an airtight container in the refrigerator for up to 3 days. The flavors actually develop nicely overnight, making this an excellent meal prep option. When reheating, use a microwave at 70% power to prevent the chicken from becoming tough, or reheat in a skillet with a splash of water to revive the sauce.
For serving, this dish pairs perfectly with steamed jasmine rice, which soaks up the delicious sticky sauce. For a lower-carb option, serve over cauliflower rice or alongside steamed broccoli. My favorite weekend presentation involves serving it in hollowed-out pineapple halves for a fun, tropical presentation that elevates the dish from simple weeknight dinner to impressive entertainment fare.
For meal prep, portion the chicken and vegetables with rice in divided containers for grab-and-go lunches throughout the week. The sweet and sour flavor profile holds up well, tasting just as delicious on day three as it did fresh from the oven.
FAQs
Can I use chicken thighs instead of breasts?
Absolutely! Chicken thighs are actually ideal for this Sheet Pan Sticky Sweet and Sour Chicken as they stay juicier and more flavorful. The higher fat content helps them remain tender during the high-heat roasting process. Just ensure they’re cut into uniform 1-inch pieces for even cooking.
How do I prevent the sauce from burning?
The key is applying the sauce in stages. Use only half initially, then add the remainder during the last 10 minutes of cooking. Also, ensure your oven isn’t running too hot by using an oven thermometer to verify the temperature. If your sauce starts to darken too quickly, tent the pan with foil.
Can I prep this ahead of time?
Yes! Cut the chicken and vegetables up to 24 hours in advance and store them separately in the refrigerator. You can also mix the sauce up to 3 days ahead and refrigerate it in an airtight container. Just bring the sauce to room temperature before using.
Is there a substitute for pineapple?
If you’re not a fan of pineapple, mango makes an excellent substitute. For a less fruity version, you can omit the fruit entirely and increase the bell peppers and onions, though you’ll want to add 2 extra tablespoons of sugar to maintain the sweet-sour balance.
Can I make this recipe gluten-free?
Easily! Simply substitute the soy sauce with tamari or coconut aminos. Double-check that your ketchup is gluten-free (most are) and you’ll have a delicious gluten-free dinner that everyone can enjoy.
Conclusion
This Sheet Pan Sticky Sweet and Sour Chicken is comfort food at its finest — a perfect balance of tangy, sweet, and savory flavors that transport you straight to your favorite restaurant without leaving home. It’s the kind of dish that rescues weeknight dinners from the ordinary, offering both the convenience of a one-pan meal and the satisfaction of homemade takeout.
The beautiful thing about cooking this at home is knowing exactly what goes into it – no artificial colors or excessive sugar, just real ingredients creating authentic flavor. Whether you’re feeding a hungry family or meal prepping for the week ahead, this recipe delivers on taste, convenience, and versatility.
From the moment you smell the caramelizing sauce in your oven to the first bite of perfectly glazed chicken, you’ll understand why this Sheet Pan Sticky Sweet and Sour Chicken has become my go-to recipe for satisfying, stress-free dinners. Give it a try tonight – your taste buds will thank you!
Sheet Pan Sticky Sweet and Sour Chicken
Ingredients
- Chicken
- 1½ pounds 680g boneless, skinless chicken breasts or thighs, cut into 1-inch cubes
- 2 tablespoons 30ml vegetable oil
- 2 tablespoons 16g cornstarch
- ½ teaspoon 3g salt
- ¼ teaspoon 1g black pepper
- Vegetables & Fruit
- 1 red bell pepper cut into 1-inch chunks
- 1 green bell pepper cut into 1-inch chunks
- 1 yellow onion cut into 1-inch chunks
- 1 cup 150g fresh pineapple chunks (or canned, drained)
- Sweet and Sour Sauce
- ⅓ cup 80ml rice vinegar
- ⅓ cup 67g packed brown sugar
- ¼ cup 60ml ketchup
- 2 tablespoons 30ml soy sauce
- 2 tablespoons 30ml pineapple juice
- 2 cloves garlic minced
- 1 tablespoon 8g cornstarch
- 1 tablespoon 15ml water
- Garnish
- 2 green onions sliced
- 1 tablespoon sesame seeds
Instructions
- Preheat Oven & Pan:
- Place a sheet pan in the oven and preheat to 425°F (220°C).
- Prepare Chicken:
- In a large bowl, toss chicken with vegetable oil. In a small bowl, combine cornstarch, salt, and pepper. Sprinkle over chicken and toss to coat.
- Make Sauce:
- In a medium bowl, whisk together rice vinegar, brown sugar, ketchup, soy sauce, pineapple juice, and garlic. In a small bowl, stir cornstarch and water into a slurry, then whisk into sauce.
- Arrange Ingredients:
- Carefully remove the hot sheet pan. Spread chicken in a single layer with space between pieces. Scatter bell peppers, onion, and pineapple evenly around the chicken.
- First Bake:
- Drizzle half the sauce over the pan. Bake for 15 minutes.
- Glaze & Finish:
- Remove pan, flip chicken pieces, stir vegetables, and pour remaining sauce over everything. Bake an additional 10 minutes, or until chicken reaches 165°F (74°C) and sauce is sticky.
- Garnish & Serve:
- Sprinkle with sliced green onions and sesame seeds. Serve immediately.