
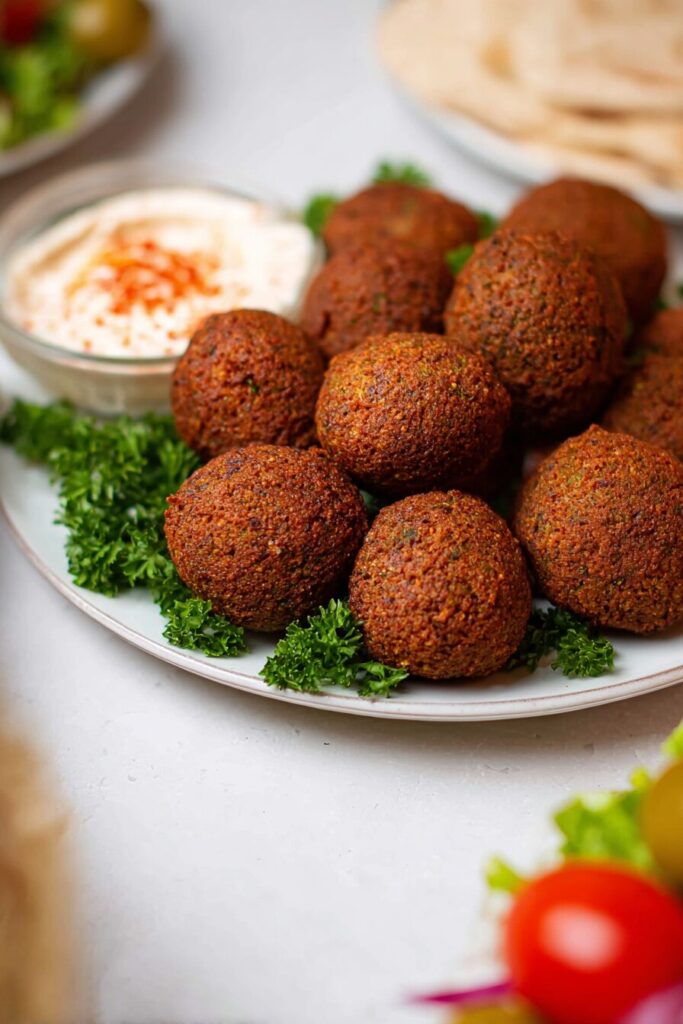
There’s something almost magical about a perfect falafel.
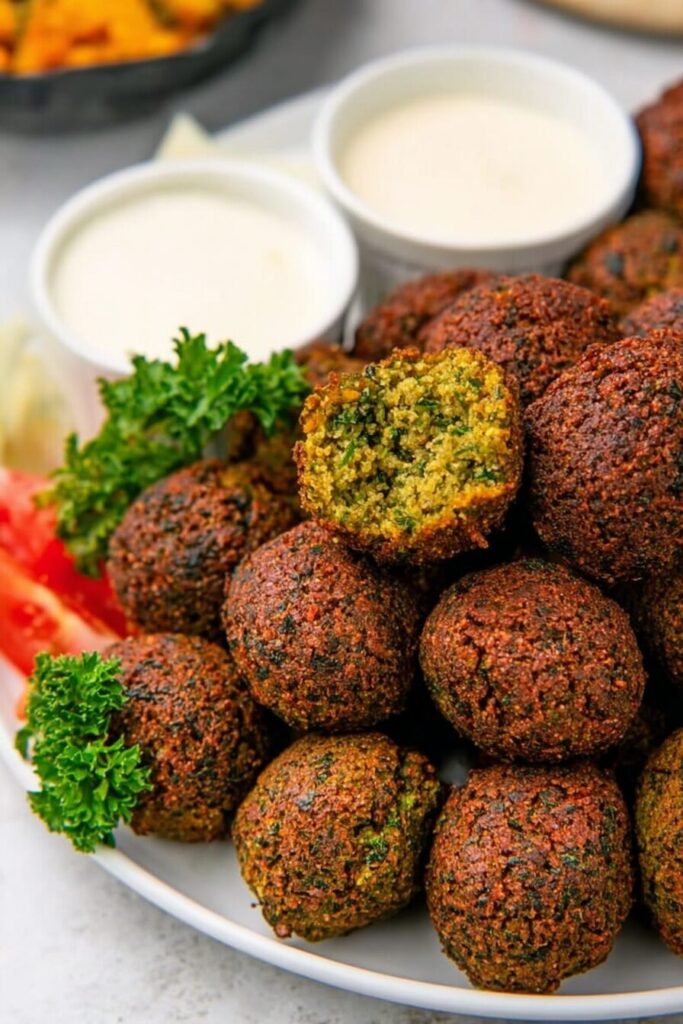
You bite through that dark, shattered-crisp shell. And then… you hit the inside. Bright green. Fluffy. Steaming hot. It’s one of those food moments that just stops you in your tracks.
For the longest time, I thought that kind of falafel was only possible at a tiny street stall somewhere in the Middle East. The kind run by a guy who’s been doing it for forty years and refuses to share his recipe.
But here’s what I found out after years of testing batches in my own kitchen: the secret isn’t some mysterious ingredient. It’s a process. It’s patience. And it starts with respecting a humble can of… wait, no. Actually, it starts with never using a can. More on that in a minute.
This dish is a beautiful thing. Simple pantry staples. A pile of fresh herbs. A little heat. And you end up with something that feels genuinely special.
Why Most Homemade Falafel Fails (And How to Fix It)
Most people end up with falafel that’s either:
- Too dense and heavy, like biting into a chickpea brick
- Falling apart in the oil before it even gets a chance to brown
- Bland and dry, with none of that herb-forward punch
Every single one of those problems has a fix. And once you understand why things go wrong, you’ll never make bad falafel again.
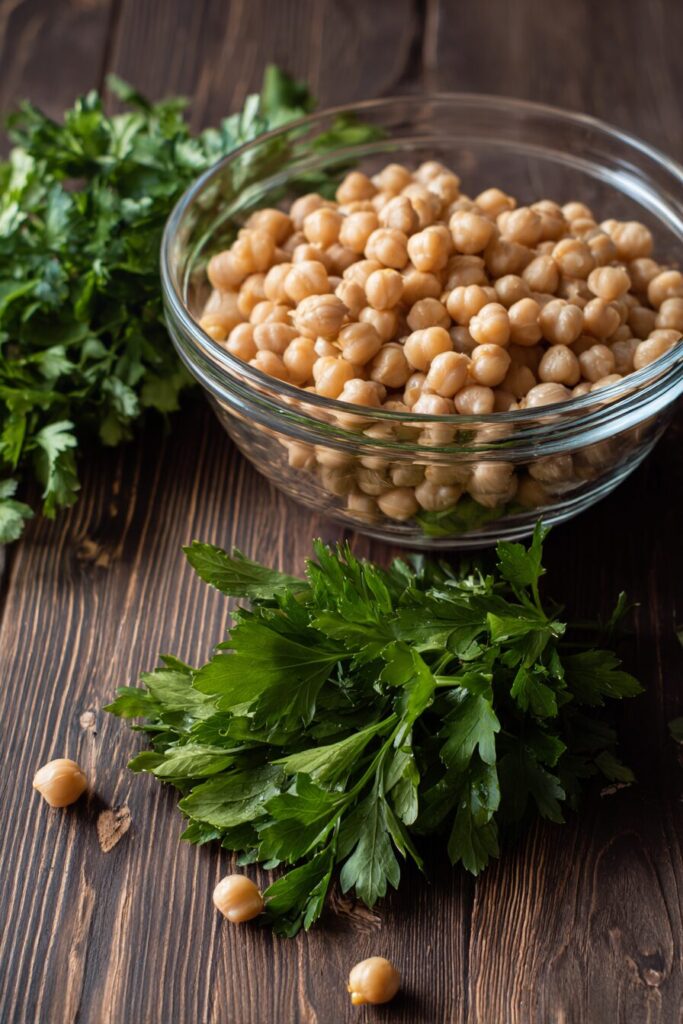
The whole experience starts long before you heat any oil. It starts the night before, when you put a pound of dried chickpeas in a bowl of cold water and just… let them sit.
Making falafel from scratch is a genuinely rewarding experience. Those hard, dusty little beans swell and soften overnight. The next morning, you blend them with a garden’s worth of parsley and cilantro. The smell of earthy cumin and bright coriander fills your whole kitchen. By the time you’re shaping the first ball, you’re already hooked.
Part One: Building the Perfect Falafel Batter
The foundation of a great falafel is texture. You’re not making hummus. You’re not making a puree. You want a coarse, slightly sandy consistency that holds together with a little pressure but still feels light.
Step 1: The Overnight Soak (Non-Negotiable)
Start with dry chickpeas. One full pound.
Pour them into a large bowl and cover them with several inches of cold water. They’re going to expand a lot overnight, so use a bowl that’s bigger than you think you need. Let them soak for at least 12 hours. Overnight is perfect.
By morning, they should be tender enough to split between your fingernails. But they should still have a slight firm snap. That’s exactly where you want them.
Step 2: Dry Them Out, Then Grind Them Down
After soaking, drain the beans completely. Then pat them dry with a clean kitchen towel.
This step matters more than people realize. Excess water is the enemy of crispy falafel. Every drop of moisture you remove now means a crispier crust later.
Once they’re as dry as you can get them, load them into your food processor with the salt. Pulse until the beans look like fine, grainy pebbles. Think coarse breadcrumbs, not smooth paste.
Step 3: Load It Up with Herbs and Spices
Now things start to smell incredible.
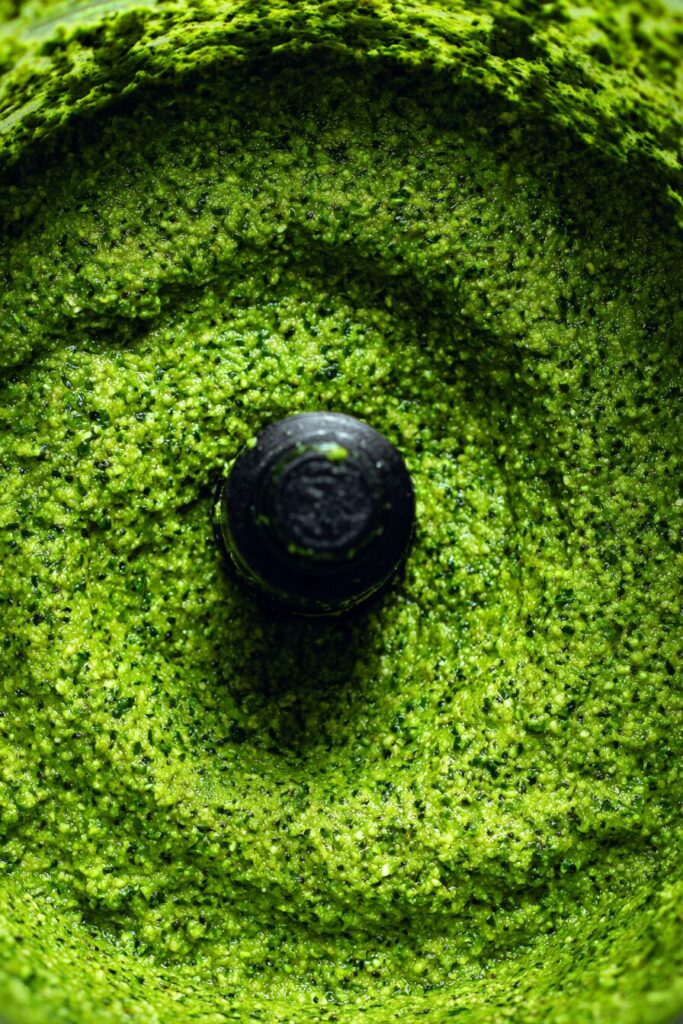
Add your roughly chopped onion, fresh garlic, parsley, and cilantro straight into the processor. Then add the cumin, coriander, and black pepper.
Pulse everything together. You’re looking for a thick, deeply green paste that still has some visible texture to it. Don’t over-process it. If you run the machine too long, you’ll get something closer to a smoothie, and that’s not what we want.
Scrape down the sides of the bowl a few times to make sure every bit gets evenly mixed.
Step 4: Let It Rest
Transfer the batter into a bowl and cover it tightly with plastic wrap.
Refrigerate it for at least one hour. I know. Waiting is the hard part. But cold batter is dramatically easier to shape, and it gives the natural starches time to bind everything together. Skip this step and your falafel will fight you every step of the way.
Part Two: Shaping and Frying for That Signature Crunch
Your batter has chilled. Your kitchen smells like a herb garden. Now it’s time to bring in the heat.
Step 1: The Last Addition
Pull the batter out of the fridge.
Sprinkle the baking powder over the top and fold it in gently. Don’t beat it to death. A soft fold is all it needs. That baking powder creates tiny air pockets inside each ball, which is what makes falafel light instead of dense.
Step 2: Shape Them Up
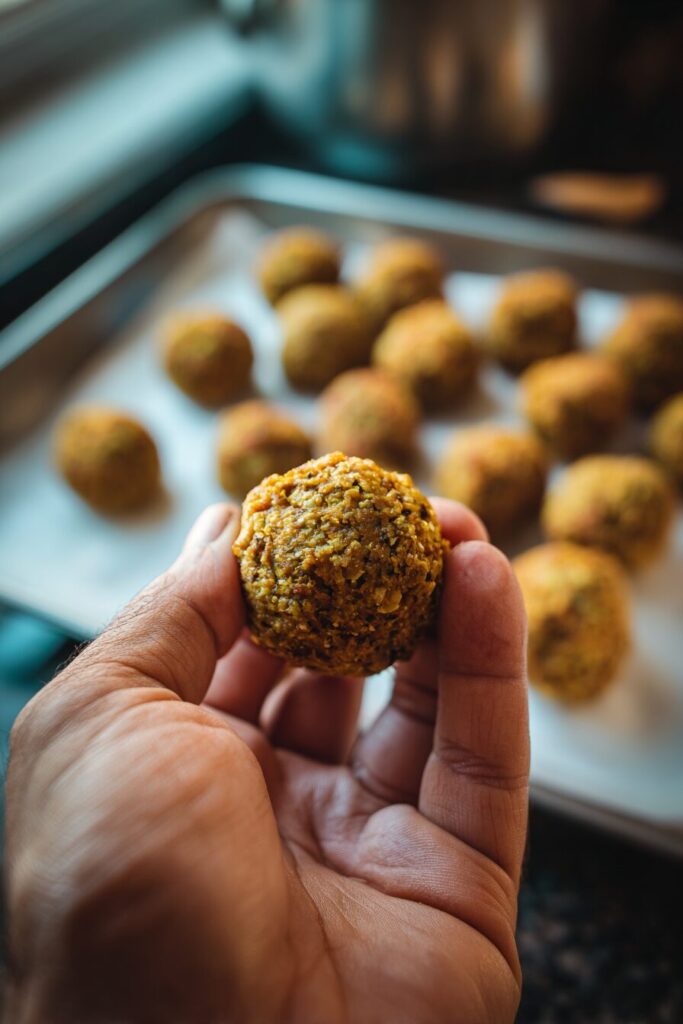
Line a tray with parchment paper and set it nearby.
Using a small scoop or just your hands, grab about 1.5 tablespoons of batter and roll it into a firm ball. Pack it with some pressure so it holds its shape. If you prefer a disc shape, gently press the ball flat. Flatter patties give you more surface area in the oil, which means more of that dark, crackling crust.
Step 3: Test the Oil Before You Commit
Fill a heavy pot with about two inches of neutral oil. Heat it over medium-high.
Before you drop a single falafel in, test the temperature. Drop a tiny pinch of batter into the oil. If it sizzles aggressively and floats right up to the surface? You’re ready. If you have a thermometer, aim for 350°F.
Here’s why this matters: too cold, and your falafel soaks up grease like a sponge. Too hot, and the outside burns before the inside has a chance to cook. That sweet spot at 350°F is where the magic lives.
Step 4: Fry in Batches
Carefully lower the balls into the hot oil. Don’t crowd them. Give each one room to breathe.
Fry for about 3 to 4 minutes, turning gently if needed. You want a deep, dark golden brown. Not light tan. Dark golden brown. That’s where the flavor is.
Lift them out with a slotted spoon and set them on a paper-towel-lined plate. Try to wait at least sixty seconds before eating one. I say “try” because I’ve never actually managed it myself.
The Full Recipe
| Ingredient | Quantity | Notes |
|---|---|---|
| Dry Chickpeas | 1 pound | Must be dry; do not use canned |
| Salt | 1 tbsp | Adjust to taste |
| Fresh Parsley | ¾ cup | Packed, stems removed |
| Fresh Cilantro | ½ cup | Packed, fresh only |
| Large Onion | 1 unit | Roughly chopped |
| Garlic | 1 clove | Freshly minced |
| Ground Cumin | 2 tsp | Earthy base flavor |
| Ground Coriander | 2 tsp | Bright, citrusy note |
| Black Pepper | 1 tsp | Freshly ground is best |
| Baking Powder | 1 tsp | Added just before frying |
| Neutral Oil | As needed | Canola or sunflower preferred |
| Tahini Sauce | For serving | Drizzle generously |
Prep Time: 10 minutes | Cook Time: 15 minutes | Total Time: 25 minutes (not including soaking and chilling) | Servings: 4 to 6 | Difficulty: Easy
Instructions
- Soak: Submerge dry chickpeas in water for 12 to 24 hours. Drain and dry thoroughly.
- Pulse: Grind chickpeas and salt in a food processor until grainy.
- Mix: Add herbs, onion, garlic, and dry spices. Process into a coarse paste.
- Chill: Refrigerate the covered mixture for at least 60 minutes.
- Prep: Fold in baking powder. Shape into small balls or patties.
- Fry: Heat 2 inches of oil to 350°F. Fry in batches until dark golden brown, approximately 3 to 4 minutes.
- Serve: Pair immediately with tahini sauce and fresh pita.
Tips That Actually Make a Difference
Never use canned chickpeas. I’ll say it louder for the people in the back. Canned chickpeas are loaded with moisture. They will turn your batter into a soggy mess that dissolves the moment it hits the oil. Dried only. Always.
Don’t hold back on the herbs. The parsley and cilantro aren’t just for flavor. They provide moisture and lightness. If you cut your falafel open and the inside isn’t a vivid, bright green? You needed more herbs.
Respect the oil temperature. Think of it like Goldilocks. Too cold, greasy and heavy. Too hot, burnt outside and raw inside. Right at 350°F, and it’s perfect every single time.
Questions I Get Asked All the Time
Can I bake these instead of frying?
Yes, absolutely. Preheat your oven to 375°F. Flatten the balls into patties and brush both sides generously with oil. Bake for 25 to 30 minutes, flipping halfway through. They won’t have quite the same juicy interior as the fried version, but they’re still genuinely delicious and a lot less mess.
My falafel keeps falling apart in the oil. What went wrong?
Two likely culprits. Either the mixture was too wet, or the oil wasn’t hot enough. Go back and make sure you dried the beans really well after soaking. If the batter still feels loose, stir in a tablespoon of chickpea flour before shaping. That usually does the trick.
How do I store and reheat leftovers?
Pop them in an airtight container and refrigerate for up to 4 days. To bring back the crunch, reheat in an air fryer or oven at 350°F for a few minutes. Avoid the microwave at all costs. It turns crispy falafel into sad, soggy ones.

Authentic Homemade Falafel
Ingredients
- 1 pound dry chickpeas Must be dry; do not use canned
- 1 tbsp salt Adjust to taste
- 3/4 cup fresh parsley Packed, stems removed
- 1/2 cup fresh cilantro Packed
- 1 large onion Roughly chopped
- 1 clove garlic Freshly minced
- 2 tsp ground cumin Earthy base flavor
- 2 tsp ground coriander Bright, citrusy note
- 1 tsp black pepper Freshly ground is best
- 1 tsp baking powder Added just before frying
- neutral oil As needed (canola or sunflower preferred)
Instructions
- Submerge dry chickpeas in several inches of cold water for 12 to 24 hours. They will expand significantly. Drain completely and pat dry with a clean kitchen towel to remove all excess moisture.
- In a food processor, pulse the dry chickpeas and salt until they look like fine, grainy pebbles or coarse breadcrumbs. Do not over-process into a smooth paste.
- Add herbs, onion, garlic, and dry spices. Pulse until you have a thick, deeply green paste that still has visible texture. Scrape down the sides of the bowl to ensure even mixing.
- Transfer the batter to a bowl, cover tightly, and refrigerate for at least 60 minutes. This allows the starches to bind.
- Gently fold the baking powder into the cold mixture. Using a scoop or your hands, shape into 1.5 tablespoon-sized balls or flat patties.
- Heat 2 inches of neutral oil to 350°F in a heavy pot. Fry in small batches for 3 to 4 minutes until dark golden brown. Drain on paper towels.