
I’ll be honest with you.
The first time I made miso glazed salmon, I was nervous. It looked complicated. It sounded like something only a trained chef could pull off. But then I made it… and it took me less than 30 minutes.
That was it. I was hooked.
This dish gives you a glossy, caramelized crust on the outside and a buttery, melt-in-your-mouth inside. Every single time. No fancy skills required. No restaurant bill at the end of the night.

Before You Start: Set Yourself Up for Success
Here’s a tip most people skip. Take your salmon out of the fridge about 15 minutes before cooking.
That’s it. That one small step makes a big difference.
A fillet that’s ice-cold in the center will cook unevenly. The outside dries out before the inside is done. Letting it come closer to room temperature means the heat works evenly all the way through.
While you’re waiting, gather your tools:
- A small mixing bowl
- A whisk or fork
- A baking sheet
- Aluminum foil or parchment paper
Simple stuff. Nothing fancy.
Why These Flavors Work So Well Together
Salmon is a naturally rich, fatty fish. That’s not a bad thing. It’s actually the secret to why this recipe is so good.
Because salmon has so much natural flavor, it can hold up to bold, intense glazes without getting overwhelmed. Think of it like a thick steak. It can handle a strong marinade. A delicate white fish like tilapia? Not so much.
Here’s what each ingredient brings to the table:
| Ingredient | What It Does |
|---|---|
| Miso paste | Deep, savory umami base |
| Brown sugar | Balances the saltiness with sweetness |
| Soy sauce | Adds earthy, comforting saltiness |
| Sesame oil | Brings a nutty, toasted aroma |
| Mirin | Creates a glossy, slightly sweet finish |
Together, they don’t just flavor the fish. They transform it.
Choosing the Right Miso Paste
Walk into any Asian grocery store and you’ll find at least three types of miso. It can feel confusing. Here’s a quick breakdown:
| Miso Type | Flavor Profile | Best For |
|---|---|---|
| White miso | Mild and slightly sweet | Light marinades and dressings |
| Yellow miso | Medium savory | Everyday cooking |
| Red miso | Bold, salty, and deep | Rich proteins like salmon |
For this recipe, red miso is my top pick. It has the depth and intensity to stand up against the richness of the fish. The flavors don’t compete. They complement each other perfectly.
Only have white miso at home? No problem at all. Just reduce the brown sugar slightly since white miso already leans a little sweeter. Your dinner will still taste absolutely fantastic.
Making the Glaze
This is the part I love most. The glaze comes together in about one minute flat.
No blender. No special tools. Just a bowl and a whisk.
You’re combining:
- Miso paste
- Brown sugar
- Soy sauce
- Sesame oil
- Mirin
Whisk it until it’s completely smooth. No lumps. No streaks. You want a thick, glossy mixture that coats the back of a spoon. If it feels too runny, add a tiny bit more miso. If it’s too thick, splash in a little warm water.
That’s your glaze. Done.

The Bake and Broil Method
A lot of people fry salmon on the stovetop. And sure, that works. But hot oil spattering all over your kitchen is never a fun time.
The oven is your best friend here.
Here’s how the method works, step by step:
Step 1: Bake at high heat. This cooks the salmon gently and evenly all the way through. It locks the natural juices inside without drying out the flesh.
Step 2: Switch to broil. Once the salmon is nearly cooked, crank the oven to high broil. The intense top heat hits the glaze directly. The sugars caramelize fast. That’s where your beautiful, sticky, restaurant-style crust comes from.

One important thing: do not walk away during the broil phase.
Miso paste has natural sugars. Those sugars can go from perfectly caramelized to burnt in under a minute. I usually leave the oven door slightly cracked so I can keep my eye on it. The moment you see dark, bubbling edges, pull that pan out immediately.
Chef Tips for Perfect Results Every Time
Leave the skin on. The skin acts as a natural barrier between the heat and the delicate flesh underneath. It keeps the fish moist and tender. You don’t have to eat it. It peels right off after cooking. But removing it before baking is a mistake.
Use a meat thermometer. Guessing when fish is done is stressful. A digital thermometer takes all that stress away. You’re looking for an internal temperature of about 130 degrees Fahrenheit. The fish will continue cooking slightly after you remove it from the oven. That’s normal. That’s called carryover cooking.
Don’t skip the resting time. Five minutes. That’s all it takes. Cutting into hot salmon immediately lets all those delicious juices run right out onto the plate. Resting lets them redistribute back into the flesh. Every bite stays juicy and full of flavor.
What to Serve Alongside
The good news? This salmon goes with almost everything.
My personal favorite pairing is a bowl of fluffy steamed white rice. The rice soaks up the extra glaze that drips off the fish. It’s simple. It’s comforting. It works every time.
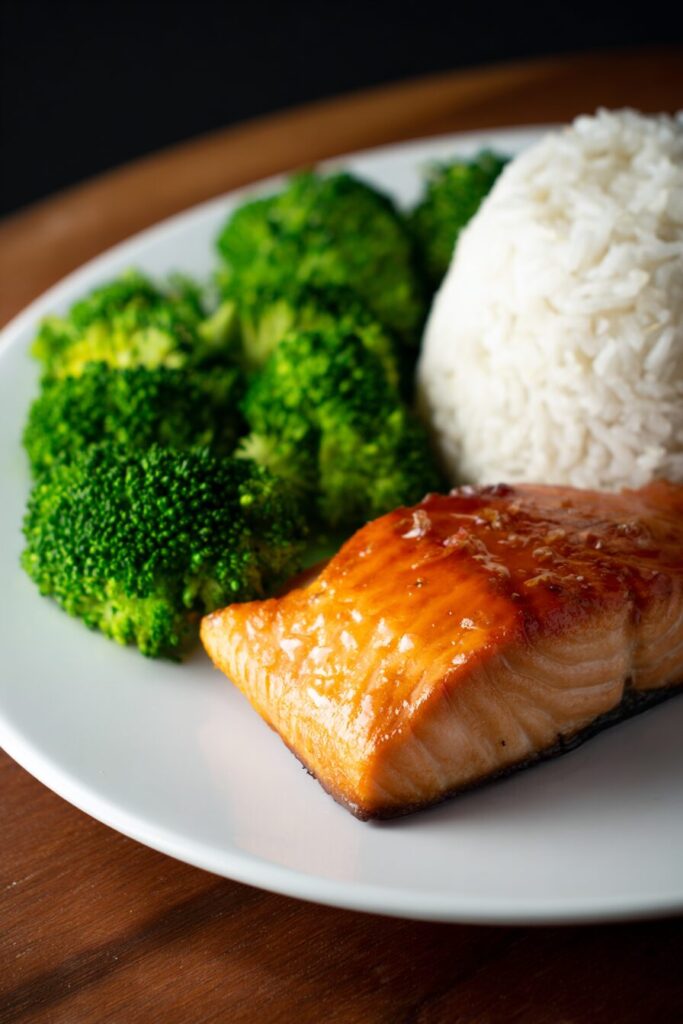
Other great options include:
- Steamed baby bok choy for a light, slightly bitter contrast
- Broccoli or snap peas for a fresh crunch
- Chewy udon noodles tossed in a light soy dressing
- A crisp cucumber salad to balance the richness of the fish
The richness of the salmon actually pairs really well with bright, acidic sides. Something cool and crunchy next to something warm and glazed is a combination that just works.
The Full Recipe
Prep Time: 10 minutes | Cook Time: 15 minutes | Total Time: 25 minutes Servings: 4 | Difficulty: Easy
Ingredients
| Ingredient | Quantity | Notes |
|---|---|---|
| Salmon fillets | 4 pieces | Keep the skin on for better baking |
| Miso paste | 3 tbsp | Red miso preferred for deeper flavor |
| Brown sugar | 1-2 tbsp | Adjust based on your sweetness preference |
| Soy sauce | 1 tbsp | Use low-sodium if you prefer less salt |
| Sesame oil | ½ tbsp | Pure toasted sesame oil works best |
| Mirin | 1½ tbsp | Use an alcohol-free mirin variety |
| Toasted sesame seeds | 1 tsp | For a crunchy, beautiful final garnish |
| Green onion/scallion | 1 small bunch | Finely chopped for a fresh garnish |

Step-by-Step Instructions
1. Prepare your equipment. Preheat your oven to exactly 400 degrees Fahrenheit. Line a sturdy baking sheet with aluminum foil or parchment paper. This simple step makes cleanup incredibly easy afterward.
2. Mix the savory glaze. Grab a small mixing bowl. Whisk together the miso paste, brown sugar, soy sauce, sesame oil, and mirin. Stir vigorously until the mixture is completely smooth and thick.
3. Coat the fillets. Place your salmon fillets on the prepared baking pan, skin side facing down. Generously brush the top and sides of each fillet with the glaze.
4. Bake the salmon. Place the pan in the center of your hot oven. Bake undisturbed for about 10 to 12 minutes. The salmon should begin to turn slightly opaque around the edges.
5. Broil for the finish. Switch your oven setting to high broil. Watch the fish carefully for 2 to 3 minutes. Remove the pan as soon as the glaze bubbles and caramelizes on top.
6. Rest and garnish. Let the salmon rest on the counter for five minutes. Sprinkle toasted sesame seeds and chopped green onions over the top. Serve immediately and enjoy.
Frequently Asked Questions
Can I marinate the salmon ahead of time?
Yes, absolutely. You can brush the glaze on and refrigerate the fillets for up to two hours before baking. The flavors penetrate a little deeper that way. That said, glazing and baking immediately still gives you a wonderfully flavorful result.
Can I use frozen salmon?
You can. Just make sure the fillets are completely thawed before adding the glaze. The best way to do this is to move them from the freezer to the fridge the night before. Once thawed, pat them very dry with a paper towel. Excess moisture prevents the glaze from sticking properly.
What if I don’t have mirin?
Mirin adds sweetness and that signature glossy finish. If you don’t have it, mix one tablespoon of water with half a teaspoon of sugar. It won’t be identical, but it works well when you’re in a pinch.
Is this recipe gluten-free?
It can be. Traditional soy sauce contains wheat, so swap it out for a certified gluten-free tamari. Also check your miso paste label. Some brands add barley or other grains during fermentation. Look for one that’s clearly labeled gluten-free and you’re good to go.

Miso Glazed Salmon
Ingredients
- 4 pieces salmon fillets Keep the skin on for better baking
- 3 tbsp miso paste Red miso preferred for deeper flavor
- 1-2 tbsp brown sugar Adjust based on your sweetness preference
- 1 tbsp soy sauce Use low-sodium if you prefer less salt
- 1/2 tbsp sesame oil Pure toasted sesame oil works best
- 1 1/2 tbsp mirin Use an alcohol-free variety if preferred
- 1 tsp toasted sesame seeds For garnish
- 1 bunch green onions Finely chopped for garnish
Instructions
- Preheat your oven to 400 degrees Fahrenheit. Line a sturdy baking sheet with aluminum foil or parchment paper for easy cleanup.
- In a small mixing bowl, whisk together the miso paste, brown sugar, soy sauce, sesame oil, and mirin until the mixture is completely smooth and thick.
- Place the salmon fillets on the prepared baking pan, skin side facing down. Generously brush the top and sides of each fillet with the miso glaze.
- Place the pan in the center of the oven and bake for 10 to 12 minutes, until the salmon begins to turn opaque around the edges.
- Switch the oven to high broil. Watch carefully for 2 to 3 minutes until the glaze bubbles and caramelizes. Remove immediately once dark and bubbling to avoid burning.
- Let the salmon rest for 5 minutes to allow juices to redistribute. Sprinkle with toasted sesame seeds and chopped green onions before serving.