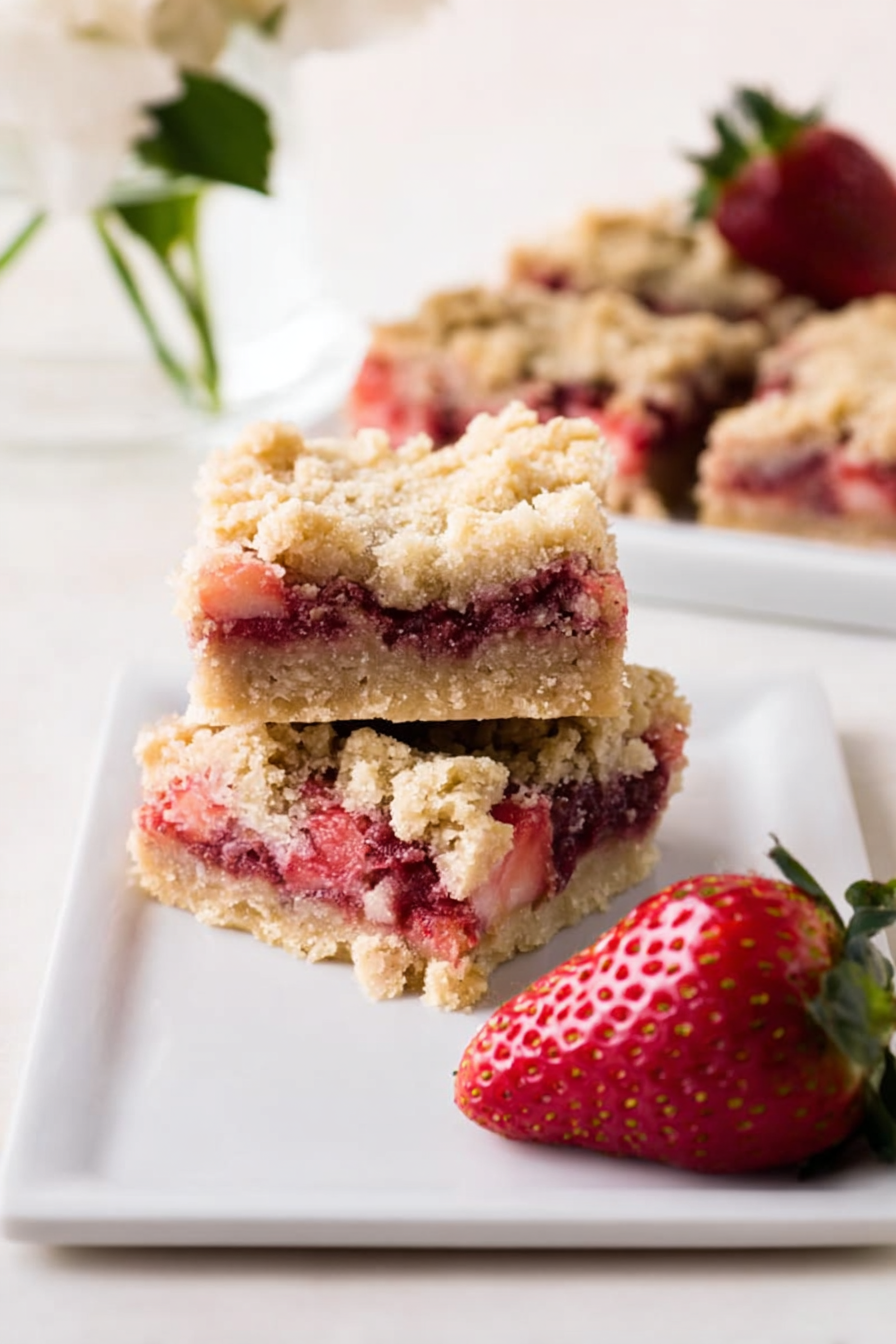
These irresistible Strawberry Crumble Bars capture the essence of summer in every bite. I’ve been perfecting this recipe for years, and it never fails to impress. The combination of buttery, golden crumble and fresh strawberry filling creates the perfect balance of sweet and tart flavors.
What makes these bars truly special is their simplicity. I use the same mixture for both the bottom crust and the top crumble, which streamlines the baking process. The result is a dessert that looks sophisticated but requires minimal effort from the baker.
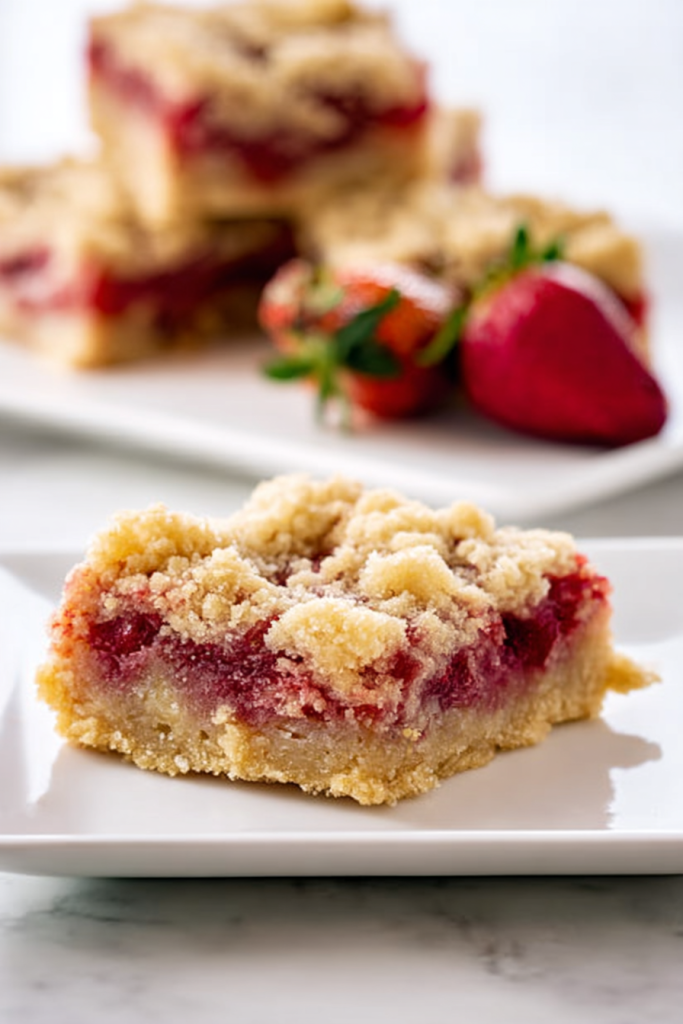
The beauty of this recipe lies in its versatility. When strawberries are at their peak season, these bars become an absolute showstopper. I love serving them at summer gatherings, potluck dinners, or simply as an afternoon treat with coffee.
Why You’ll Love This Recipe
Perfect for strawberry season. When those gorgeous, ruby-red strawberries flood the markets, this recipe gives you the perfect excuse to buy them by the basket. The fresh fruit filling celebrates the natural sweetness of peak-season berries.
One mixture, two purposes. The genius of this recipe is using the same crumble mixture for both the base and topping. This eliminates complicated steps and reduces prep time significantly.
Make-ahead friendly. These bars actually improve after sitting overnight. The flavors meld together beautifully, making them perfect for meal prep or entertaining.
Freezer-friendly dessert. I always make a double batch because these bars freeze exceptionally well. Wrap individual portions for quick treats throughout the season.
Customizable sweetness. The granulated sugar in the strawberry filling can be adjusted based on your berries’ natural sweetness. Taste-test as you go for perfect results.
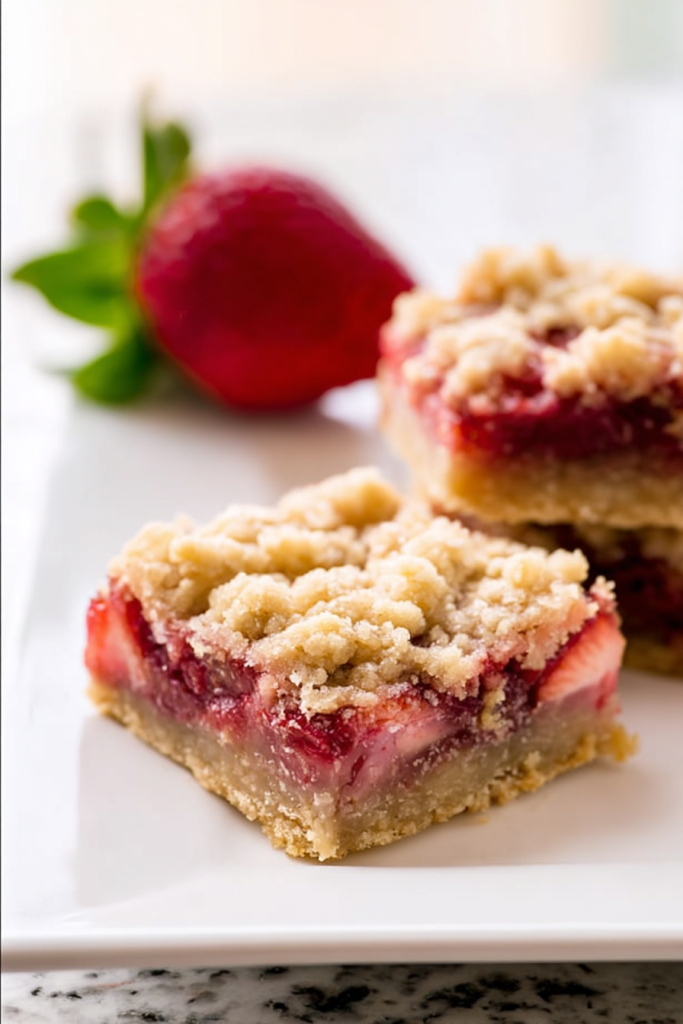
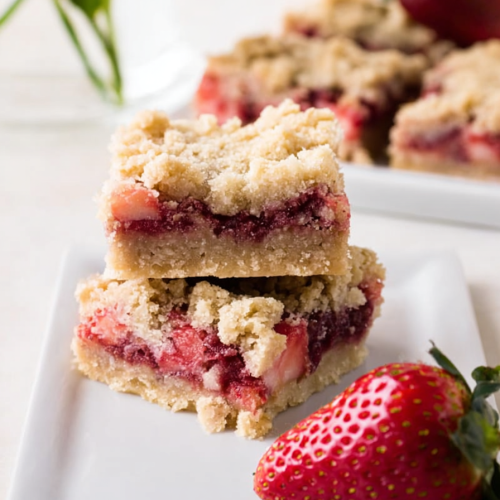
The texture contrast in these bars is absolutely divine. The bottom layer bakes into a sturdy, cookie-like crust that holds everything together. Meanwhile, the top crumble becomes golden and slightly crispy, providing that satisfying crunch with every bite.
I’ve served these bars to countless friends and family members over the years. They consistently rank among my most requested desserts, especially during strawberry season. The recipe is foolproof enough for beginning bakers yet sophisticated enough to serve at elegant dinner parties.
Prep Time: 15 minutes | Cook Time: 40 minutes | Total Time: 55 minutes | Servings: 16 bars | Difficulty: Easy
Ingredients & Instructions
Ingredients You’ll Need
| Ingredient | Quantity | Notes |
|---|---|---|
| All-purpose flour | 2 cups | Provides structure for crust and crumble |
| Baking powder | 1/2 teaspoon | Creates slight lift in the bottom crust |
| Salt | 1/2 teaspoon | Enhances flavors and balances sweetness |
| Unsalted butter | 2/3 cup (11 tbsp) | Must be cold and cubed for proper texture |
| Light brown sugar | 2/3 cup packed | Adds depth and caramel notes |
| Large egg | 1 | Binds the crumble mixture together |
| Pure vanilla extract | 1 teaspoon | Enhances overall flavor profile |
| Fresh strawberries | 3 cups chopped | Choose ripe, fragrant berries |
| Granulated sugar | 1/4 cup | Sweetens and draws juice from berries |
| Cornstarch | 1 tablespoon | Thickens strawberry filling |
How To Make Strawberry Crumble Bars
Step 1: Prepare your workspace. Preheat your oven to 350°F. Line a 9×9-inch baking pan with parchment paper, leaving some overhang for easy removal. This step prevents sticking and makes serving much simpler.
Step 2: Create the crumble base. In a large mixing bowl, whisk together flour, baking powder, and salt. Add the cold, cubed butter and use a pastry cutter to work it into the flour mixture. Continue until the mixture resembles coarse crumbs with some pea-sized butter pieces remaining.
Step 3: Add wet ingredients. In a separate bowl, whisk together brown sugar, egg, and vanilla extract until well combined. The mixture should be smooth and slightly thick.
Step 4: Combine for crumble mixture. Pour the wet ingredients into the flour-butter mixture. Using a rubber spatula or clean hands, gently combine until a crumbly mixture forms. Don’t overmix – some variation in texture is desirable.
Step 5: Form the bottom crust. Reserve about one-third of the crumble mixture for the topping. Press the remaining two-thirds firmly into the prepared baking pan. Create an even, compact layer that will serve as your sturdy foundation.
Step 6: Prepare strawberry filling. In a medium bowl, combine chopped strawberries, granulated sugar, and cornstarch. Toss gently until strawberries are evenly coated. The mixture will look slightly wet from the natural berry juices.
Step 7: Assemble the bars. Spread the strawberry mixture evenly over the pressed crust. Sprinkle the reserved crumble mixture over the top, creating an even but not too dense layer.
Step 8: Bake to perfection. Place in the preheated oven and bake for 40-45 minutes. The bars are done when the top is golden brown and you can see the strawberry filling bubbling around the edges.
Step 9: Cool completely. Remove from oven and let cool completely in the pan before cutting. This step is crucial for clean cuts and proper texture development.
Pro Tips for Perfect Results
Use cold butter consistently. Cold butter creates the flaky, tender texture that makes these bars special. If your butter gets too soft during prep, pop it back in the refrigerator for a few minutes.
Don’t skip the cornstarch. This ingredient prevents soggy bottoms by thickening the strawberry juices that release during baking. Your crust will stay crisp and structurally sound.
Chop strawberries uniformly. Aim for pieces roughly 1/2-inch in size. This ensures even cooking and prevents some pieces from becoming mushy while others remain firm.
Press the bottom crust firmly. A well-compacted base layer prevents the bars from falling apart when cut. Use the bottom of a measuring cup if your hands aren’t doing the job effectively.
Storage, Variations & FAQs
Storage & Make-Ahead Tips
Room temperature storage: These bars keep well covered at room temperature for up to 2 days. However, I prefer refrigerating them for optimal freshness and easier cutting.
Refrigerator storage: Store covered in the refrigerator for up to 5 days. The flavors actually improve overnight as everything melds together beautifully.
Freezing instructions: Wrap individual bars in plastic wrap, then place in a freezer-safe container. They’ll maintain quality for up to 4 months. Thaw overnight in the refrigerator before serving.
Make-ahead strategy: You can prepare these bars completely up to 2 days in advance. They’re actually easier to cut when chilled, making them perfect for entertaining.

Recipe Variations & Substitutions
Gluten-free option: Replace all-purpose flour with a 1:1 gluten-free flour blend containing xanthan gum. The texture will be nearly identical to the original version.
Refined sugar-free: Substitute coconut sugar for both brown and granulated sugars. The flavor will be slightly more complex with subtle caramel undertones.
Mixed berry version: Replace strawberries with a combination of blueberries, raspberries, and blackberries. Adjust sugar slightly based on berry tartness.
Frozen strawberry adaptation: Thaw frozen strawberries completely and drain excess liquid before chopping. You may need an extra tablespoon of cornstarch to compensate for additional moisture.
Oat crumble topping: Add 1/2 cup rolled oats to the reserved crumble mixture for extra texture and heartiness.
Troubleshooting Common Issues
Soggy bottom crust: This usually indicates insufficient baking time or skipping the cornstarch. Ensure your oven is properly preheated and bake until edges bubble actively.
Crumble won’t hold together: The butter may have been too warm, or the mixture was overworked. Chill the mixture briefly before pressing into the pan.
Overly tart filling: Taste your strawberries before adding sugar. Very tart berries may need an additional 1-2 tablespoons of granulated sugar.
Frequently Asked Questions
Can I use frozen strawberries instead of fresh ones? Yes, but thaw them completely first and drain excess liquid. Pat them dry with paper towels before chopping. You might need extra cornstarch to handle the additional moisture frozen berries release.
How do I know when the bars are fully baked? Look for golden-brown crumble on top and bubbling strawberry filling around the edges. The center should feel set when gently pressed. If the top browns too quickly, tent with foil for the remaining baking time.
Can I double this recipe for a larger pan? Absolutely! Use a 9×13-inch pan and increase baking time by 10-15 minutes. Check for doneness using the same visual cues – golden top and bubbling edges.
What’s the best way to get clean cuts? Cool the bars completely before cutting, preferably after refrigerating for an hour. Use a sharp knife and wipe it clean between cuts. Chilled bars slice much more cleanly than warm ones.
Can I make these bars dairy-free? Replace the butter with cold vegan butter or coconut oil that’s been chilled until solid. The texture will be slightly different but still delicious. Make sure your substitute is cold when you incorporate it into the flour mixture.
These Strawberry Crumble Bars represent everything I love about summer baking – fresh seasonal fruit, simple techniques, and crowd-pleasing results. Whether you’re a seasoned baker or just starting your culinary journey, this recipe delivers consistent, delicious results every single time.
Strawberry Crumble Bars
Ingredients
- 2 cups all-purpose flour
- 1/2 tsp baking powder
- 1/2 tsp salt
- 2/3 cup 11 tbsp unsalted butter, cold and cubed
- 2/3 cup light brown sugar packed
- 1 large egg
- 1 tsp pure vanilla extract
- 3 cups fresh strawberries chopped
- 1/4 cup granulated sugar adjust based on berry sweetness
- 1 tbsp cornstarch
Instructions
- Preheat oven to 350°F (175°C). Line a 9×9-inch baking pan with parchment paper, leaving overhang for easy removal.
- Make the crumble base: In a large bowl, whisk flour, baking powder, and salt. Add cold, cubed butter and cut it in using a pastry cutter until coarse crumbs form.
- Mix wet ingredients: In a separate bowl, whisk brown sugar, egg, and vanilla extract until smooth.
- Combine mixtures: Pour the wet mixture into the dry ingredients and mix gently until crumbly. Do not overmix.
- Form crust: Reserve 1/3 of the mixture for the topping. Press the remaining 2/3 firmly into the bottom of the prepared pan.
- Make strawberry filling: In another bowl, mix chopped strawberries, granulated sugar, and cornstarch until coated.
- Assemble: Spread the strawberry filling over the crust. Sprinkle the reserved crumble evenly over the top.
- Bake: Bake for 40–45 minutes, until the top is golden and the filling bubbles around the edges.
- Cool completely: Let cool fully in the pan before slicing. Refrigerate for cleaner cuts.