
There’s something magical about biting into a perfectly crafted raspberry crumble bar. The buttery, golden crumble gives way to a burst of tart-sweet raspberry filling that instantly transports me back to lazy summer afternoons in my grandmother’s kitchen. I’ve been perfecting this raspberry crumble bars recipe for years, and I can confidently say it strikes the perfect balance between simplicity and indulgence.

Raspberry crumble bars have deep roots in traditional British baking, where fruit crumbles became popular during wartime rationing. Bakers discovered that combining minimal ingredients could create maximum flavor impact. The technique spread across continents, evolving into the beloved bar format we know today. What started as a resourceful way to stretch ingredients has become a cherished dessert that celebrates the natural sweetness of seasonal fruit.
My love affair with raspberry crumble bars began during a particularly abundant raspberry season. I had bushels of fresh berries from my garden and needed a way to preserve their vibrant flavor. Traditional pies seemed too formal, and simple jam felt too ordinary. These bars offered the perfect solution – they capture summer’s essence while providing the convenience of handheld treats.
The beauty of raspberry crumble bars lies in their versatility and forgiving nature. Unlike delicate pastries that require precise techniques, these bars welcome experimentation and adapt beautifully to ingredient substitutions. Whether you’re using fresh berries at peak ripeness or frozen ones in the depths of winter, this recipe delivers consistent, crowd-pleasing results.
What sets my version apart is the careful balance of textures and flavors. The oat-flour crumble provides a hearty, satisfying base that complements rather than competes with the raspberry filling. I’ve discovered that the secret lies in the proper ratio of wet to dry ingredients, ensuring each bite offers the perfect contrast between crispy topping and juicy fruit.
Recipe Timing:
- Prep Time: 15 minutes
- Cook Time: 35 minutes
- Total Time: 50 minutes
- Servings: 12 bars
- Difficulty: Easy
Ingredients & Step-by-Step Instructions
Ingredients Table
| Ingredient | Quantity | Notes |
|---|---|---|
| All-purpose flour | 1 cup | Sifted for best texture |
| Rolled oats | 1 cup | Old-fashioned variety preferred |
| Brown sugar, packed | 1/2 cup | Adds molasses depth |
| Granulated sugar | 1/2 cup | For sweetness balance |
| Baking powder | 1/2 teaspoon | Ensures proper rise |
| Salt | 1/4 teaspoon | Enhances all flavors |
| Unsalted butter, melted | 1/2 cup | Room temperature works best |
| Vanilla extract | 1 teaspoon | Pure extract recommended |
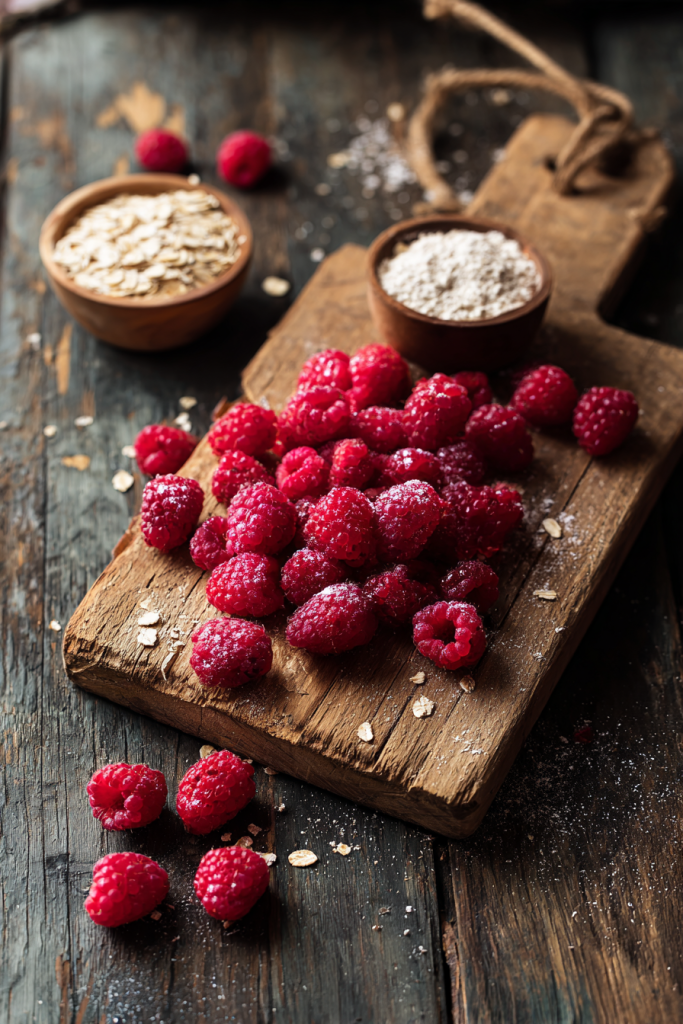
| Fresh raspberries | 2 cups | Can substitute frozen, thawed |
| Cornstarch | 1 tablespoon | Prevents soggy bottoms |
| Lemon juice | 1 tablespoon | Brightens raspberry flavor |
| Granulated sugar (filling) | 1 tablespoon | Balances tartness |
Preparing the Crumble Base
I always start by creating the foundation of these bars – the buttery crumble mixture that serves double duty as both crust and topping. In a large mixing bowl, I combine the flour, rolled oats, brown sugar, granulated sugar, baking powder, and salt. Using a whisk, I blend these dry ingredients until they’re evenly distributed and no lumps remain.
The key to perfect crumble texture lies in how you incorporate the butter. I pour the melted butter and vanilla extract into the dry mixture gradually, stirring with a fork as I go. The mixture should resemble coarse breadcrumbs with some larger clumps – this creates the ideal texture contrast once baked.
Pro tip: Don’t overmix the crumble! You want some variation in texture, which creates those delightful crispy and tender spots that make each bite interesting.
Creating the Raspberry Filling
While many recipes skip this step, I believe preparing the raspberry filling separately is crucial for preventing soggy bars. In a medium bowl, I gently combine the fresh raspberries with cornstarch, ensuring each berry gets lightly coated. The cornstarch acts as a thickening agent, absorbing excess juices during baking.
I then add the lemon juice and tablespoon of sugar to the berries. The lemon juice serves multiple purposes – it brightens the raspberry flavor, prevents the fruit from browning, and helps activate the cornstarch. I fold these ingredients together with a rubber spatula, being careful not to crush the delicate berries.
Assembly and Baking Process
Preheat your oven to 350°F (175°C) and line an 8×8-inch baking pan with parchment paper, leaving overhang for easy removal. I press two-thirds of the crumble mixture firmly into the bottom of the prepared pan, creating an even, compact base. Using the bottom of a measuring cup helps achieve uniform thickness.
Next, I distribute the raspberry filling evenly over the crust, making sure berries reach every corner. Finally, I sprinkle the remaining crumble mixture over the raspberries, leaving some fruit visible for an appealing rustic appearance.
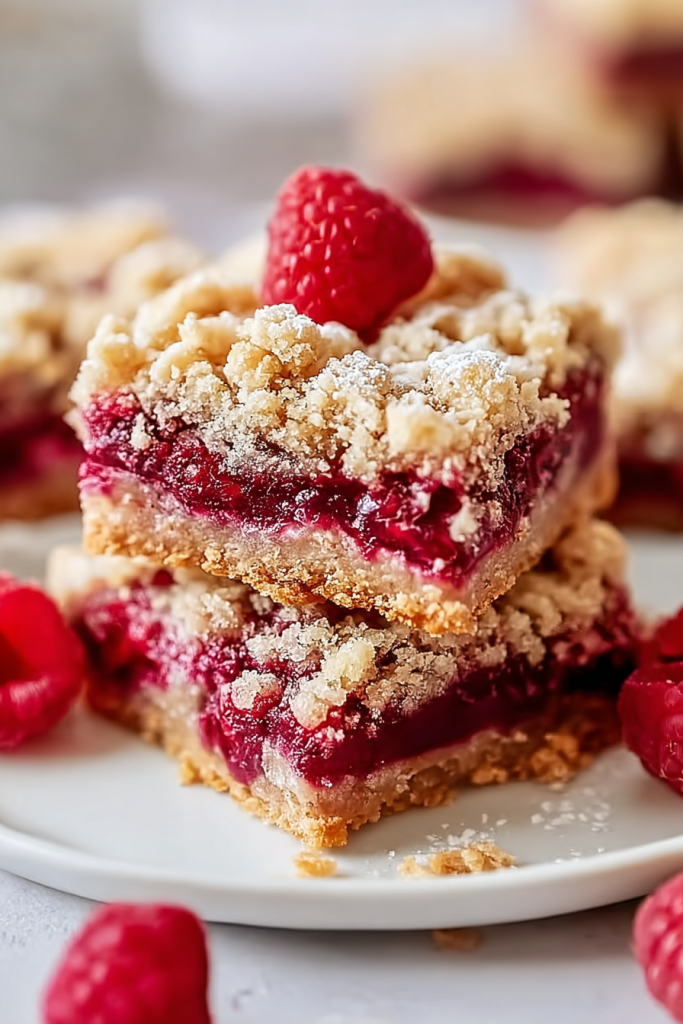
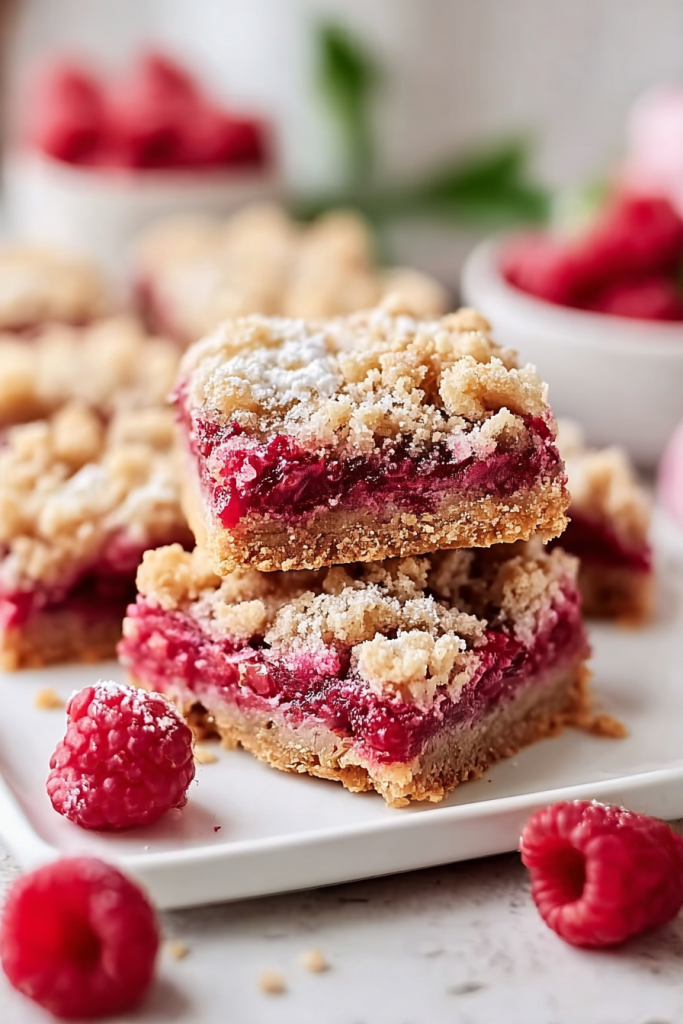
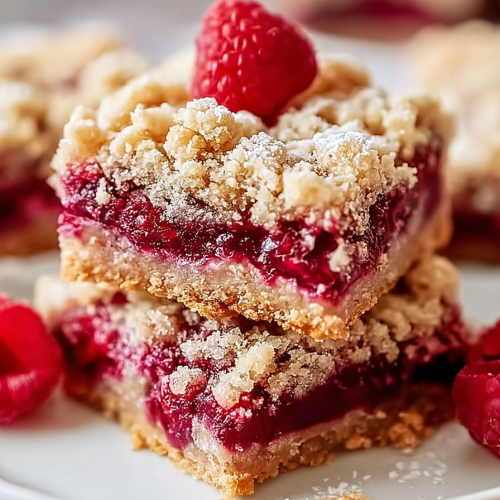
The baking process requires patience – these bars need 30-35 minutes in the oven until the top turns golden brown and the raspberry filling bubbles gently around the edges. I resist the temptation to overbake, as this can make the crumble tough and dry out the fruit.
Pro tip: The bars will seem soft when you first remove them from the oven, but they firm up significantly as they cool. Allow at least 2 hours of cooling time for clean cuts.
Serving, Storage & FAQs
Perfect Serving Suggestions
These raspberry crumble bars shine in various serving contexts, adapting beautifully to both casual and elegant presentations. I love serving them slightly warm with a scoop of vanilla ice cream for an indulgent dessert experience. The temperature contrast between the warm, crumbly bars and cold ice cream creates a delightful sensory experience.
For afternoon tea or coffee gatherings, I dust the cooled bars with powdered sugar and serve alongside freshly brewed coffee or Earl Grey tea. The bars pair wonderfully with whipped cream or mascarpone cheese for those seeking extra richness.
During summer entertaining, these bars make excellent picnic or potluck contributions since they travel well and require no special serving utensils. I often cut them into smaller squares for bite-sized treats at parties, where guests can easily enjoy them without plates or forks.
Storage and Make-Ahead Tips
Proper storage ensures these bars maintain their delicious texture for days. I store completely cooled bars in an airtight container at room temperature for up to three days. For longer storage, they freeze beautifully for up to three months when wrapped individually in plastic wrap and placed in freezer bags.
The crumble mixture can be prepared up to two days in advance and stored in the refrigerator, making this recipe perfect for busy bakers who like to prep ahead. I’ve also successfully frozen unbaked bars for up to one month – simply add 5-10 extra minutes to the baking time when cooking from frozen.
Pro tip: If the bars seem to lose their crispness after storage, place them in a 300°F oven for 5-8 minutes to restore the crumble texture.
Recipe Variations and Substitutions
One of my favorite aspects of this recipe is its adaptability. I’ve successfully substituted the raspberries with blueberries, blackberries, or a mixed berry combination. Each variation brings its own unique flavor profile while maintaining the recipe’s core appeal.
For those avoiding gluten, I’ve had excellent results substituting the all-purpose flour with a 1:1 gluten-free flour blend. The texture remains remarkably similar, though the bars may be slightly more delicate.
Dietary modifications work well too – I’ve used coconut oil in place of butter for dairy-free versions, and maple syrup instead of some sugar for refined-sugar-free alternatives. Each substitution requires minor adjustments, but the fundamental recipe structure remains sound.
Frequently Asked Questions
Can I use frozen raspberries instead of fresh? Absolutely! Frozen raspberries work wonderfully in this recipe. Thaw them completely and drain excess liquid before using. You might need to add an extra tablespoon of cornstarch to account for additional moisture. I actually prefer frozen berries during off-season months since they’re picked at peak ripeness.
Why do my bars turn out soggy on the bottom? Soggy bottoms usually result from insufficient pre-baking preparation or skipping the cornstarch in the filling. Make sure to press the bottom crust firmly and ensure your raspberries are well-drained. The cornstarch is crucial for absorbing fruit juices during baking.
Can I double this recipe for a larger crowd? Yes! This recipe doubles beautifully. Use a 9×13-inch pan and increase baking time by 8-10 minutes. The larger pan creates thinner bars, so watch carefully to prevent overbaking. I often make double batches for family gatherings and holiday events.
How do I know when the bars are properly baked? Look for a golden-brown crumble top and gently bubbling raspberry filling around the edges. The center should feel set but still slightly soft when gently pressed. Overbaked bars become dry and crumbly rather than tender and moist.
What’s the best way to cut clean bar squares? Use a sharp knife wiped clean between cuts, and make sure the bars are completely cool before cutting. I line my pan with parchment paper for easy removal, then cut on a cutting board rather than in the pan to protect my bakeware.
Final Thoughts
These raspberry crumble bars represent everything I love about home baking – they’re approachable enough for beginners yet satisfying for experienced bakers seeking comfort food perfection. The combination of buttery crumble and tart-sweet raspberries creates a dessert that feels both rustic and refined.
Every time I make these bars, I’m reminded why simple ingredients, when combined thoughtfully, create the most memorable treats. The aroma that fills your kitchen during baking, the anticipation while they cool, and the satisfaction of that first perfect bite – these are the moments that make baking truly rewarding.
I encourage you to make this recipe your own by experimenting with different berry combinations or adding personal touches like a hint of almond extract or a sprinkle of cinnamon. Baking should be a joyful, creative process, and these bars provide the perfect canvas for your culinary imagination.
Share your creations with family and friends, and don’t forget to save the recipe for future raspberry seasons. Happy baking!
Raspberry Crumble Bars
Ingredients
- 1 cup all-purpose flour sifted
- 1 cup rolled oats old-fashioned
- 1/2 cup brown sugar packed
- 1/2 cup granulated sugar
- 1/2 tsp baking powder
- 1/4 tsp salt
- 1/2 cup unsalted butter melted, room temp
- 1 tsp vanilla extract
- 2 cups fresh raspberries or thawed frozen
- 1 tbsp cornstarch
- 1 tbsp lemon juice
- 1 tbsp granulated sugar for filling
Instructions
- Preheat oven to 350°F (175°C). Line an 8×8-inch pan with parchment paper, leaving overhang.
- Make the crumble base: In a large bowl, whisk together flour, oats, brown sugar, granulated sugar, baking powder, and salt.
- Add wet ingredients: Pour in melted butter and vanilla. Mix with a fork until crumbly, with some larger clumps.
- Form crust: Press 2/3 of the crumble mixture into the prepared pan to create a firm, even base.
- Prepare filling: In a medium bowl, gently combine raspberries, cornstarch, lemon juice, and 1 tbsp granulated sugar. Stir carefully to avoid crushing berries.
- Assemble: Spread raspberry filling evenly over the crust. Sprinkle remaining crumble over the top, leaving some berries visible.
- Bake: Bake for 30–35 minutes, until the top is golden and the filling is bubbling at the edges.
- Cool completely: Let bars cool in the pan for at least 2 hours before slicing.