
There’s something deeply satisfying about pulling a golden, crispy chicken out of the oven. The smell alone fills your whole house. And when everyone at the table goes quiet after the first bite? That’s the moment you’ll never forget.
Today, we’re making Ina Garten’s perfect roast chicken. And yes, it’s just as good as everyone says.
Roasting a whole bird might feel a little intimidating at first. I get it. I felt the same way the first time I tried it. But here’s the truth: this recipe is incredibly forgiving. You don’t need fancy equipment. You don’t need professional chef skills. You just need good ingredients, a hot oven, and a little patience.
Let’s walk through every single step together.
Prep Time: 10 minutes | Cook Time: 1 hour 30 minutes | Total Time: 1 hour 40 minutes | Servings: 6 | Difficulty: Easy
What You’ll Need
Here’s everything you need before you even turn on the oven. Stick closely to this list for the best results.
| Ingredient | Quantity | Notes |
|---|---|---|
| Roasting chicken | 1 whole (5 to 6 lbs) | Giblets removed; patted completely dry before seasoning |
| Kosher salt | To taste | Use a generous amount both inside and outside |
| Black pepper | To taste | Freshly ground yields a much stronger, better flavor |
| Fresh thyme | 1 large bunch | Leave the sprigs whole for easy cavity stuffing |
| Lemon | 1 whole | Halved crosswise to release fresh citrus juices |
| Garlic | 1 head | Cut in half crosswise; leave the papery skins on |
| Butter | 2 tbsp | Melted thoroughly to easily brush onto the raw skin |
| Spanish onion | 1 whole | Thickly sliced to rest directly underneath the bird |
| Chicken stock | 1 cup | Used to create a beautifully rich pan gravy |
| All-purpose flour | 2 tbsp | Acts as a reliable thickener for the pan gravy |
Now, let me tell you why each of these ingredients actually matters.
A five to six-pound chicken is the sweet spot for roasting. Big enough to feed a family. Small enough to cook through evenly without drying out the breast meat.
Kosher salt pulls moisture away from the skin. That’s the secret to that crackly, golden exterior you’re going for. Freshly ground black pepper adds just enough gentle heat without overpowering anything.
The fresh thyme gives the whole bird a deeply savory, herbal fragrance as it roasts. Think of it like slow-cooking a pot of soup. The aromatics do the heavy lifting on flavor.
Lemon halves go right inside the cavity. As the chicken heats up, the lemon releases steam from the inside out. This keeps the meat incredibly moist and adds a bright, subtle citrus note throughout.
Garlic slowly sweetens and softens as it roasts. By the time the chicken is done, it’s mild and buttery. Nothing sharp about it.
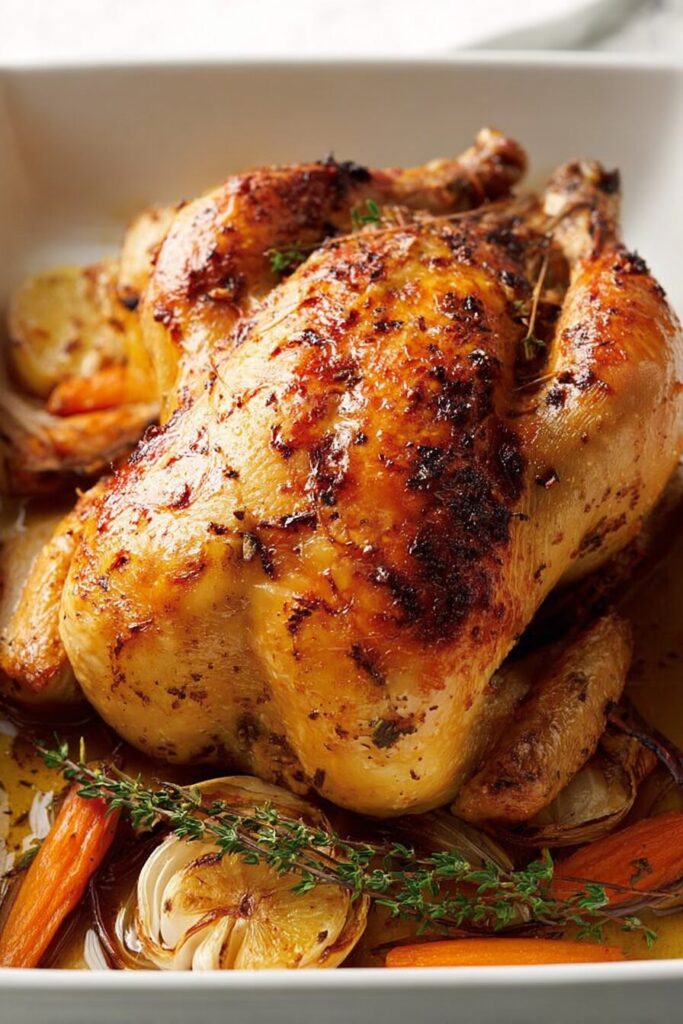
The Spanish onion slices sit under the bird the entire time. They act like a natural roasting rack, lifting the chicken off the pan while soaking up every drop of savory drippings. You’ll want to eat those onions right alongside the chicken. Trust me.
And finally, the chicken stock and flour come together at the end to make a velvety pan gravy that ties the whole meal together.
Step-by-Step: How to Make Ina Garten’s Roast Chicken
Step 1: Get the Oven Hot and Prep the Bird
Start by preheating your oven to 425°F. A hot oven is non-negotiable here. It’s what gives you that deep golden skin instead of a pale, sad-looking bird.
While the oven heats up, take your chicken out of the packaging. Reach inside and remove any giblets tucked in the cavity. You can toss them or save them for stock later.
Now here’s the step that most people skip. And it’s the most important one.
Dry the chicken. Completely.
Use clean paper towels and pat every inch of the outside until it’s bone dry. Then reach inside the cavity and dry that too. Surface moisture is the enemy of crispy skin. If there’s any wetness on that bird, it’ll steam in the oven instead of roast. You’ll end up with soft, rubbery skin. Not what we want.

Step 2: Season and Stuff
Grab your kosher salt and freshly ground black pepper.
Season the inside of the cavity first. Be generous. Don’t be shy. The salt slowly works its way into the thick meat from the inside out.
Now stuff the cavity with your aromatics:
- The entire large bunch of fresh thyme
- Both lemon halves, cut side in
- The halved head of garlic, cut side in
It’ll be a tight fit. Push everything in firmly and securely.

Step 3: Truss, Butter, and Season the Outside
Tie the two legs together using a piece of cotton kitchen string. This helps the bird hold its shape in the oven and cook more evenly. It also keeps all those aromatics locked inside the cavity where they belong.
Tuck the wing tips under the body of the bird. At 425°F, those thin tips will burn fast if you leave them sticking out.
Now take your 2 tablespoons of melted butter and brush it all over the outside skin. Every surface. Every crevice.
Sprinkle the outside generously with more kosher salt and black pepper. The butter and salt together are what create that iconic, crackling crust.
Step 4: Into the Oven
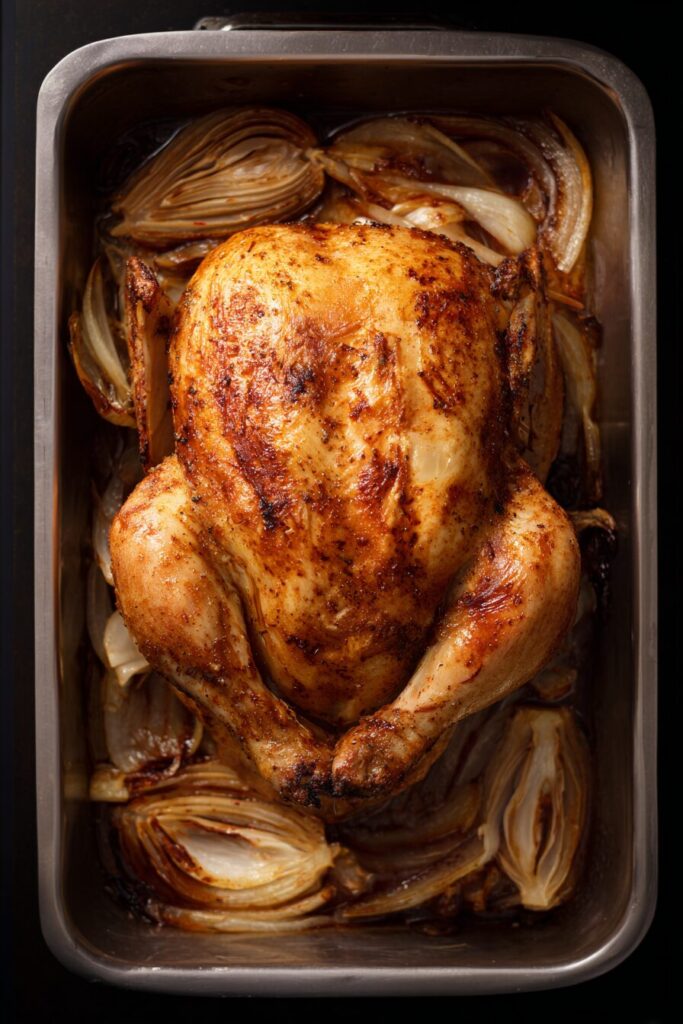
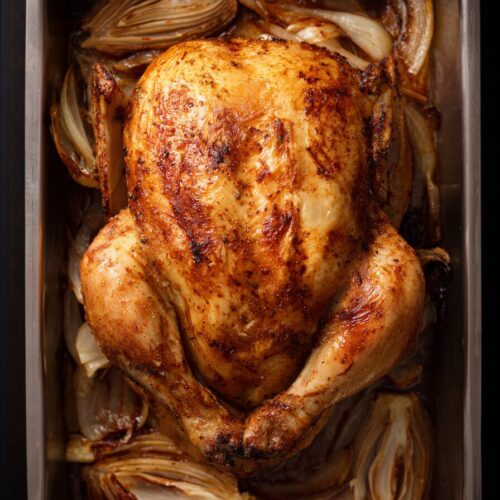
Scatter your thickly sliced Spanish onion across the bottom of a sturdy roasting pan.
Place the chicken directly on top of the onions.
Slide the pan into your preheated oven and let it roast, undisturbed, for 1 hour and 30 minutes.
Don’t keep opening the oven door. Let the heat do its job.
You’ll know it’s done when you pierce the thigh and the juices run completely clear. No pink. No cloudiness. Just clear.
Step 5: Rest the Chicken
Once the chicken comes out of the oven, resist every urge to cut into it immediately.
Move it to a serving platter. Cover it loosely with aluminum foil. And let it rest for 20 full minutes.
I know it’s hard. It smells incredible. But resting is what allows all those juices to redistribute back through the meat. Slice it too soon and those juices run right out onto your cutting board. Your chicken ends up dry, and all that effort goes to waste.
Twenty minutes. That’s all it takes.
Step 6: Make the Pan Gravy
While the chicken rests, let’s make the gravy. This part is easier than it sounds.
Look at the bottom of your roasting pan. You’ll see soft, caramelized onions and a pool of deeply flavored drippings. That’s liquid gold.
Here’s what to do:
- Carefully pour off the excess fat from the pan, but reserve exactly 2 tablespoons in a small cup.
- Leave all the browned bits stuck to the bottom of the pan. Those are flavor.
- Pour 1 cup of chicken stock into the roasting pan.
- Place the pan directly on your stovetop over high heat.
- Cook and stir for about 5 minutes, scraping up every bit from the bottom with a flat wooden spoon.
- In your small cup, whisk the reserved fat with the 2 tablespoons of flour until completely smooth. This is your thickening paste.
- Scrape that paste into the simmering pan liquid and whisk constantly.
- Boil for a few minutes until the gravy thickens and the flour taste cooks out.
- Strain the finished gravy into a small warm saucepan.
- Taste it. Season with more salt and pepper if needed.
Keep it warm over a very low flame until you’re ready to serve.
Serving It Up
Bring that beautiful golden chicken to the table whole. Let everyone see it before you start carving. That first look? Worth it every time.
To carve, start by separating the legs and thighs from the body. Then slice the breast meat cleanly against the grain. Serve everything alongside:
- A generous pour of warm pan gravy
- The soft, caramelized onions from the roasting pan
Storing Leftovers
Got some chicken left over? Here’s how to handle it properly.
Let the chicken cool down fully to room temperature first. Then pull all the meat off the bones and place it in an airtight container in the refrigerator. It stays fresh and delicious for up to four days.
Cold leftover chicken is perfect for:
- Fresh green salads
- Sandwiches and wraps
- Quick weeknight pasta
- Chicken soup the next day
Store the pan gravy separately in its own container. Warm it gently on the stove before using it again.
And those leftover bones? Don’t throw them away. Toss them in a pot with water, vegetables, and herbs to make your own rich homemade stock. Nothing from this bird needs to go to waste.
Frequently Asked Questions
Why do I need to dry the chicken before roasting?
Wet skin steams in the oven instead of roasting. And steamed skin never gets crispy. Drying the bird thoroughly with paper towels is honestly the single most important step in this whole recipe. It’s what separates a pale, soft-skinned chicken from a gloriously golden one.
Can I use olive oil instead of melted butter?
Yes, you can. Olive oil will still help crisp the skin beautifully. But butter gives you a richer, more traditional flavor that’s hard to beat. If you have butter on hand, use it. You’ll notice the difference.
How do I know when the chicken is fully cooked?
The most reliable way is a digital meat thermometer. Insert it into the thickest part of the thigh, avoiding the bone. It should read 165°F. No thermometer? Pierce the thigh deeply and check the juices. If they run clear with no pink, you’re good to go.
Why did my gravy turn out lumpy?
Lumpy gravy almost always comes down to one thing: the flour wasn’t fully mixed into the fat before adding it to the hot liquid. Make sure you whisk the two together into a completely smooth paste before scraping it into the pan. And keep whisking constantly once it hits the hot stock. That constant motion is what keeps it silky and smooth.
Do I really have to truss the legs?
Trussing creates a more compact shape, which helps the breast and thigh meat cook at the same rate. It also keeps all the aromatics tucked inside the cavity where they belong. It takes about sixty seconds. Definitely worth doing.
Ina Garten’s Perfect Roast Chicken
Ingredients
- 1 whole roasting chicken 5 to 6 lbs; giblets removed and patted completely dry
- Kosher salt to taste; use generously
- Black pepper freshly ground, to taste
- 1 large bunch fresh thyme whole sprigs
- 1 whole lemon halved crosswise
- 1 head garlic cut in half crosswise
- 2 tbsp butter melted
- 1 whole Spanish onion thickly sliced
- 1 cup chicken stock for pan gravy
- 2 tbsp all-purpose flour for thickening gravy
Instructions
- Preheat your oven to 425°F. Remove giblets and pat the chicken completely dry inside and out with paper towels.
- Season the cavity generously with salt and pepper. Stuff with the thyme bunch, both lemon halves, and the halved garlic head.
- Truss the legs with kitchen string and tuck the wing tips under the body. Brush the skin with melted butter and season the exterior generously with salt and pepper.
- Place the sliced onion in the bottom of a roasting pan. Place the chicken on top and roast for 1 hour and 30 minutes until juices run clear.
- Transfer chicken to a platter, cover loosely with foil, and let rest for 20 minutes before carving.
- Prepare the gravy: Pour off all but 2 tbsp of fat. Add chicken stock to the roasting pan over high heat, scraping up browned bits. Whisk flour with the reserved fat to make a paste, add to the pan, and simmer until thickened.