
Look, I’ll be real with you.
I used to be terrified of cooking scallops.
They seemed like this fancy restaurant thing that only trained chefs could pull off. You know what I mean? Like, one wrong move and you’ve got expensive rubbery disasters on your plate.
But then I figured out the secret.
And honestly? It’s almost embarrassingly simple.
Now these scallops are what I make when I want to look like a kitchen rockstar without actually breaking a sweat. The whole thing takes 10 minutes. Seriously. That’s less time than waiting for pizza delivery.
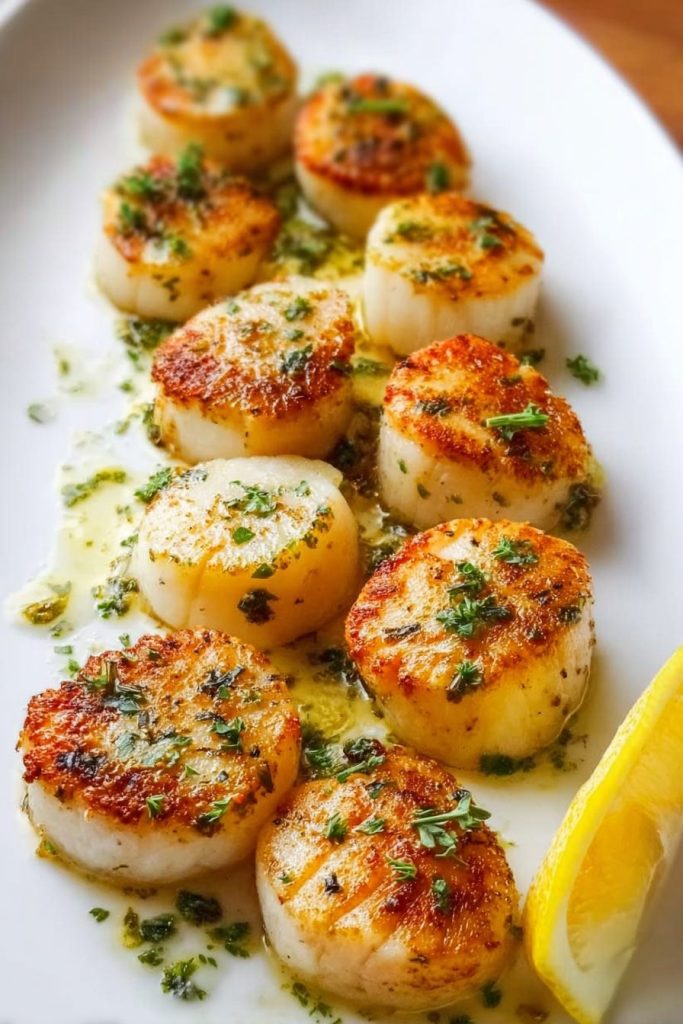
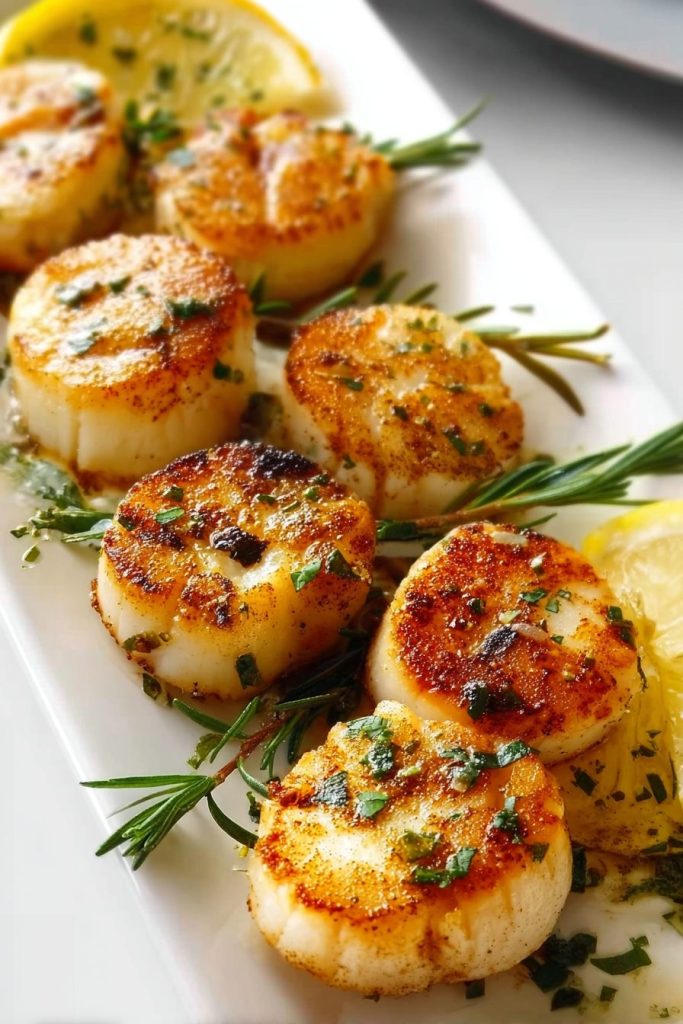
Here’s what makes them so good: you get this gorgeous golden-brown crust on the outside. Then you bite in and it’s butter-tender inside. Add some garlicky herb butter and… yeah. Pure magic.
Recipe Timing:
- Prep Time: 5 minutes
- Cook Time: 5 minutes
- Total Time: 10 minutes
- Servings: 4
- Difficulty: Easy
Why This Recipe Actually Works
Let me break down what makes these scallops so ridiculously good.
First up – the flavor.
Scallops taste naturally sweet. Kind of delicate. When you pair that with rich butter and bright lemon? Chef’s kiss. The garlic adds this depth without taking over the whole show. And fresh herbs? They tie everything together.
But here’s the real deal.
Texture is everything.
When you nail it, scallops get this caramelized crust while staying soft inside. That contrast? That’s what makes people’s eyes roll back in their heads.
Mess it up though, and you’re chewing on seafood rubber bands. Not fun.
The good news?
The technique is actually super straightforward. You’re doing three things:
- Dry the scallops really well
- Sear them in hot oil
- Finish with garlic butter
That’s it. No fancy equipment. No complicated French techniques. Just a good skillet and 10 minutes.
I make these for date nights at home all the time. They look fancy enough for an anniversary. But they’re quick enough for a random Tuesday when you want something special.
Plus your kitchen won’t smell fishy for the next three days. Always a win.
What You Need (And Why It Matters)
Let me walk you through everything. I’ll explain what each ingredient does and give you some backup options if you need them.
Complete Ingredients Table
| Ingredient | Quantity | Notes |
|---|---|---|
| Sea scallops | 16 large (~1 lb) | Fresh or thawed; remove side muscle |
| Sea salt | 1 tsp | For seasoning scallops |
| Black pepper | 1/4 tsp | Freshly ground works best |
| Olive oil | 1 tbsp | For searing; can use avocado oil |
| Salted butter | 2 tbsp | Softened; unsalted works too |
| Lemon juice | 1 tbsp | Freshly squeezed preferred |
| Garlic | 2 cloves | Minced finely |
| Fresh thyme | 1/2 tbsp | Leaves only, stems removed |
| Fresh parsley | 1/2 tbsp | Chopped, for butter and garnish |
Picking the Right Scallops
This is where everything starts.
Not all scallops are the same. And the difference? It’s huge.
Size matters.
You want large sea scallops. Not those tiny bay scallops. Sea scallops are about marshmallow-sized. They’re meatier. Easier to cook without overdoing it.
Bay scallops are cute and all, but they’ll overcook before you even get a proper sear going.
Dry vs. wet is critical.
Dry scallops haven’t been soaked in chemicals or water. They look slightly beige or ivory colored.
Wet scallops? Bright white. That’s because they’ve been soaking in preservatives. All those extra liquids make it almost impossible to get a good sear. They just steam instead of getting that gorgeous caramelized crust.
Always go for dry scallops if you can find them.
The count-per-pound thing.
You’ll see labels like “10-20” or “20-30” per pound. Lower numbers = bigger scallops. I used the 10-20 size for this recipe. Perfect.
Smaller ones work too. Just watch your timing super carefully.
Got frozen scallops?
Thaw them overnight in your fridge. Or seal them in a bag and drop them in cold water for faster thawing. Never… and I mean never… use hot water. You’ll start cooking the edges. Bad news.
The Other Stuff Explained
Oil gives you that initial sear.
I like olive oil for the flavor. But honestly? Any high-heat oil works. Avocado oil is great too. Just needs to handle medium-high heat without smoking up your kitchen.
Butter brings the richness.
I use salted butter because I love the flavor it adds. Only got unsalted? No biggie. Just toss in an extra pinch of salt with your herb butter.
Make sure it’s softened though. You need to be able to mash it with everything else easily.
Lemon juice = brightness.
That acidity cuts right through all that buttery richness. And it plays so well with the sweet scallops.
Fresh lemon juice tastes way better than the bottled stuff. Trust me here.
Fresh garlic is basically required.
For the best flavor anyway. Jarred minced garlic works in a pinch – you’ll need about a teaspoon to replace two fresh cloves. Garlic powder? Use 1/4 teaspoon. But the flavor won’t pop quite as much.
Fresh herbs make this special.
I mix thyme and parsley for that aromatic, fresh vibe. But feel free to play around with what you’ve got on hand.
Chives? Great. Basil? Awesome. Dill, rosemary, tarragon? All work beautifully.
Just skip dried herbs completely if you don’t have fresh. The texture doesn’t work well in this quick butter sauce.
Let’s Actually Cook These Things
Alright, time to get cooking. I’ll walk you through every single step.
Make the Garlic Herb Butter (2 minutes)
Grab a small bowl.
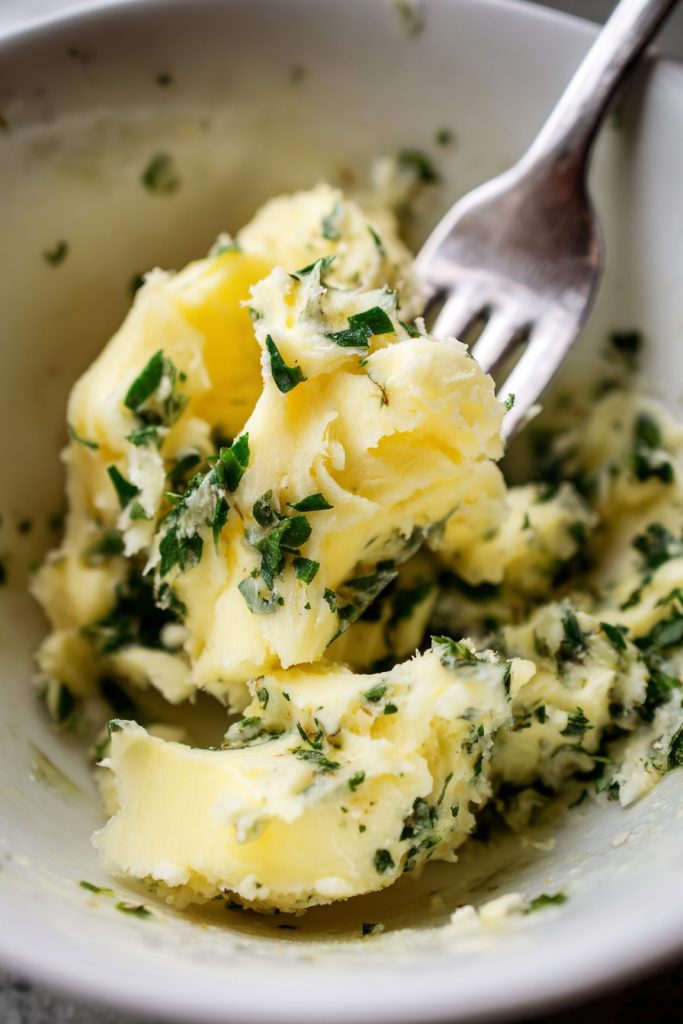
Toss in your softened butter, lemon juice, minced garlic, thyme leaves, and chopped parsley. Use a fork to mash it all together.
The mixture might look kind of separated. That’s because lemon juice and butter don’t naturally want to hang out together.
Don’t stress about it.
Once this hits the hot pan later, it’ll all come together perfectly. Set the bowl aside somewhere you can reach it easily from the stove.
Prep Your Scallops (3 minutes)
This step right here?
This determines whether you get that beautiful golden crust or not.
First, pull off any little side muscles from your scallops. They’re these tough tabs attached to one side. You can eat them, but they’re chewy. I always yank them off.
Now grab a stack of paper towels.
Pat each scallop completely dry. And I mean really dry. Flip them. Dry the other side too.
Any moisture on the surface = steam when it hits the hot pan. Steam = no browning. No browning = no delicious crust.
See where this is going?
Right before you cook, season both sides with salt and pepper. I wait until the last minute so the salt doesn’t pull moisture out of the scallops.
Heat Your Pan (1 minute)
Put a large cast iron skillet over medium-high heat.
Add your olive oil.
Let it heat up until it’s shimmering – you’ll see little ripples dancing across the surface. Takes about a minute.
The pan needs to be hot enough that your scallops sizzle the second they touch it.
No cast iron?
Use stainless steel with a thick bottom. But skip the nonstick pans. They just don’t get hot enough for proper searing. And the temperature difference? It really matters here.
Keep that bowl of garlic herb butter nearby. You’ll need to add it quick once you flip the scallops.
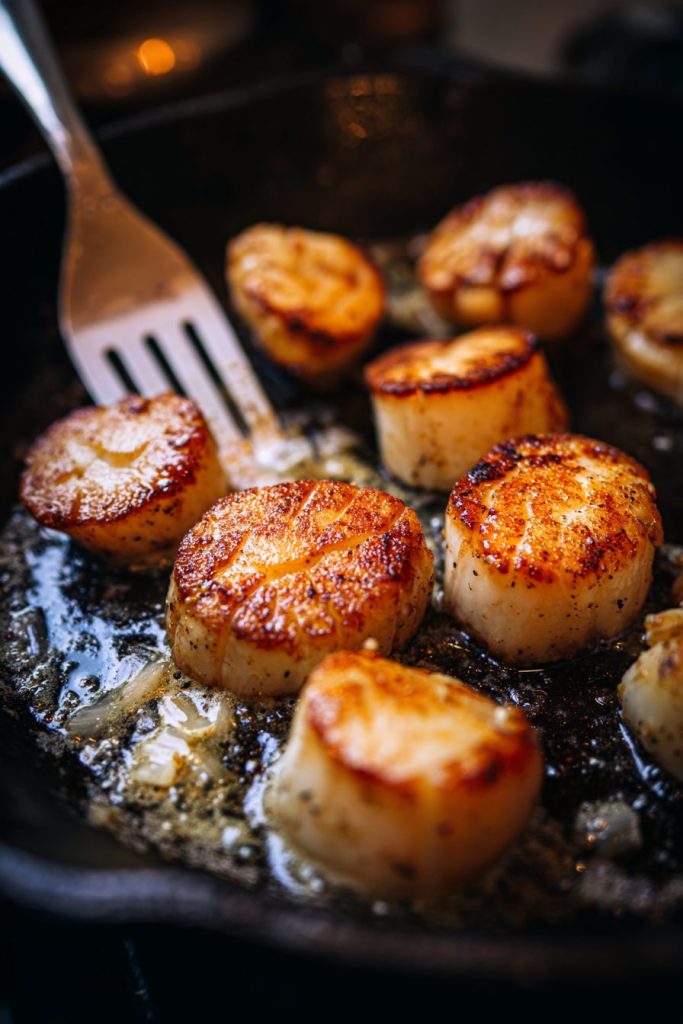
Sear the First Side (2-3 minutes)
Carefully place your scallops in the hot pan.
Single layer. Space between each one. They shouldn’t be touching each other or crowding the edges.
Skillet too small? Cook in two batches. Don’t crowd them.
Now here’s the hard part.
Don’t. Touch. Them.
No peeking underneath. No adjusting their position. No poking with your spatula.
Just let them sit there and sear for 2-3 minutes. Undisturbed.
You’ll hear them sizzling. You might start smelling that caramelization happening. Resist every urge to mess with them.
When should you flip?
The scallops will naturally release from the pan when they’re ready. Try to flip one and it sticks? Give it another 30 seconds.
When you do flip, you should see this deep golden-brown crust on the cooked side.
Beautiful.
Add the Garlic Butter Magic (2-3 minutes)
Flip each scallop over.
Immediately drop spoonfuls of that garlic herb butter around them in the pan. Don’t dump it right on top – let it melt in the pan first.
As the butter melts and starts sizzling, grab a spoon. Time to baste.
Tilt your pan slightly to pool the butter. Then scoop it up and drizzle it over the scallops. This basting adds flavor and helps cook those top surfaces.
Keep cooking for another 2-3 minutes.
The second side should develop that same gorgeous crust. Your scallops are done when they feel firm but still have a tiny bit of give when you press gently.
They should look opaque instead of translucent. But still moist inside.
Serve Right Away
Transfer your scallops to plates immediately.
If you leave them in that hot pan, they’ll keep cooking from the residual heat. And then you’ve overcooked them.
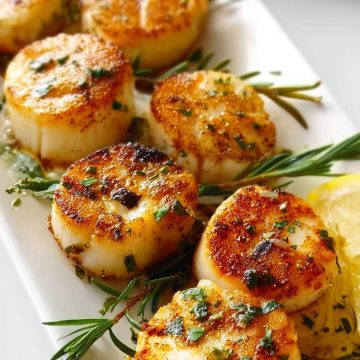
Spoon that beautiful garlic butter over each portion. Toss on some extra fresh herbs and lemon wedges for squeezing.
The whole thing – raw scallops to plated dinner?
About 10 minutes.
That’s faster than most takeout arrives.
Tips That Actually Make a Difference
Let me share what changed my scallop game from hit-or-miss to consistently amazing.
Dry Those Scallops Like Your Life Depends On It
I’m serious about this.
After the paper towel pat-down, I sometimes let them sit on a clean towel for a few extra minutes. Some people even stick them in the fridge uncovered for 30 minutes before cooking.
The drier the surface? The better your crust.
It’s that simple.
Get Your Temperature Right
Your pan needs to be properly hot before the scallops go in.
Too cool = they stick and steam. Too hot = outside burns before the inside cooks.
Medium-high heat works perfectly for most stoves. You want that oil shimmering but not smoking.
Don’t Overcook (This Is Crucial)
Overcooked scallops turn into rubbery little hockey pucks.
They cook fast. Like, incredibly fast. Stay alert.
I set a timer for 2 minutes per side as my baseline. Want to be super precise? Use a meat thermometer. Internal temp should hit 115°F.
They’ll keep cooking a bit after you pull them from the heat.
Your Pan Choice Matters
Cast iron holds heat like a champ. That helps maintain temperature when you drop in cold scallops.
Stainless steel works too, but it needs a thicker bottom.
Nonstick? Forget it. Doesn’t get hot enough for proper caramelization.
This is one of those recipes where your pan actually affects how things turn out.
Give Them Space
Crowded scallops just steam each other instead of searing.
Leave at least an inch between each one. Cooking for a crowd? Do multiple batches.
Keep the first batch warm in a low oven while you cook the rest.
Make Extra Butter (You’ll Thank Me)
This herb butter is too good to only use on scallops.
I double the recipe all the time. Skip the lemon juice in the extra portion. Store it wrapped in plastic wrap in the fridge. Keeps for a week.
Use it on:
- Steaks
- Chicken
- Vegetables
- Bread
When you’re ready to use it with scallops? Just add fresh lemon juice to the pan.
Try These Variations
Bacon-wrapped: Wrap each scallop with a thin strip of bacon before searing. Stick a toothpick through to hold it. Adds smoky flavor and richness.
Spicy kick: Toss a pinch of red pepper flakes into your garlic butter. The heat works really well against those sweet scallops.
Different herbs: Rosemary and sage for earthier vibes. Basil and oregano for Mediterranean feels. Cilantro and lime for Asian-inspired flavors.
What to Serve With These
These elegant scallops deserve good company. Here’s what I recommend.
Vegetable Sides
Roasted vegetables are perfect with the rich butter sauce.
I’ll often prep Brussels sprouts, asparagus, or broccoli while the scallops rest. Just toss them with olive oil and roast at 425°F for 15-20 minutes.
They finish right when your scallops are ready.
Green beans work great too. Quick sauté with garlic. Takes minutes. The crunch contrasts nicely with tender scallops.
Something Starchy
Serving scallops over a starch catches all that precious garlic butter.
Rice pilaf makes an excellent base. So do creamy mashed potatoes or buttery pasta.
Want something lighter?
Try zucchini noodles or cauliflower mash. Both soak up the sauce without feeling heavy.
Fresh Salads
A bright salad cuts through all that richness.
Arugula with lemon vinaigrette? Perfect.
Simple mixed greens with cherry tomatoes? Also great.
Caprese salad brings Italian vibes – tomatoes, fresh mozzarella, basil, balsamic glaze.
Drink Pairing
These scallops work beautifully with crisp white options or light, fruity choices. The butter and garlic play well with lots of different profiles.
Storing and Reheating
These taste best fresh, obviously.
But sometimes you’ve got leftovers.
Refrigerating: Store cooled scallops in an airtight container for up to 2-3 days. Keep the garlic butter separate if you can.
Reheating: Use a skillet over low heat. Add a tiny bit of butter or oil. Warm gently for just 1-2 minutes. Flip once.
High heat or extended reheating = rubber city.
Freezing: You can freeze cooked scallops for up to 3 months. But the texture suffers a bit. Thaw completely in the fridge before gentle reheating.
Real talk though? I rarely have leftovers. These disappear fast.
Questions People Always Ask
Can I use frozen scallops?
Yep! Just thaw them right.
Put frozen scallops in your fridge overnight for slow, even thawing. Need them faster? Seal in a plastic bag and drop in cold water for about 30 minutes.
Never thaw in hot water or the microwave. That starts cooking the edges unevenly.
Once thawed, pat them extra dry. Frozen scallops release more moisture.
No fresh herbs?
Fresh herbs really shine here. But you can work around it.
Just skip them from the garlic butter mixture. You’ll end up with classic lemon garlic butter. Still delicious.
Don’t substitute dried herbs though. Their texture doesn’t work in this quick butter sauce.
Want herb flavor? Add a tiny bit of dried herbs – like 1/4 teaspoon – directly to the scallops before searing.
How do I know they’re perfectly cooked?
Look for these signs:
The scallops feel firm when gently pressed. But still have a slight give in the center.
They turn from translucent to opaque white.
The sides show a thin band of opaqueness going through the middle.
Want precision?
Use an instant-read thermometer. Center should reach 115°F. They’ll keep cooking off the heat to about 120°F.
Anything over 125°F starts getting rubbery.
Why do mine stick to the pan?
Usually happens for one of three reasons:
First – pan isn’t hot enough when you add them. Make sure your oil is shimmering before the scallops go in.
Second – you’re trying to flip too early. They release naturally once a proper crust forms. If they stick? Wait another 30 seconds.
Third – too much moisture on the scallops. Really dry them thoroughly with paper towels before cooking.
Can I make the butter ahead?
Yes!
Mix your butter with garlic and herbs up to 3 days ahead. Keep it in the fridge in an airtight container.
Wait to add the lemon juice until you’re actually cooking though. Citrus makes butter watery when stored.
When ready to cook, let the butter come to room temp so it melts quickly in the pan.
This works great for dinner parties when you want less last-minute scrambling.
This recipe has seriously become my secret weapon for impressive dinners. Sweet scallops. Caramelized crust. Aromatic garlic butter.
It never fails to wow people.
Whether you’re celebrating something special or just treating yourself on a random weeknight, these scallops deliver restaurant-quality results without the restaurant prices or stress.
Give them a shot. I think you’ll be shocked at how simple it is to cook scallops at home.
Garlic Butter Scallops
Ingredients
Scallops
- 16 large sea scallops approximately 1 lb, fresh or thawed, side muscle removed
- 1 tsp sea salt for seasoning
- 1/4 tsp black pepper freshly ground
- 1 tbsp olive oil or avocado oil
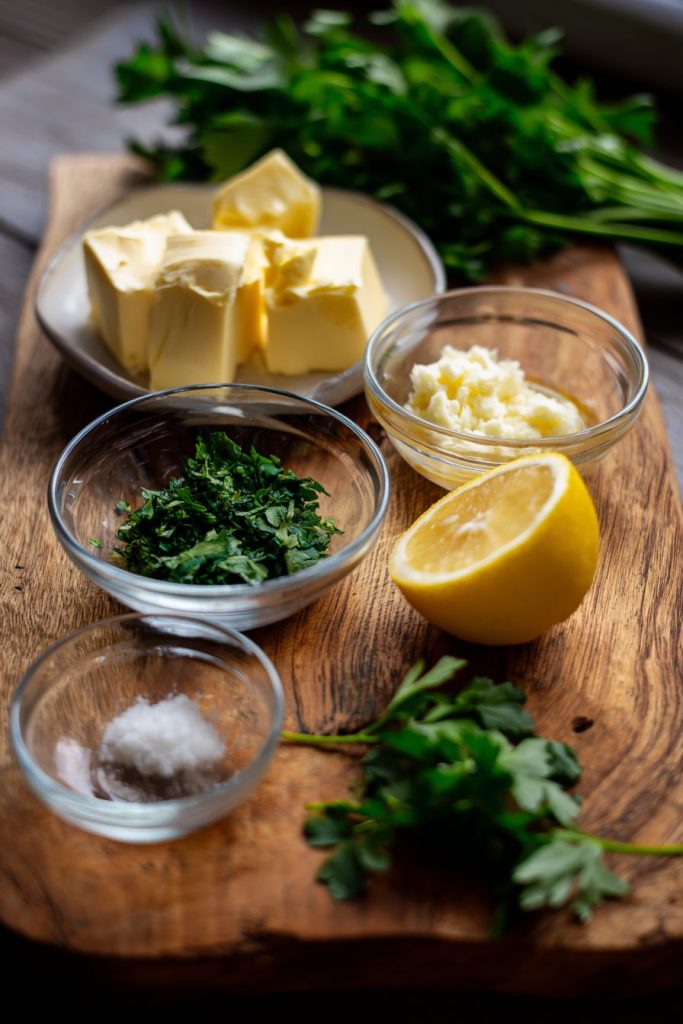
Garlic Herb Butter
- 2 tbsp salted butter softened
- 1 tbsp lemon juice freshly squeezed
- 2 cloves garlic minced finely
- 1/2 tbsp fresh thyme leaves only, stems removed
- 1/2 tbsp fresh parsley chopped, plus extra for garnish
Instructions
Make the Garlic Herb Butter
- In a small bowl, combine the softened butter, lemon juice, minced garlic, thyme leaves, and chopped parsley. Mash everything together with a fork until well combined. Set aside.
Prep the Scallops
- Remove any side muscles from the scallops (small tough tabs on one side).
- Pat each scallop completely dry with paper towels on both sides. This is crucial for getting a good sear.
- Season both sides of the scallops with salt and pepper just before cooking.
Sear the Scallops
- Heat a large cast iron skillet over medium-high heat. Add the olive oil and let it heat until shimmering, about 1 minute.
- Carefully place the scallops in the hot pan in a single layer with space between each one. Do not move them. Let them sear undisturbed for 2-3 minutes until they develop a deep golden-brown crust and release naturally from the pan.
- Flip each scallop over and immediately add spoonfuls of the garlic herb butter around them in the pan.
- As the butter melts, tilt the pan and use a spoon to baste the scallops with the butter. Cook for another 2-3 minutes until the second side develops a golden crust and the scallops are opaque and firm but still slightly tender in the center (internal temperature should reach 115°F).
- Transfer the scallops to plates immediately to prevent overcooking. Spoon the garlic butter over each portion and garnish with extra fresh herbs and lemon wedges.
1 Comment
Really excellent recipe! My stainless pan caused a bit of sticking but even the scraped bits were delicious. I added a bit of Old Bay to the spices as well and it was a really lovely dinner.